How to Design a Picture Wall
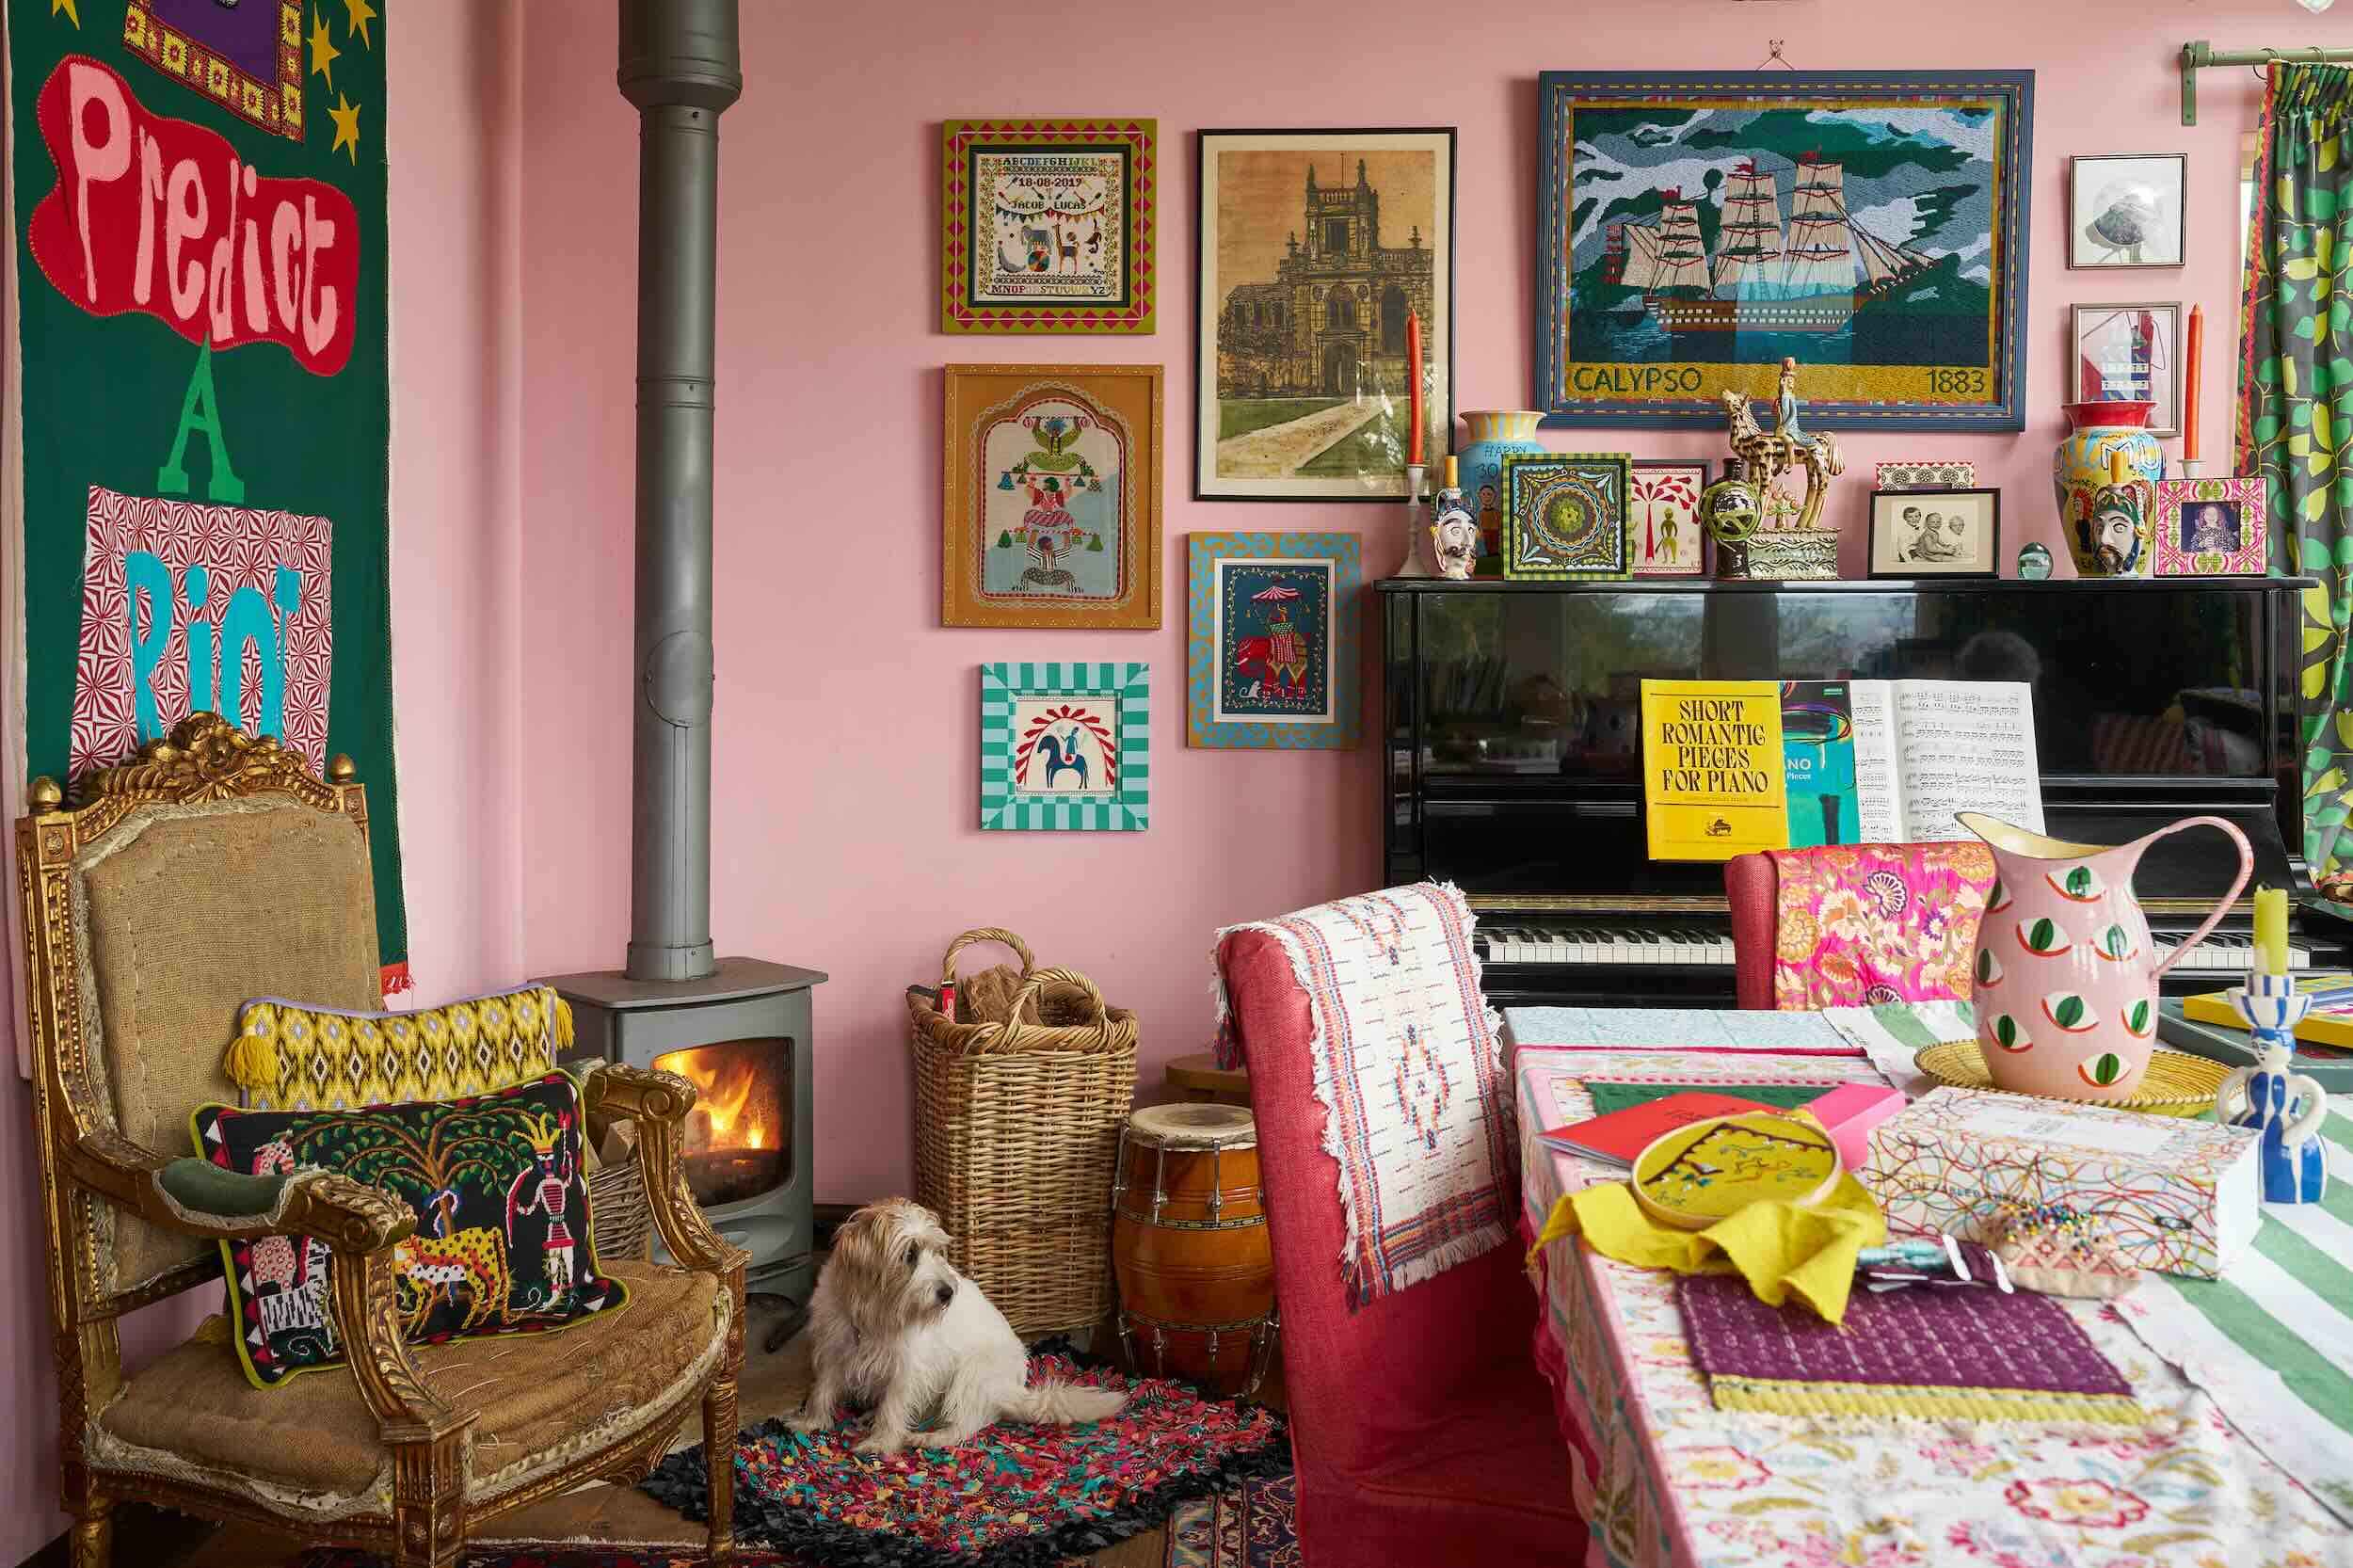
Picture walls are a fantastic and exciting way to display lots of different pieces of art in a small space. A good picture wall will guide your eyes through the different elements, while feeling like one cohesive piece. But getting started on creating your own picture wall can be intimidating...
With more pieces it can often feel like you are more likely to get things wrong. Even if you love each individual piece, you may be afraid that they won’t all work together on the wall. There are a lot of decisions to make along the way, from the colour of the wall to the colour of your frames, how to make different styles and colour palettes work together, to what shapes to put next to each other... not to mention the fear of hanging them unevenly or in a position you don’t like and ending up with a wall full of holes!

But don’t worry, this article will take you through the process and hopefully make creating a picture wall feel much less daunting. Remember that picture walls look best when they’re a little imperfect. When the spacing is uneven or the pieces feel a little random it just feels more characterful and homely. Any mistakes are reversible, and it's fun to see your wall evolve over time.
So we’re going to take you through the steps to create your own picture wall, from planning your layout to hanging your pieces and making any tweaks.
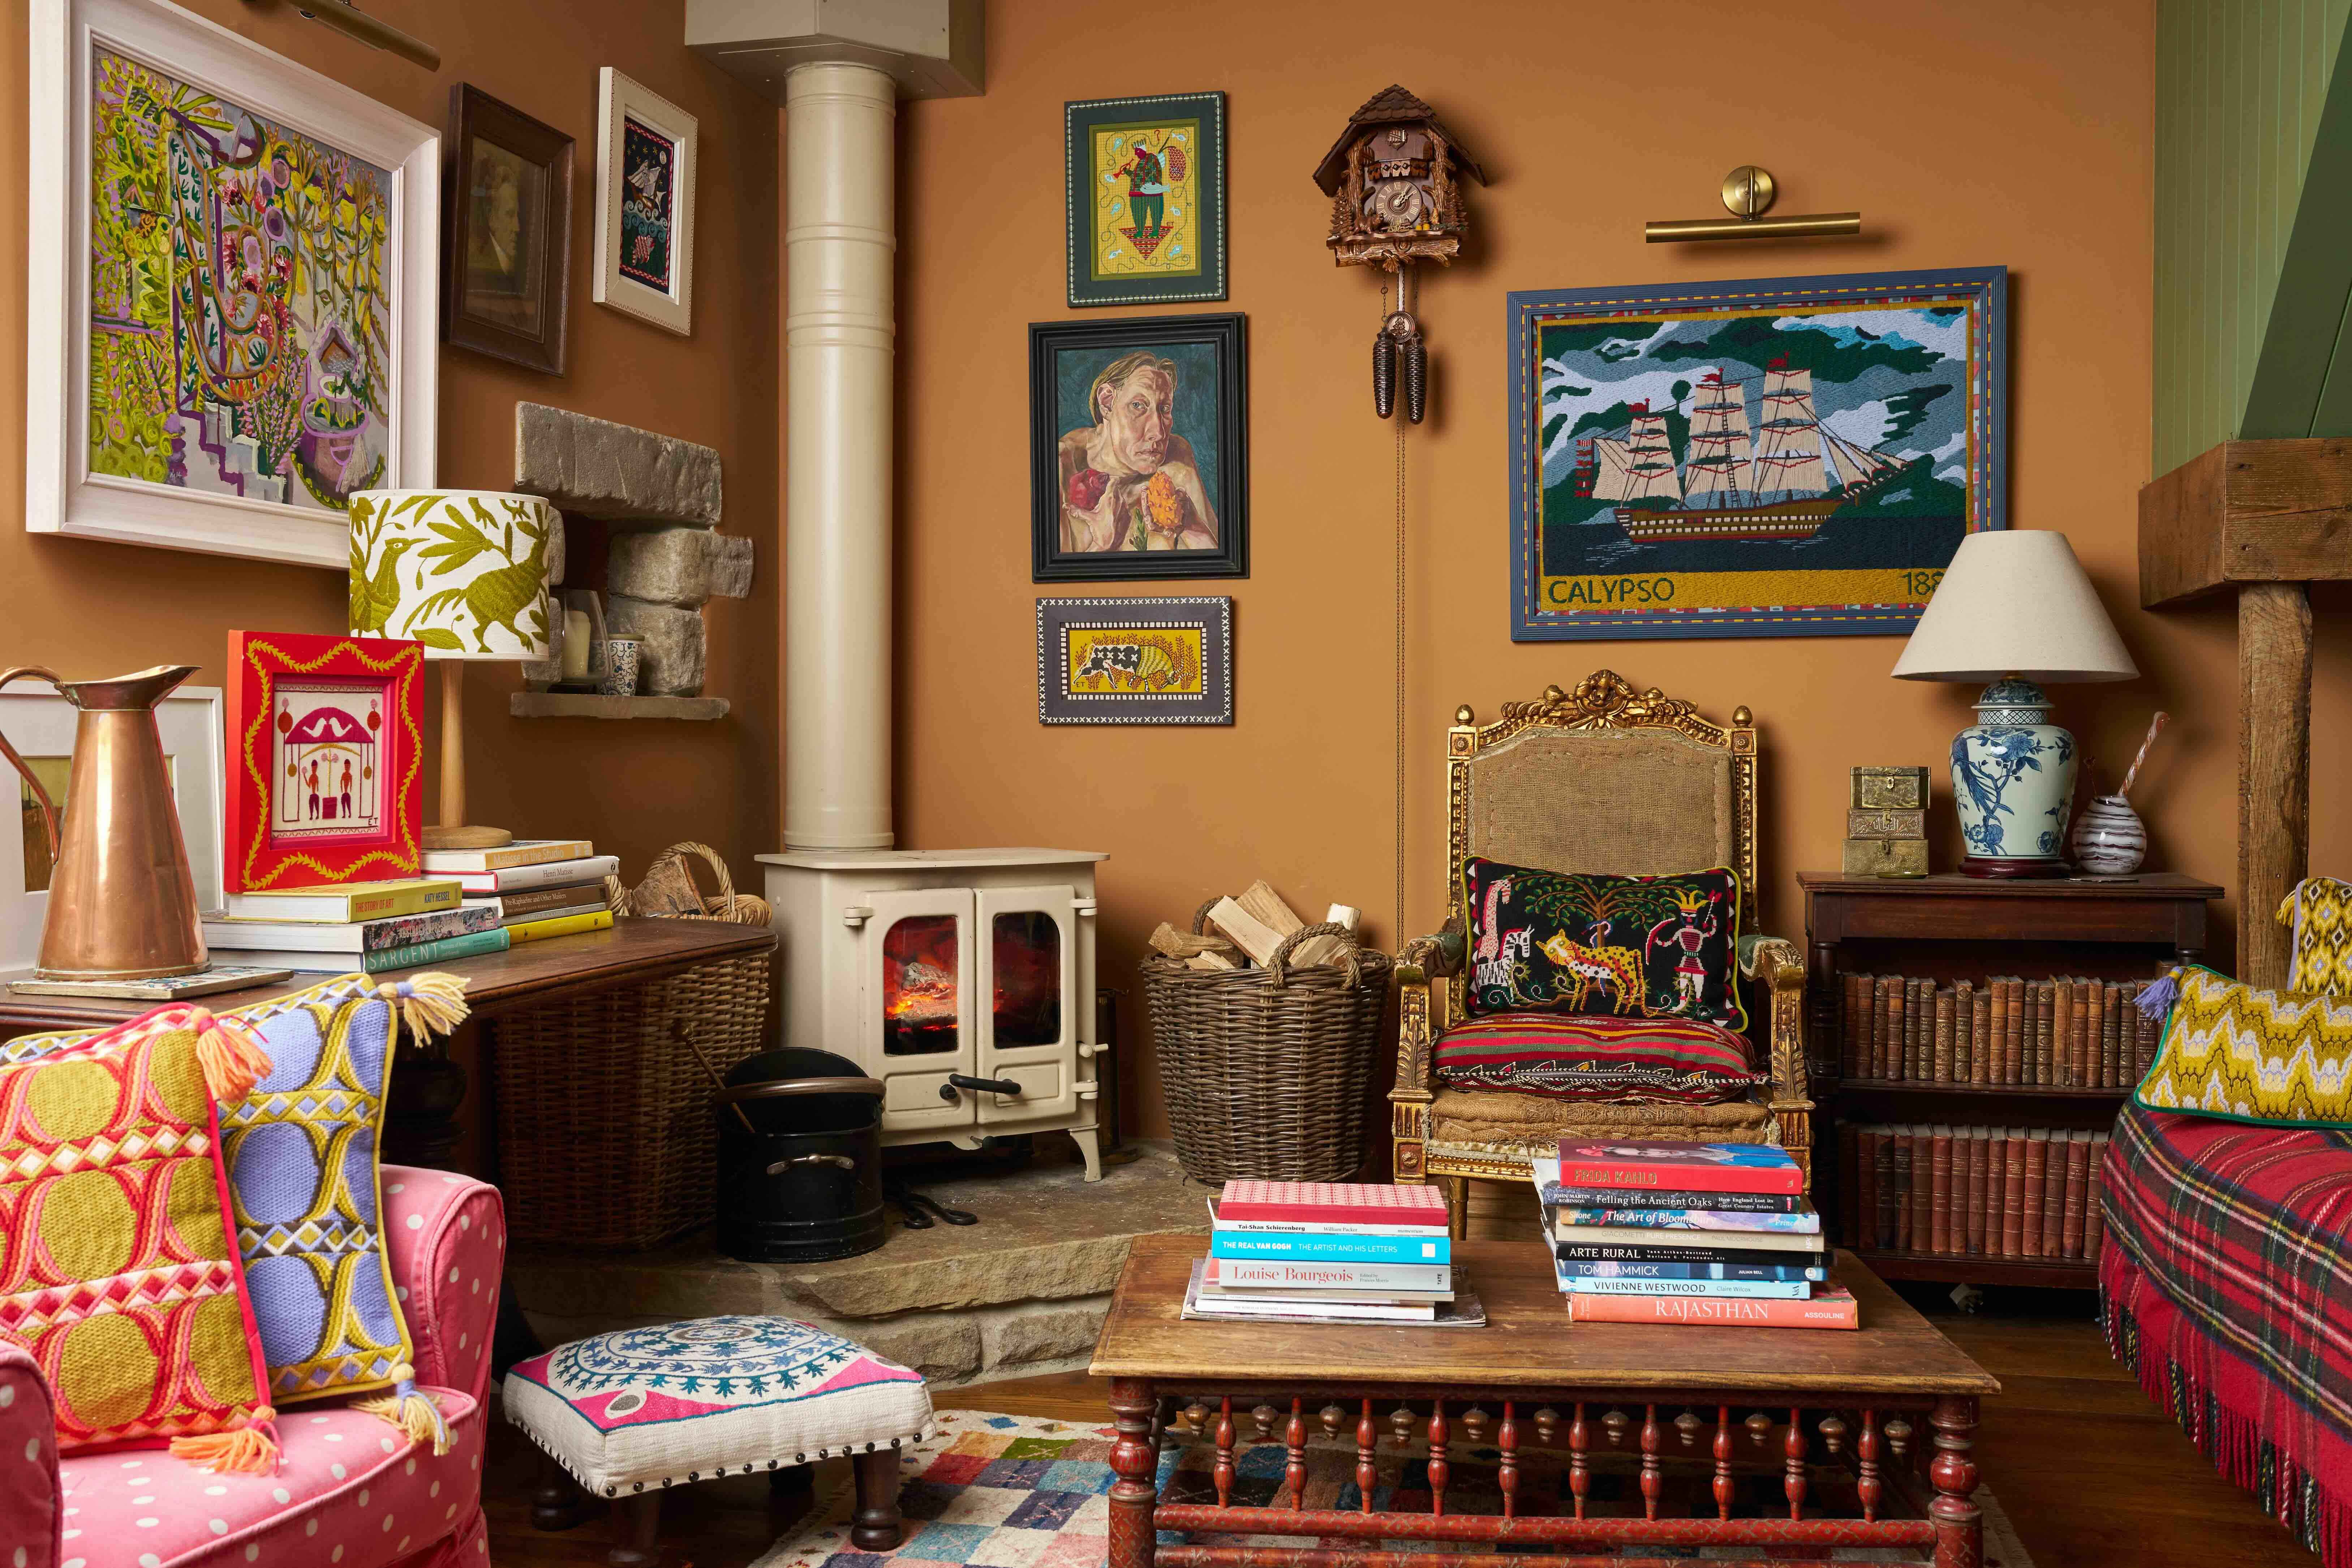
You can use different arrangements for your picture wall, from a structured, grid-like layout to a more organic ‘salon-style’ approach, or a layout based around one central piece.
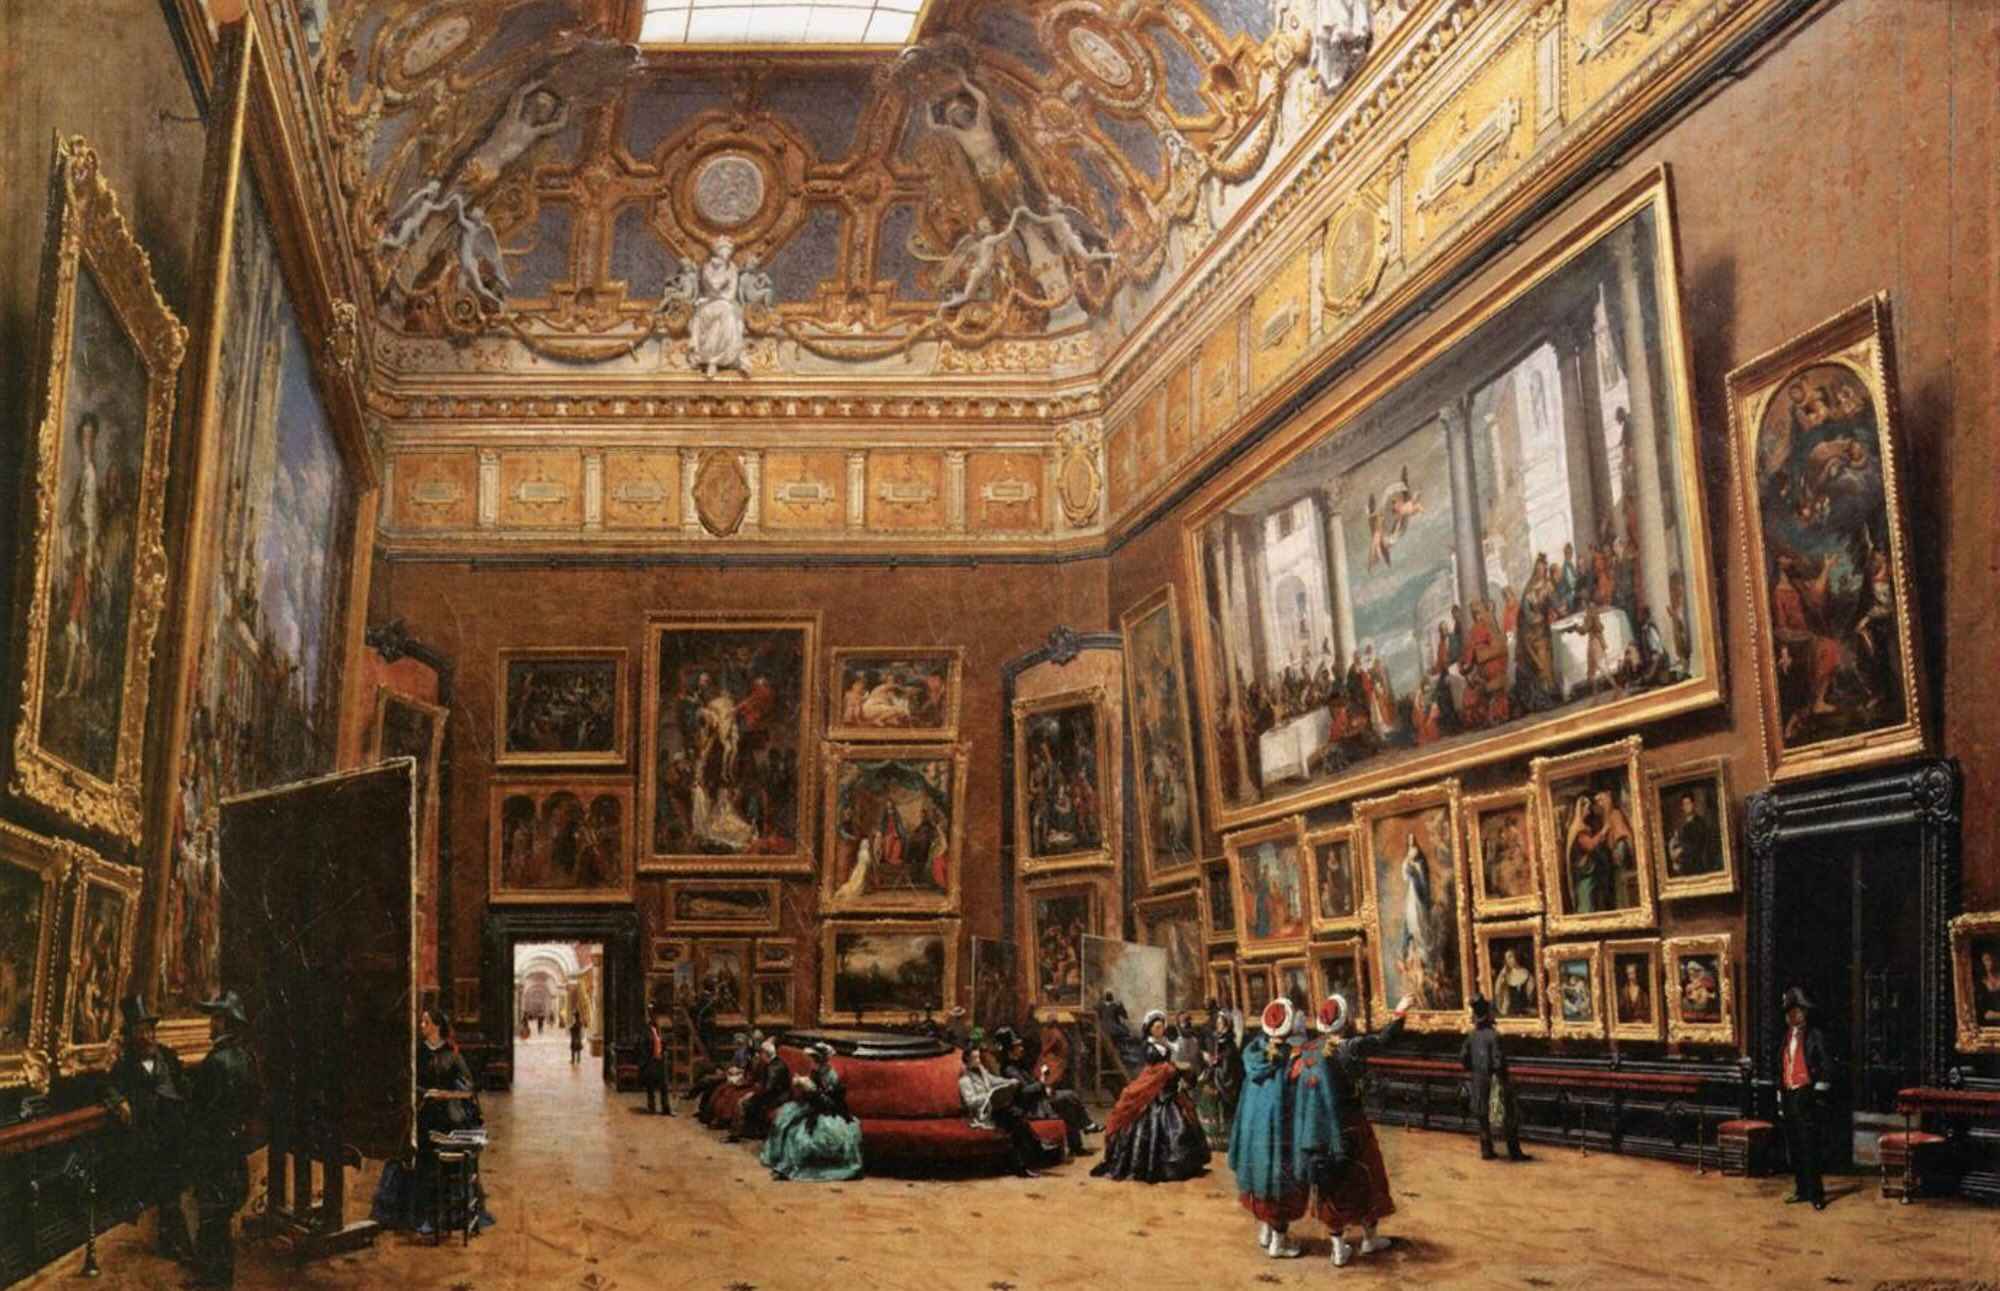
This style emerged in Paris in the 17th Century, as a way to display as many pictures as possible in the limited spaces of the salons. The paintings were arranged close together from floor to ceiling, a little like a Tetris board.
Pros:
- It's easier to hang as you don’t need consistent spacing
- Good for when you have lots of different pieces
- It can be more interesting for a viewer to discover unexpected things
Cons:
- You need quite a variety of pieces and framing styles to make it work

Pros:
- Clean and calm aesthetic
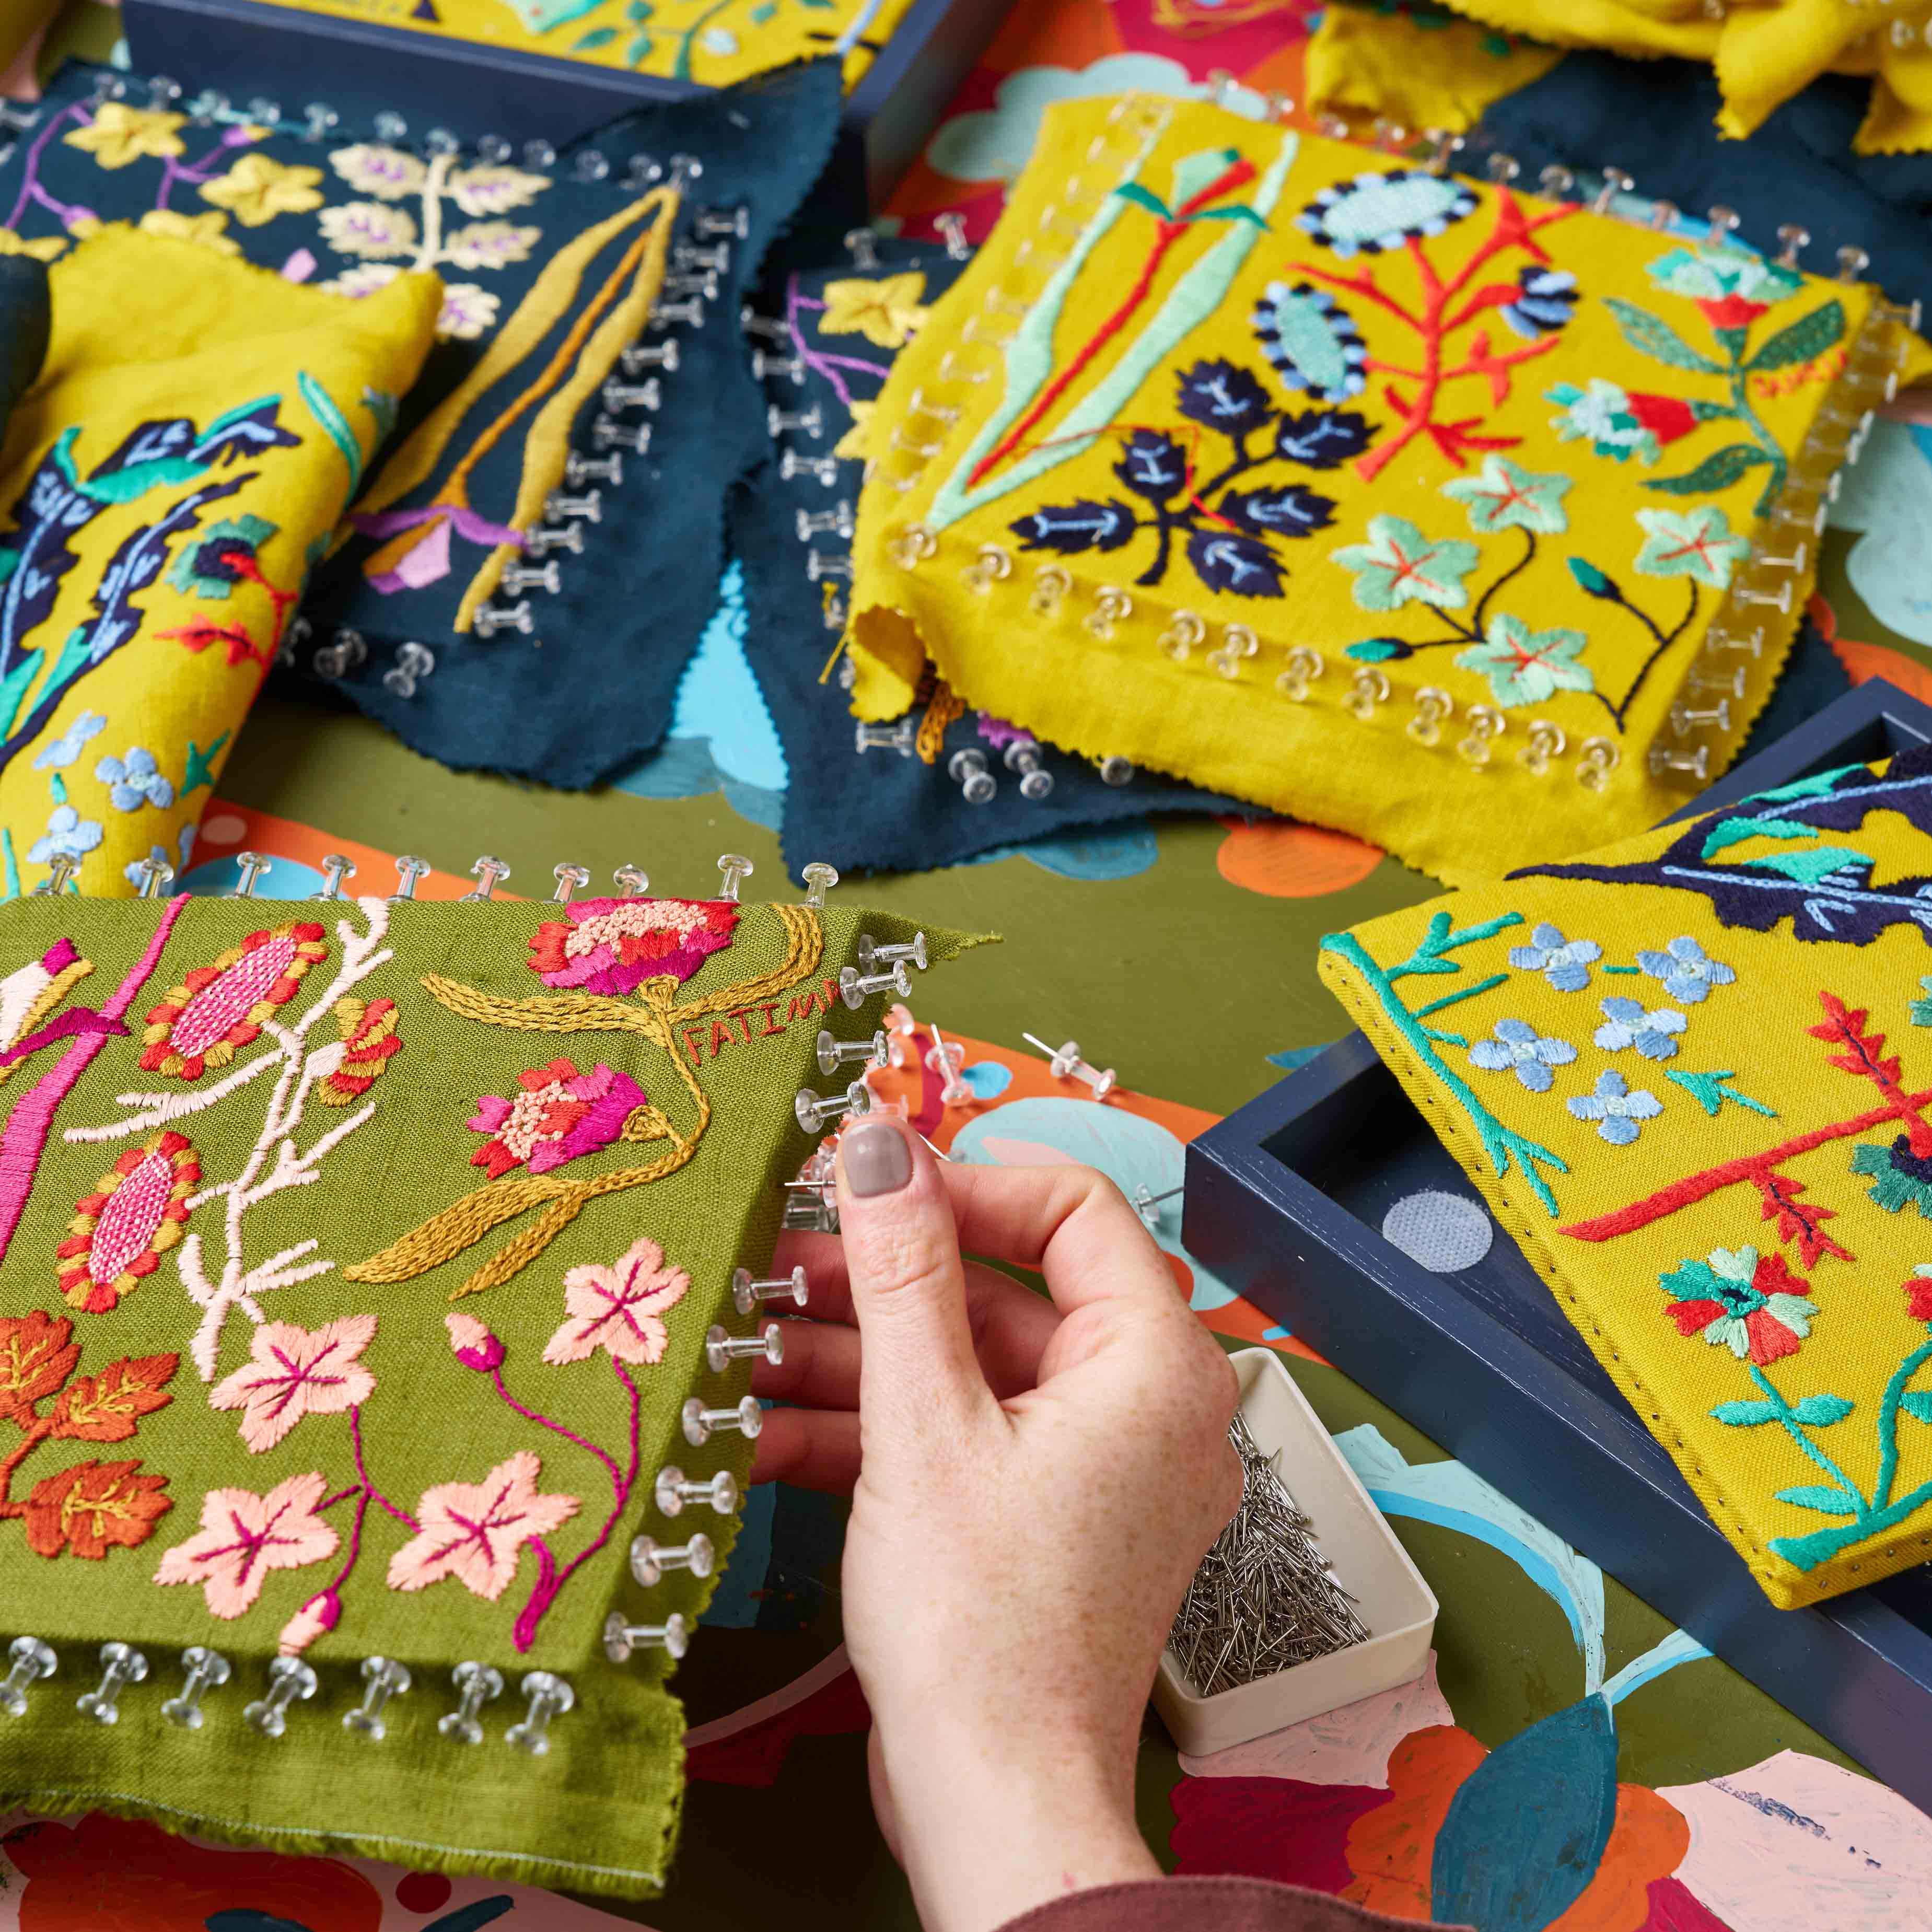
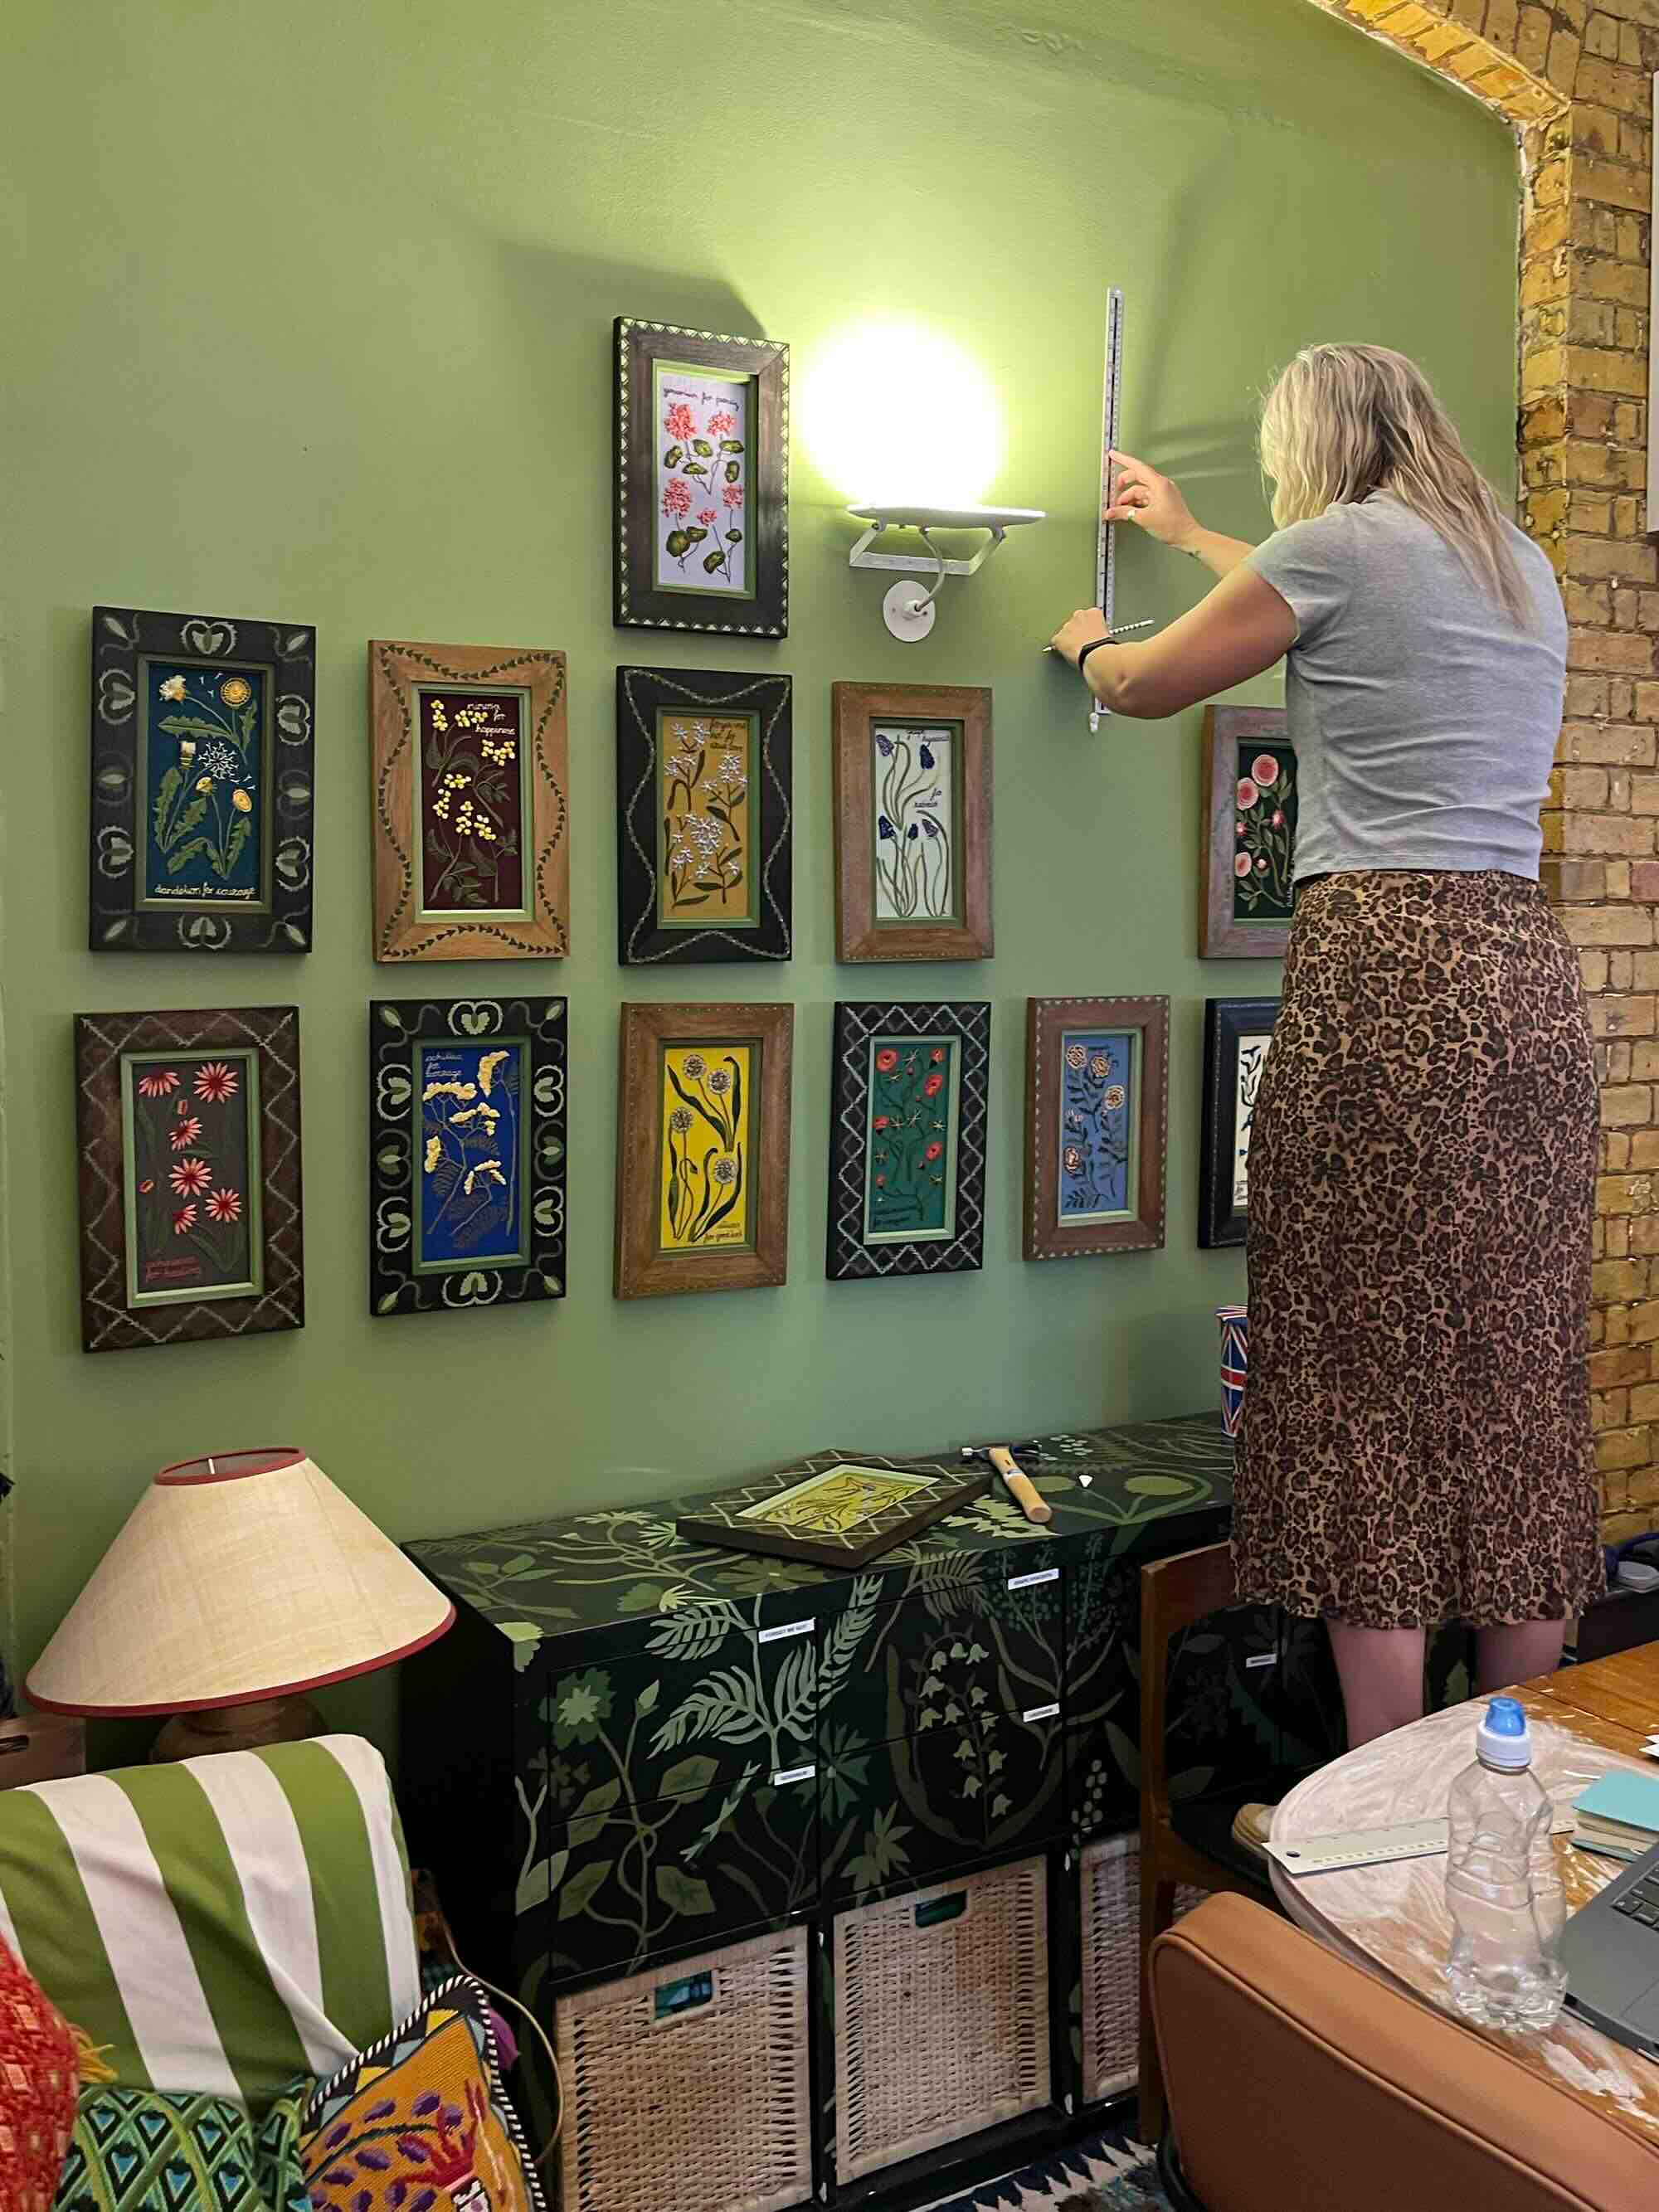
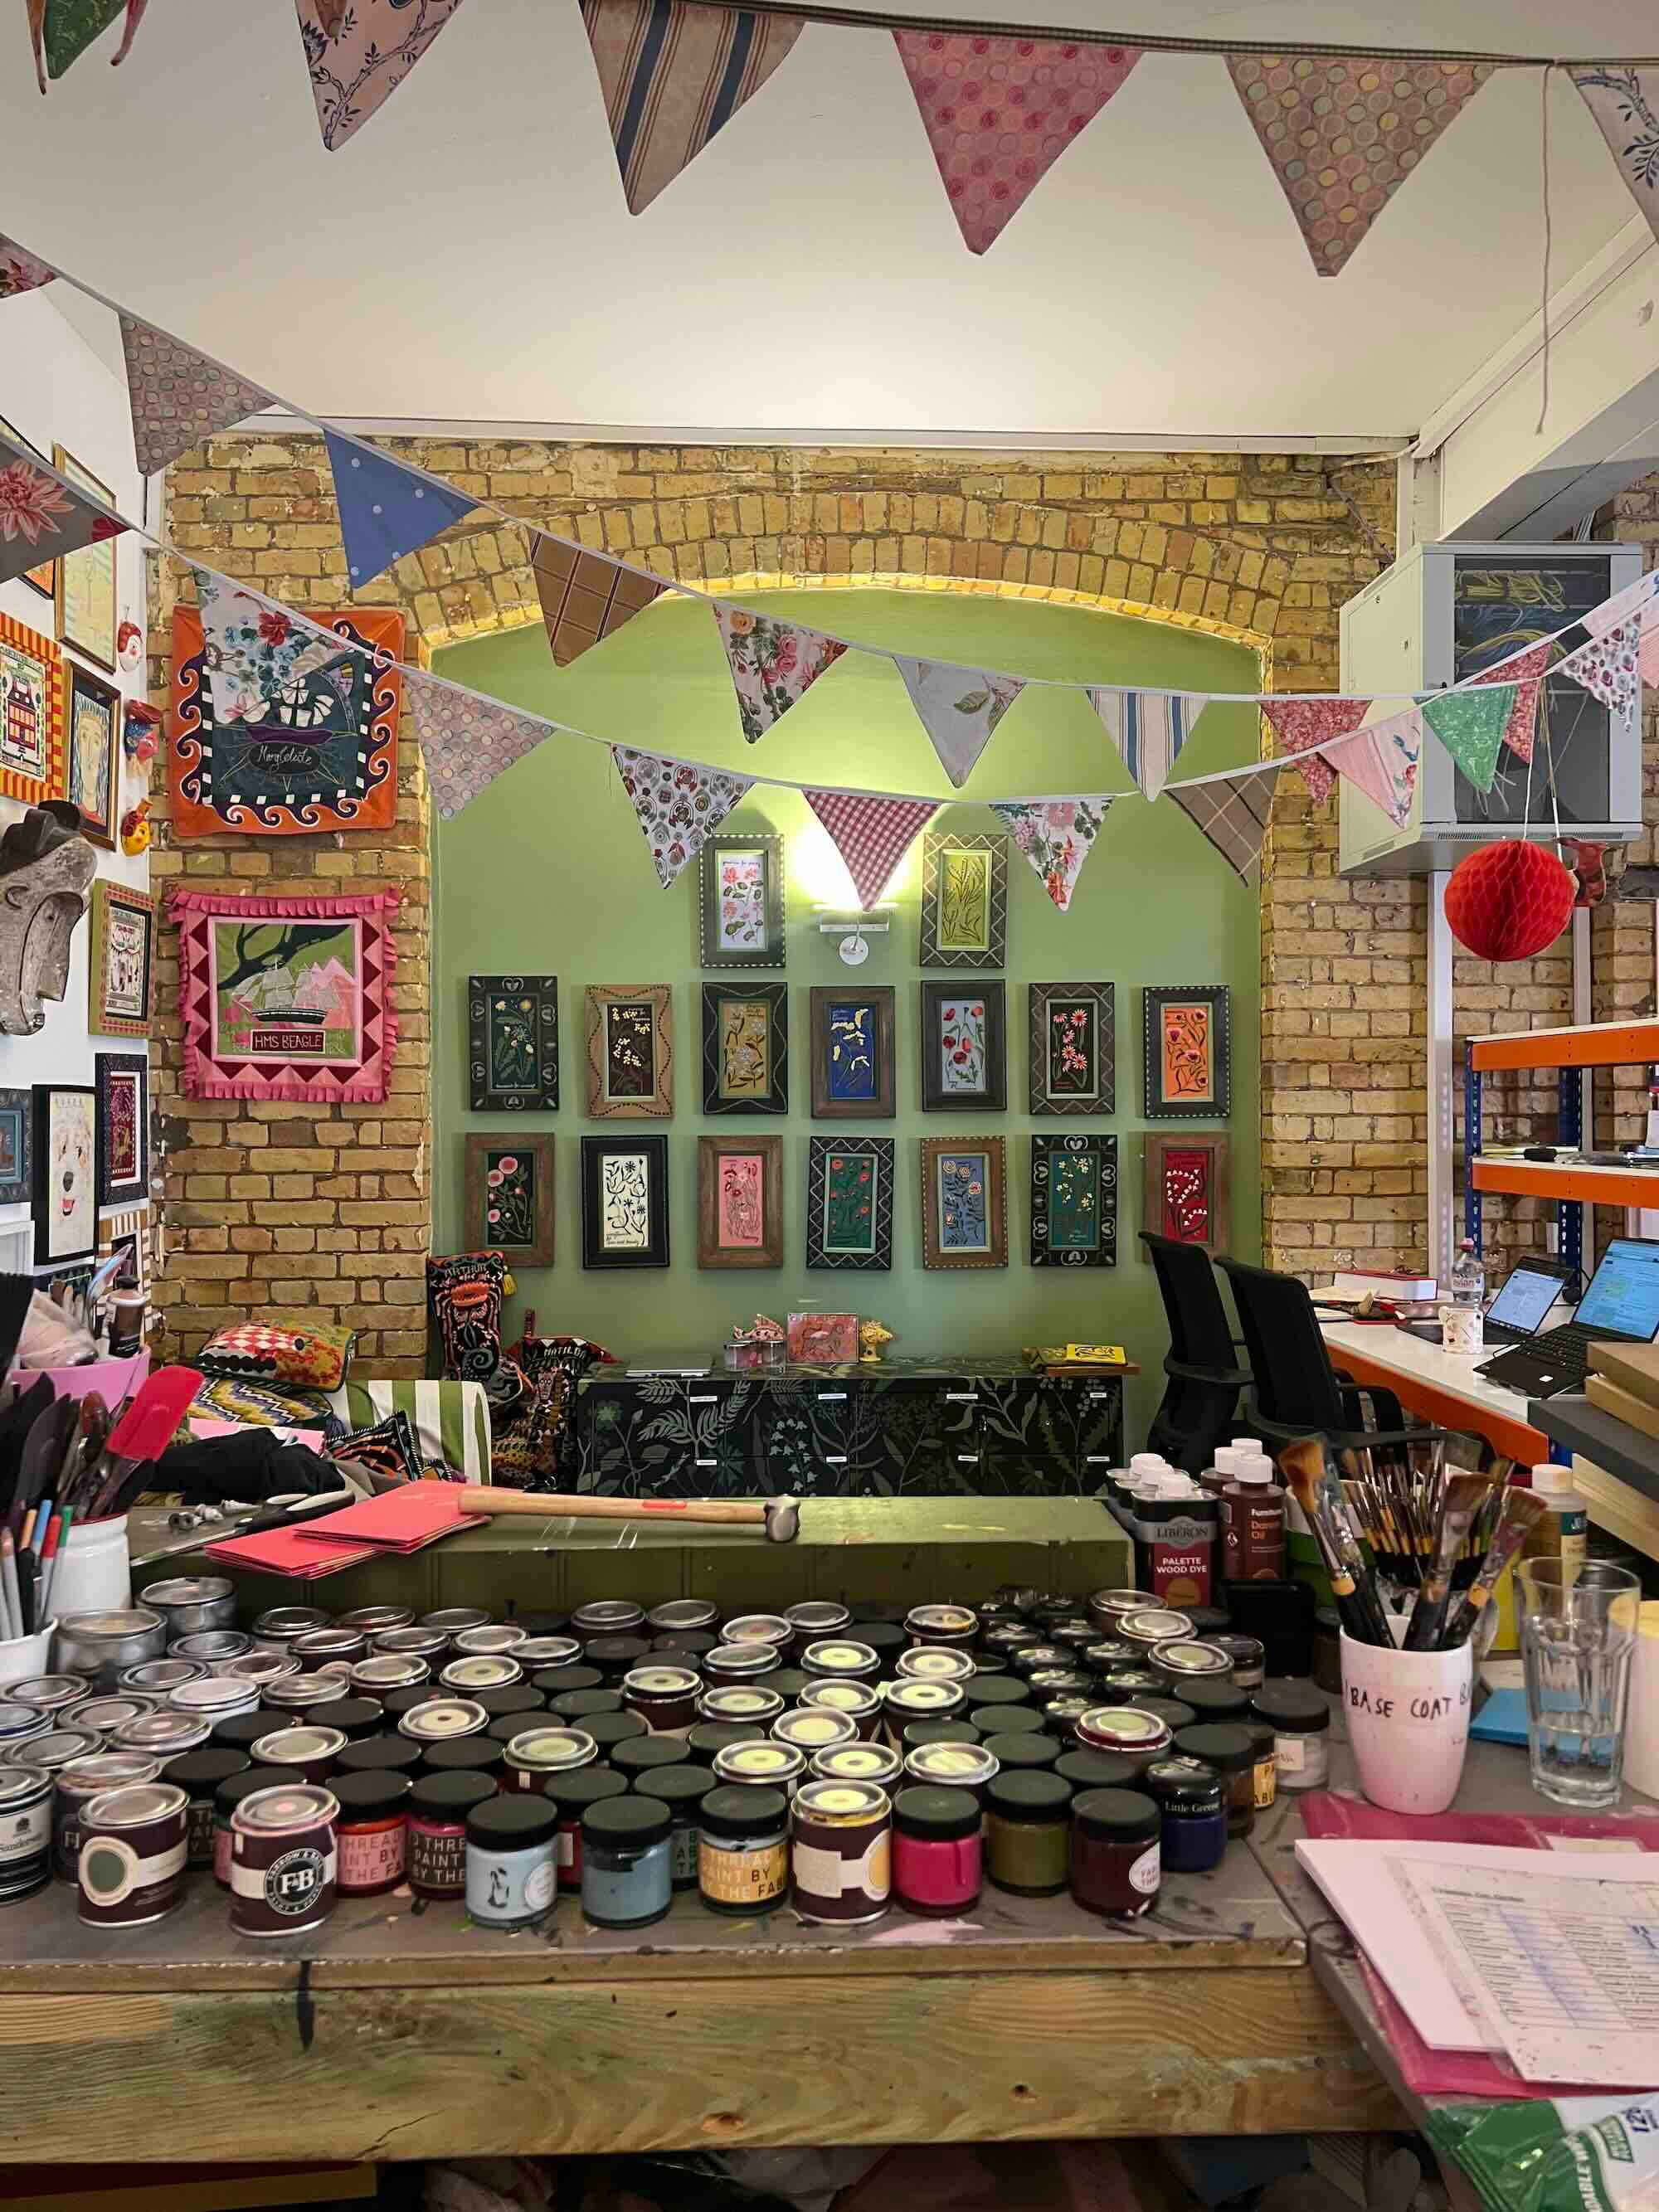
- This is a good layout for when all your pieces are the same size, for example we chose to use this arrangement for our botanicals frames
Cons:
- It's a little hard to hang as you can easily see if things are not in line
Pros:
- You have one key artwork so it’s easier to hang around the edges
- Good for a smaller space
Cons:
- Could risk detracting from the main piece
If you’re having trouble deciding which style to use for your picture wall, start by gathering together all the pieces you want to hang before you start. If you lay them out on the floor, this can help you work out what looks best.
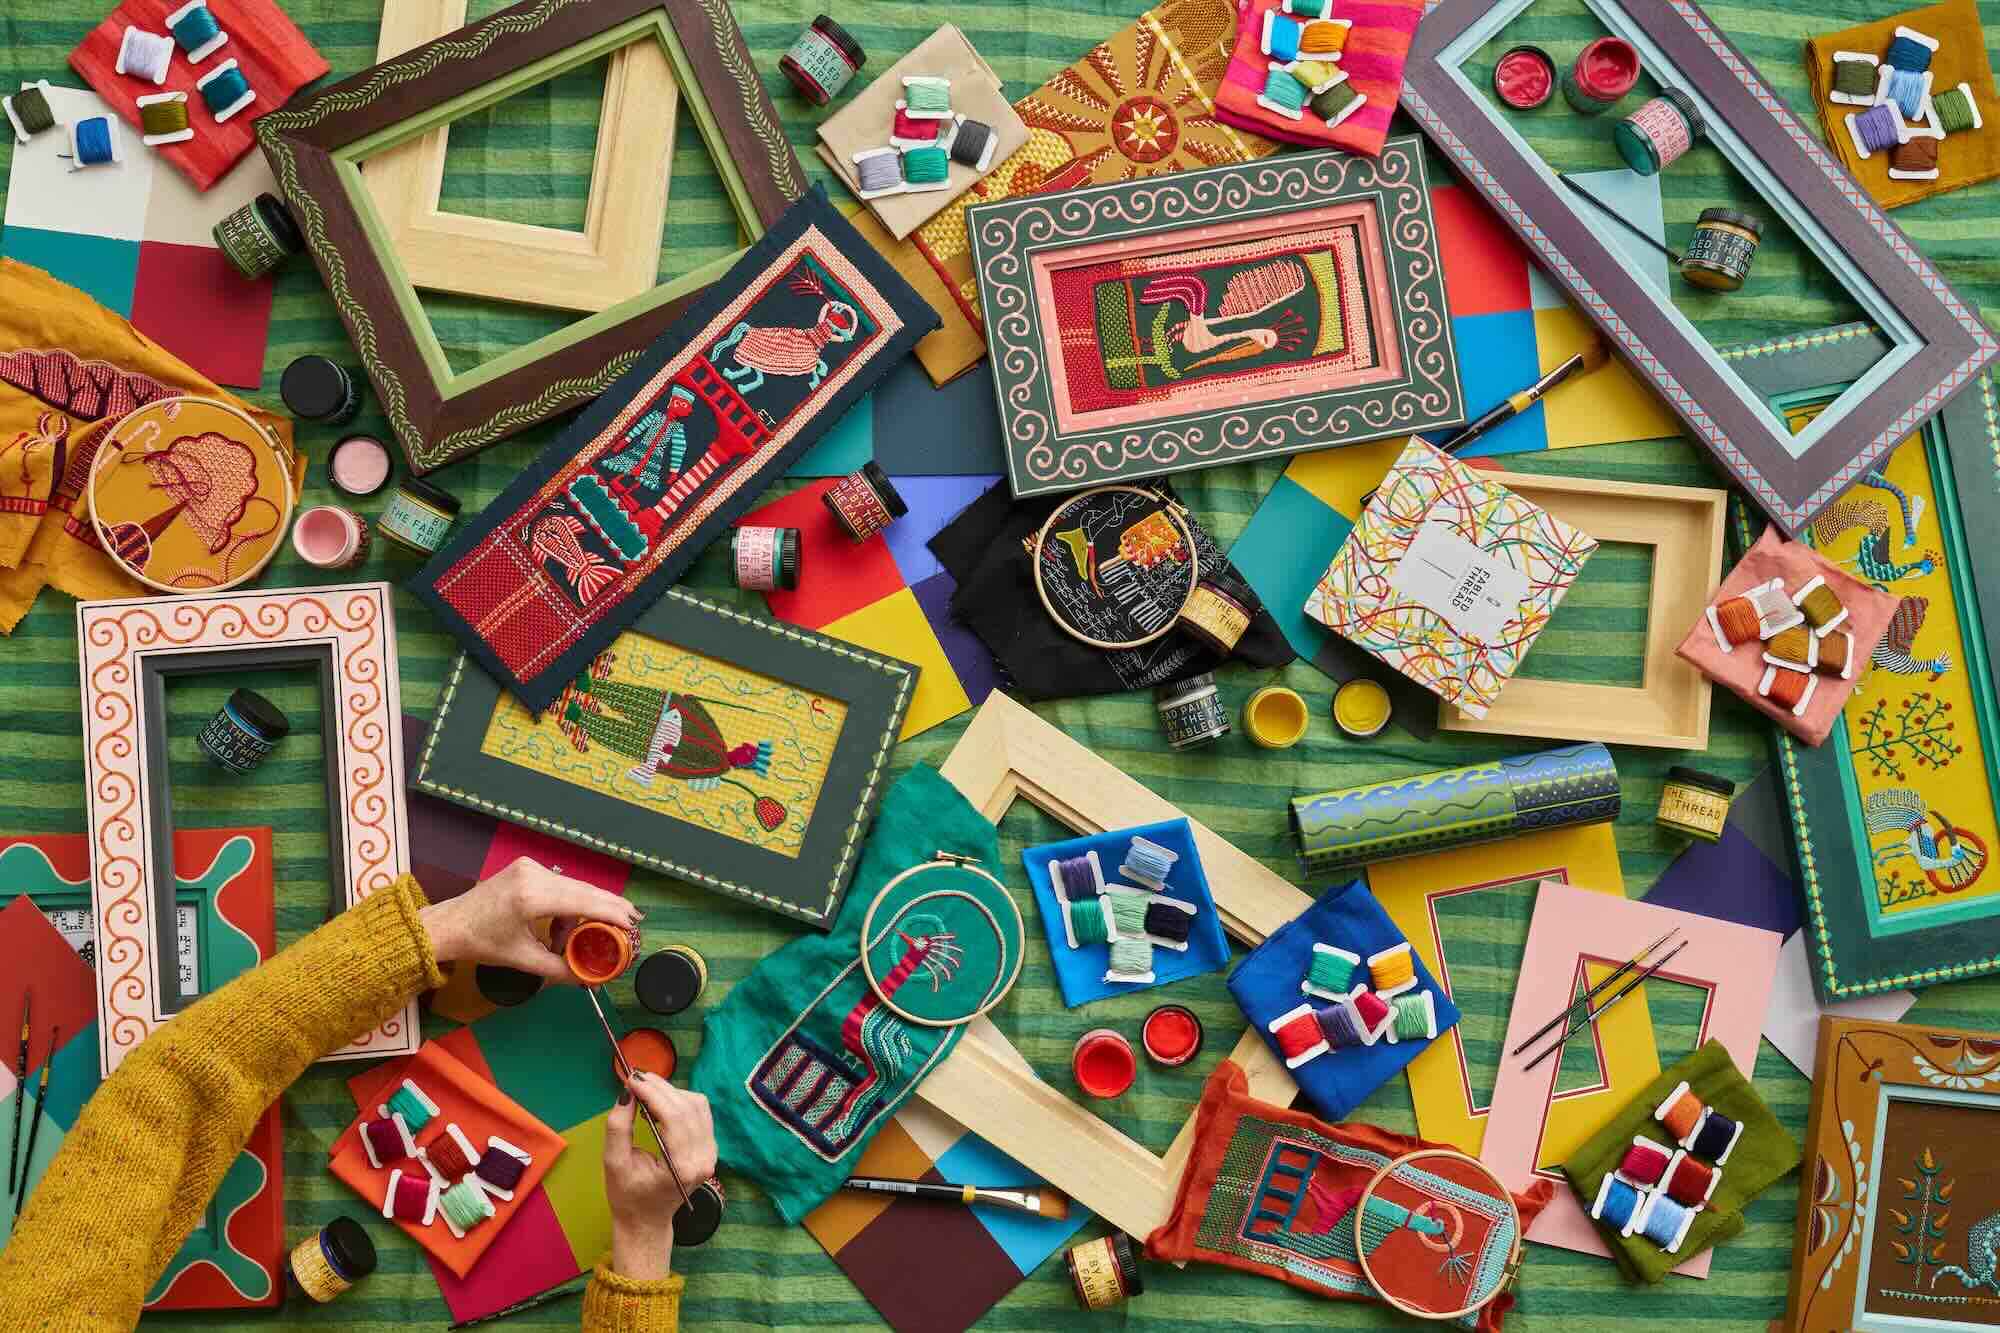
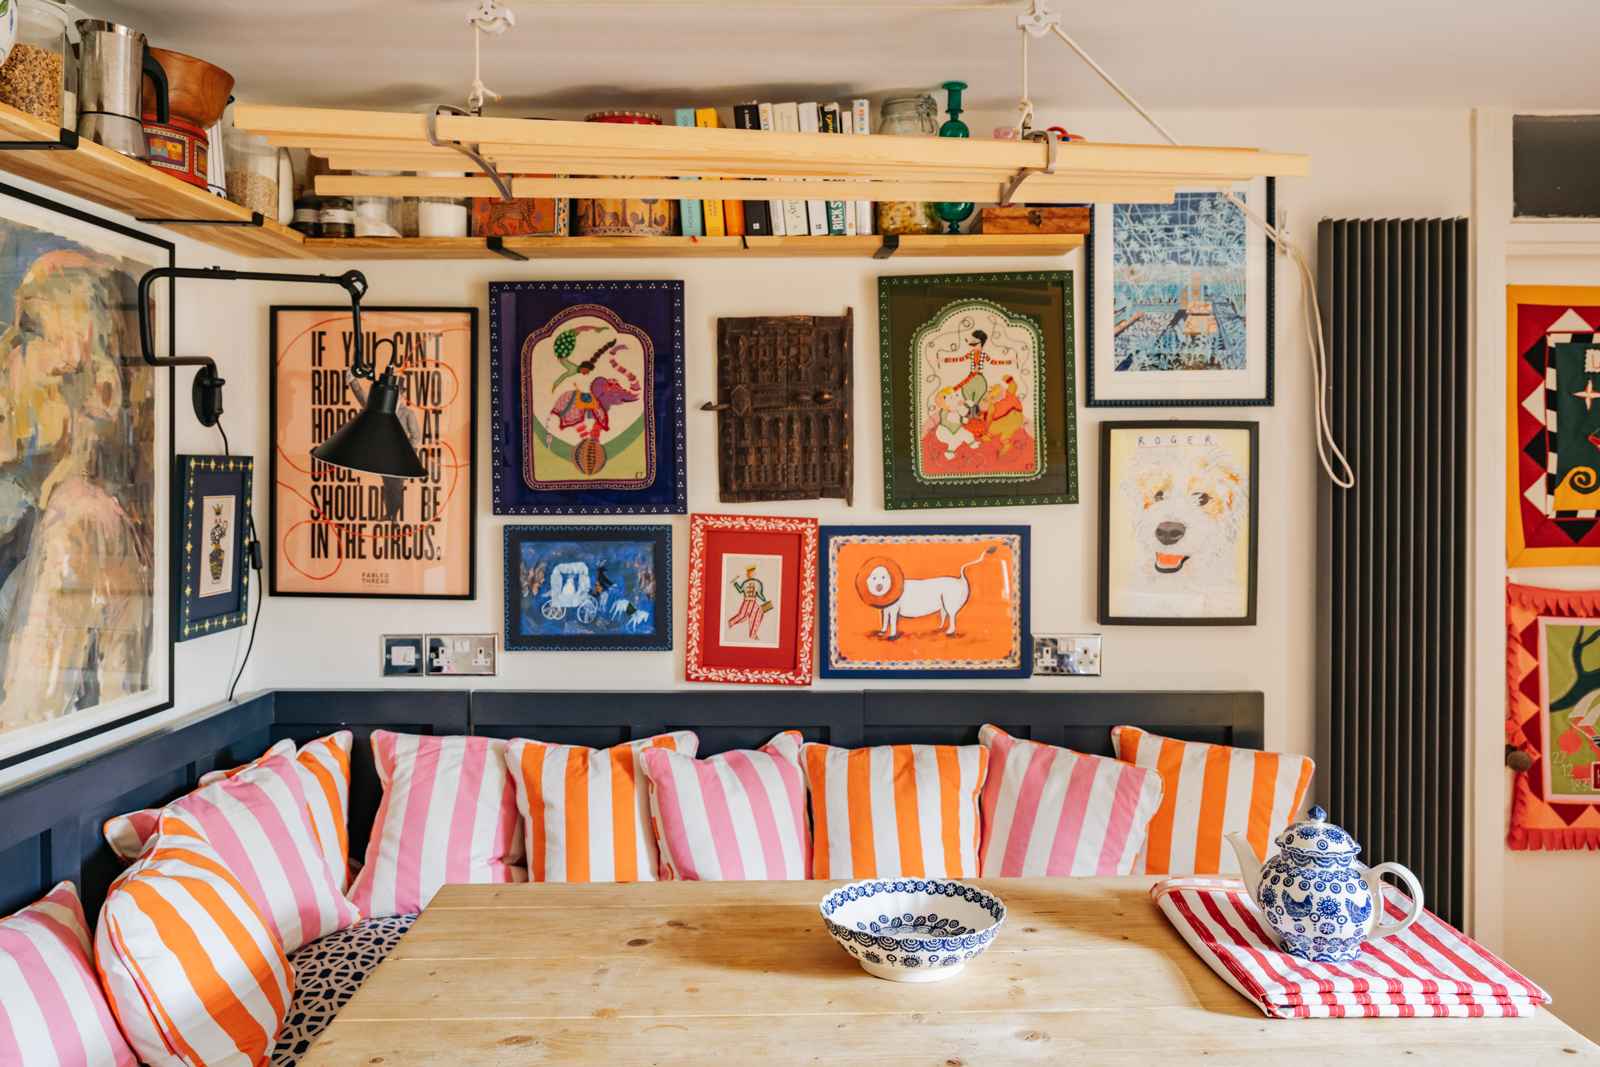
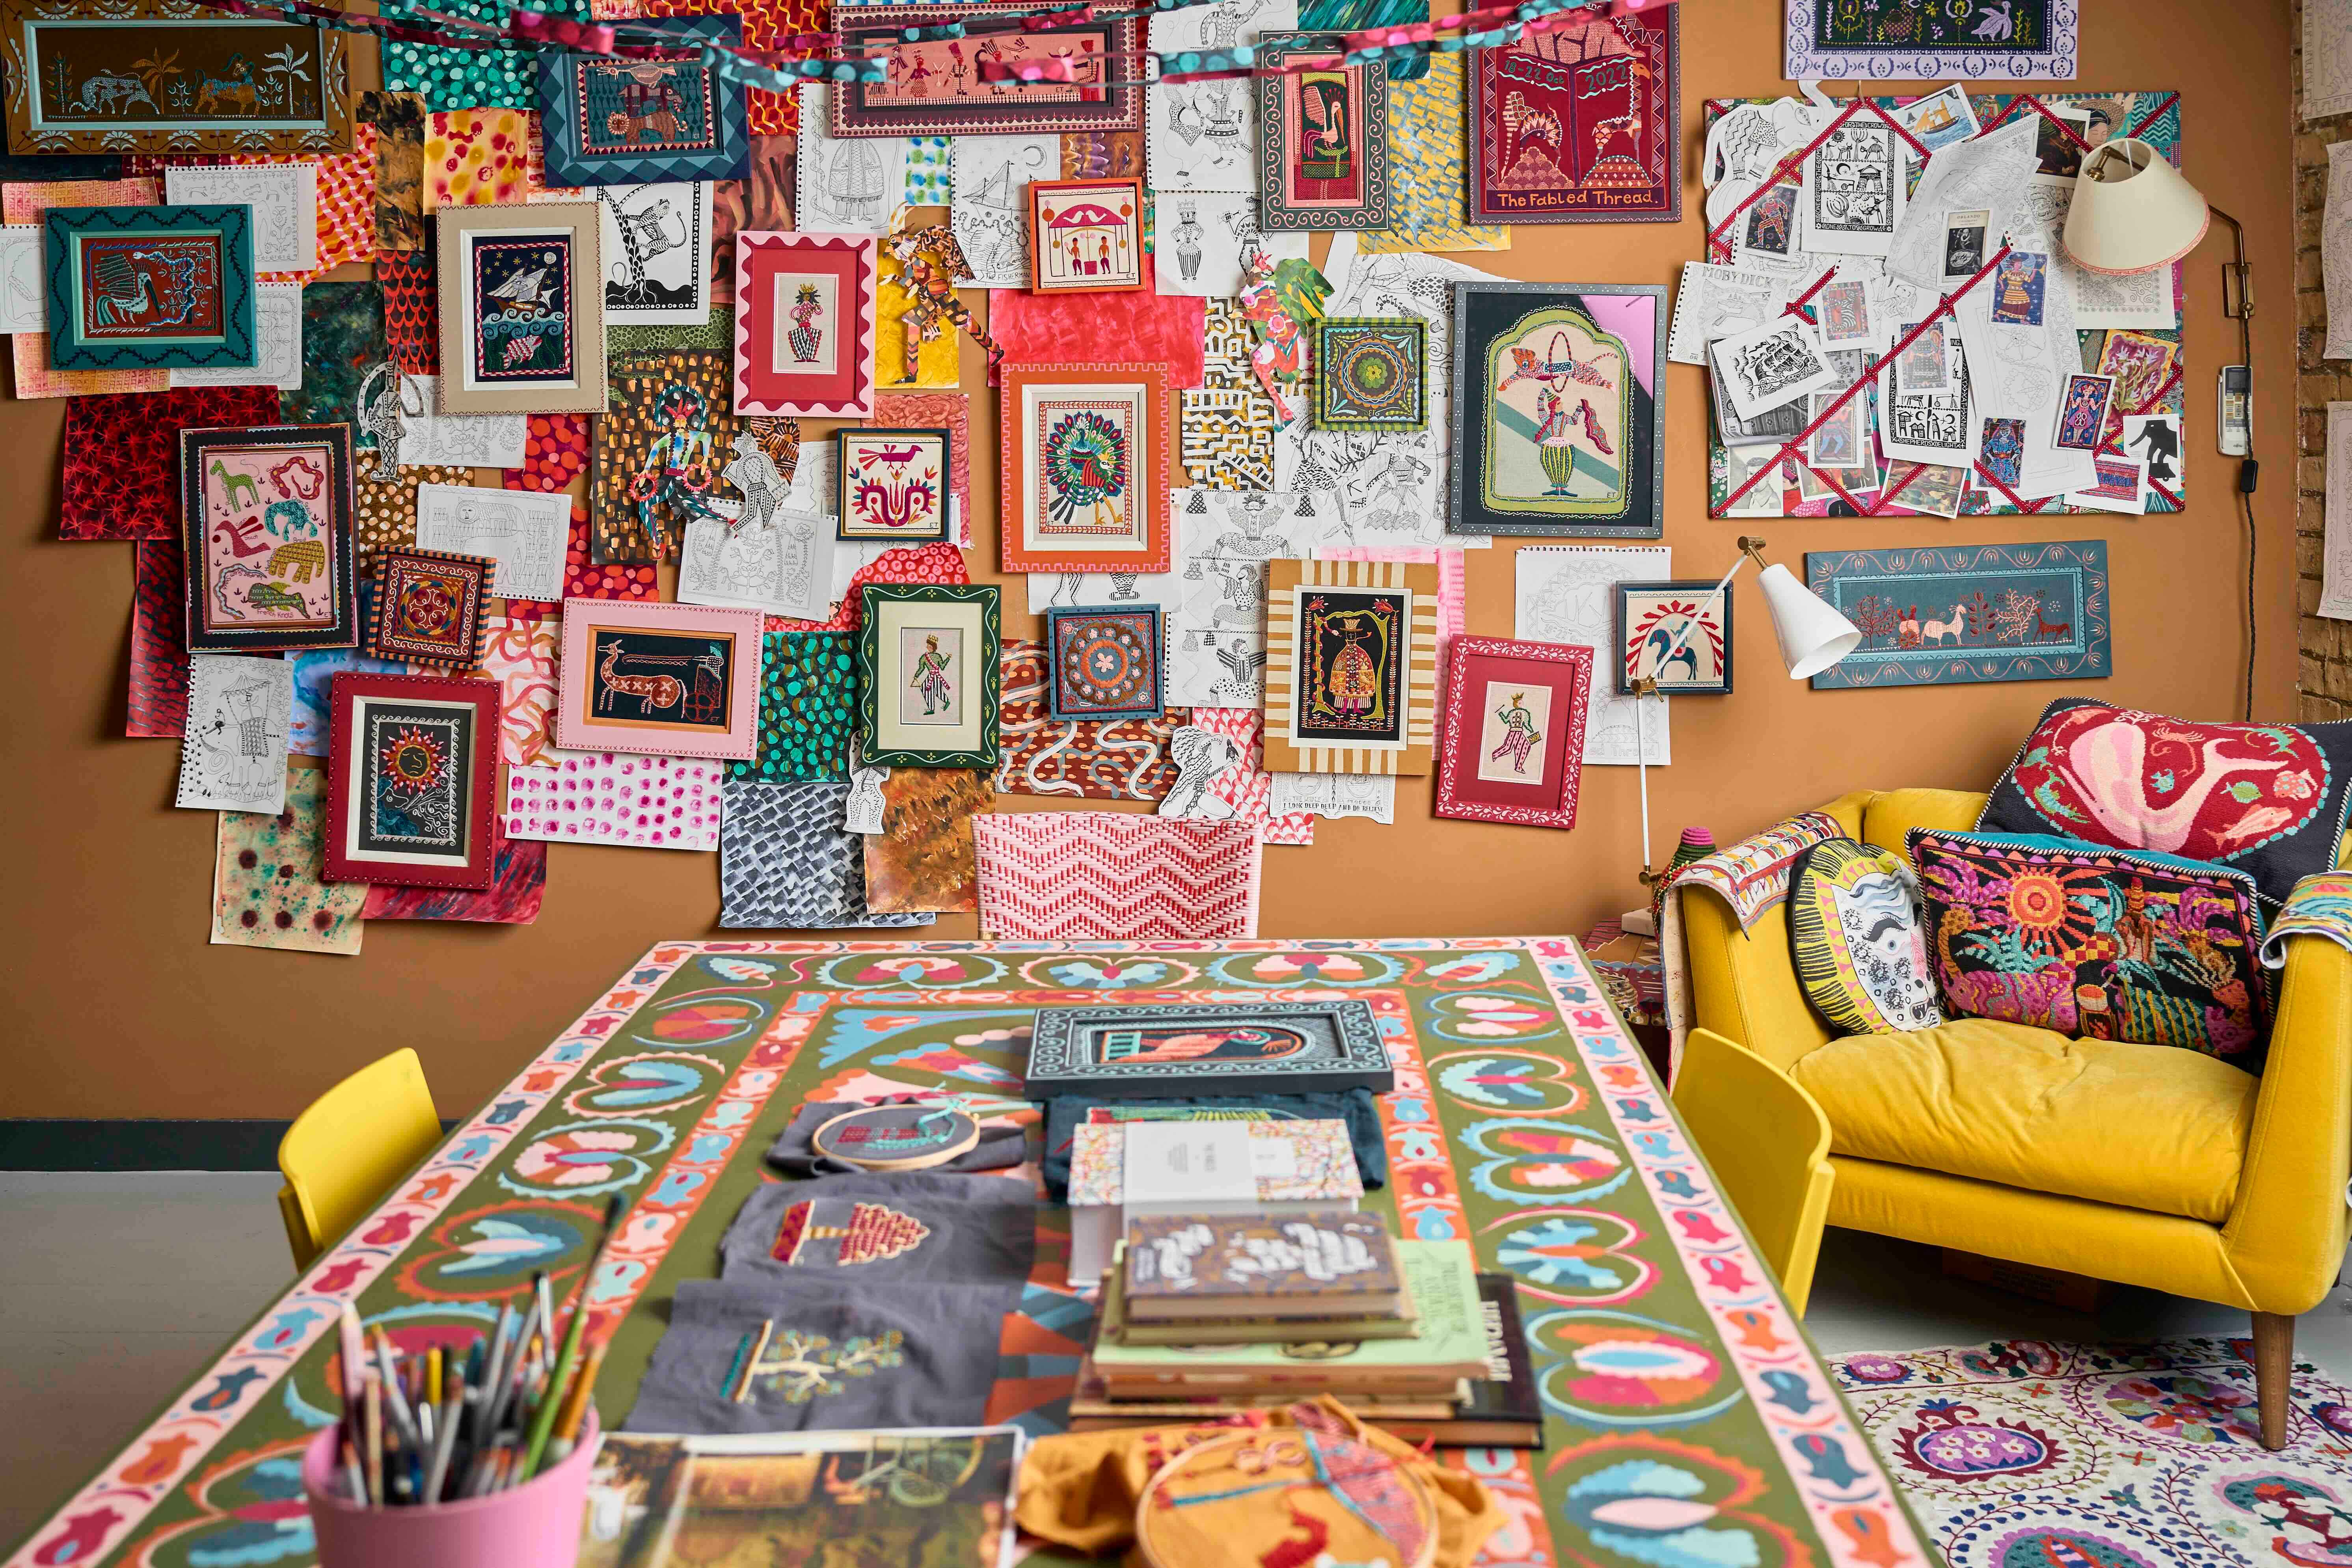
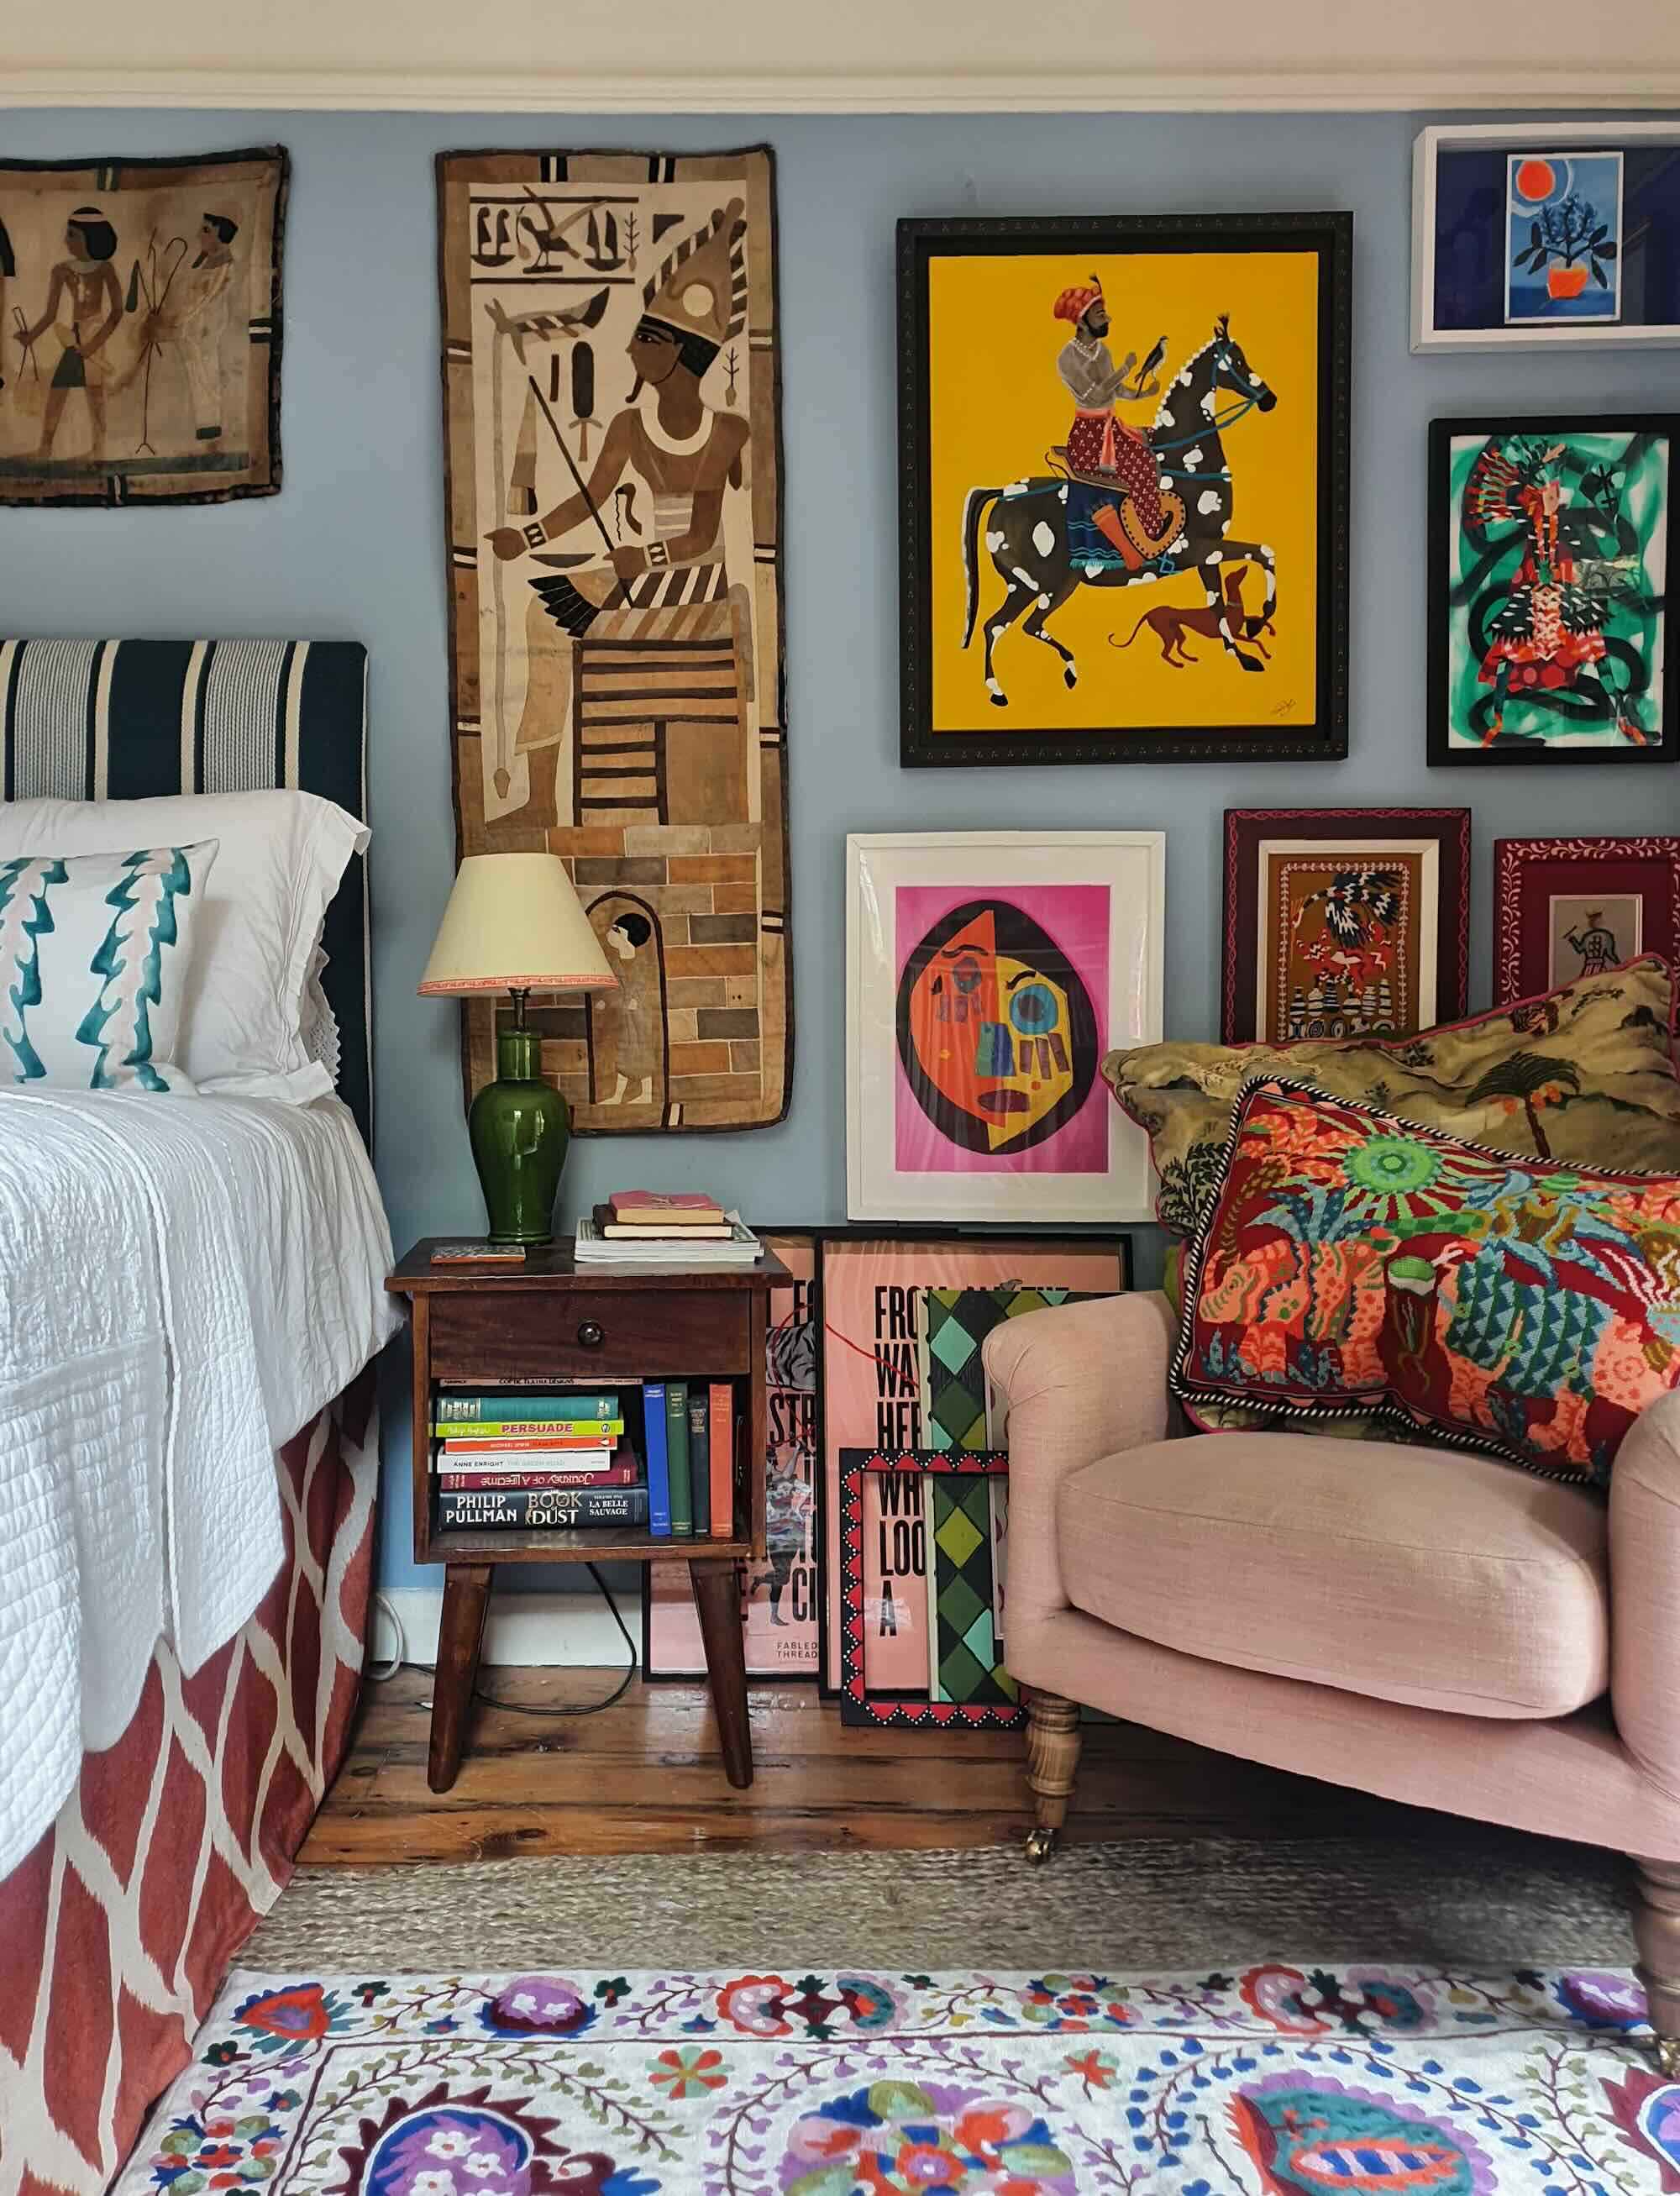
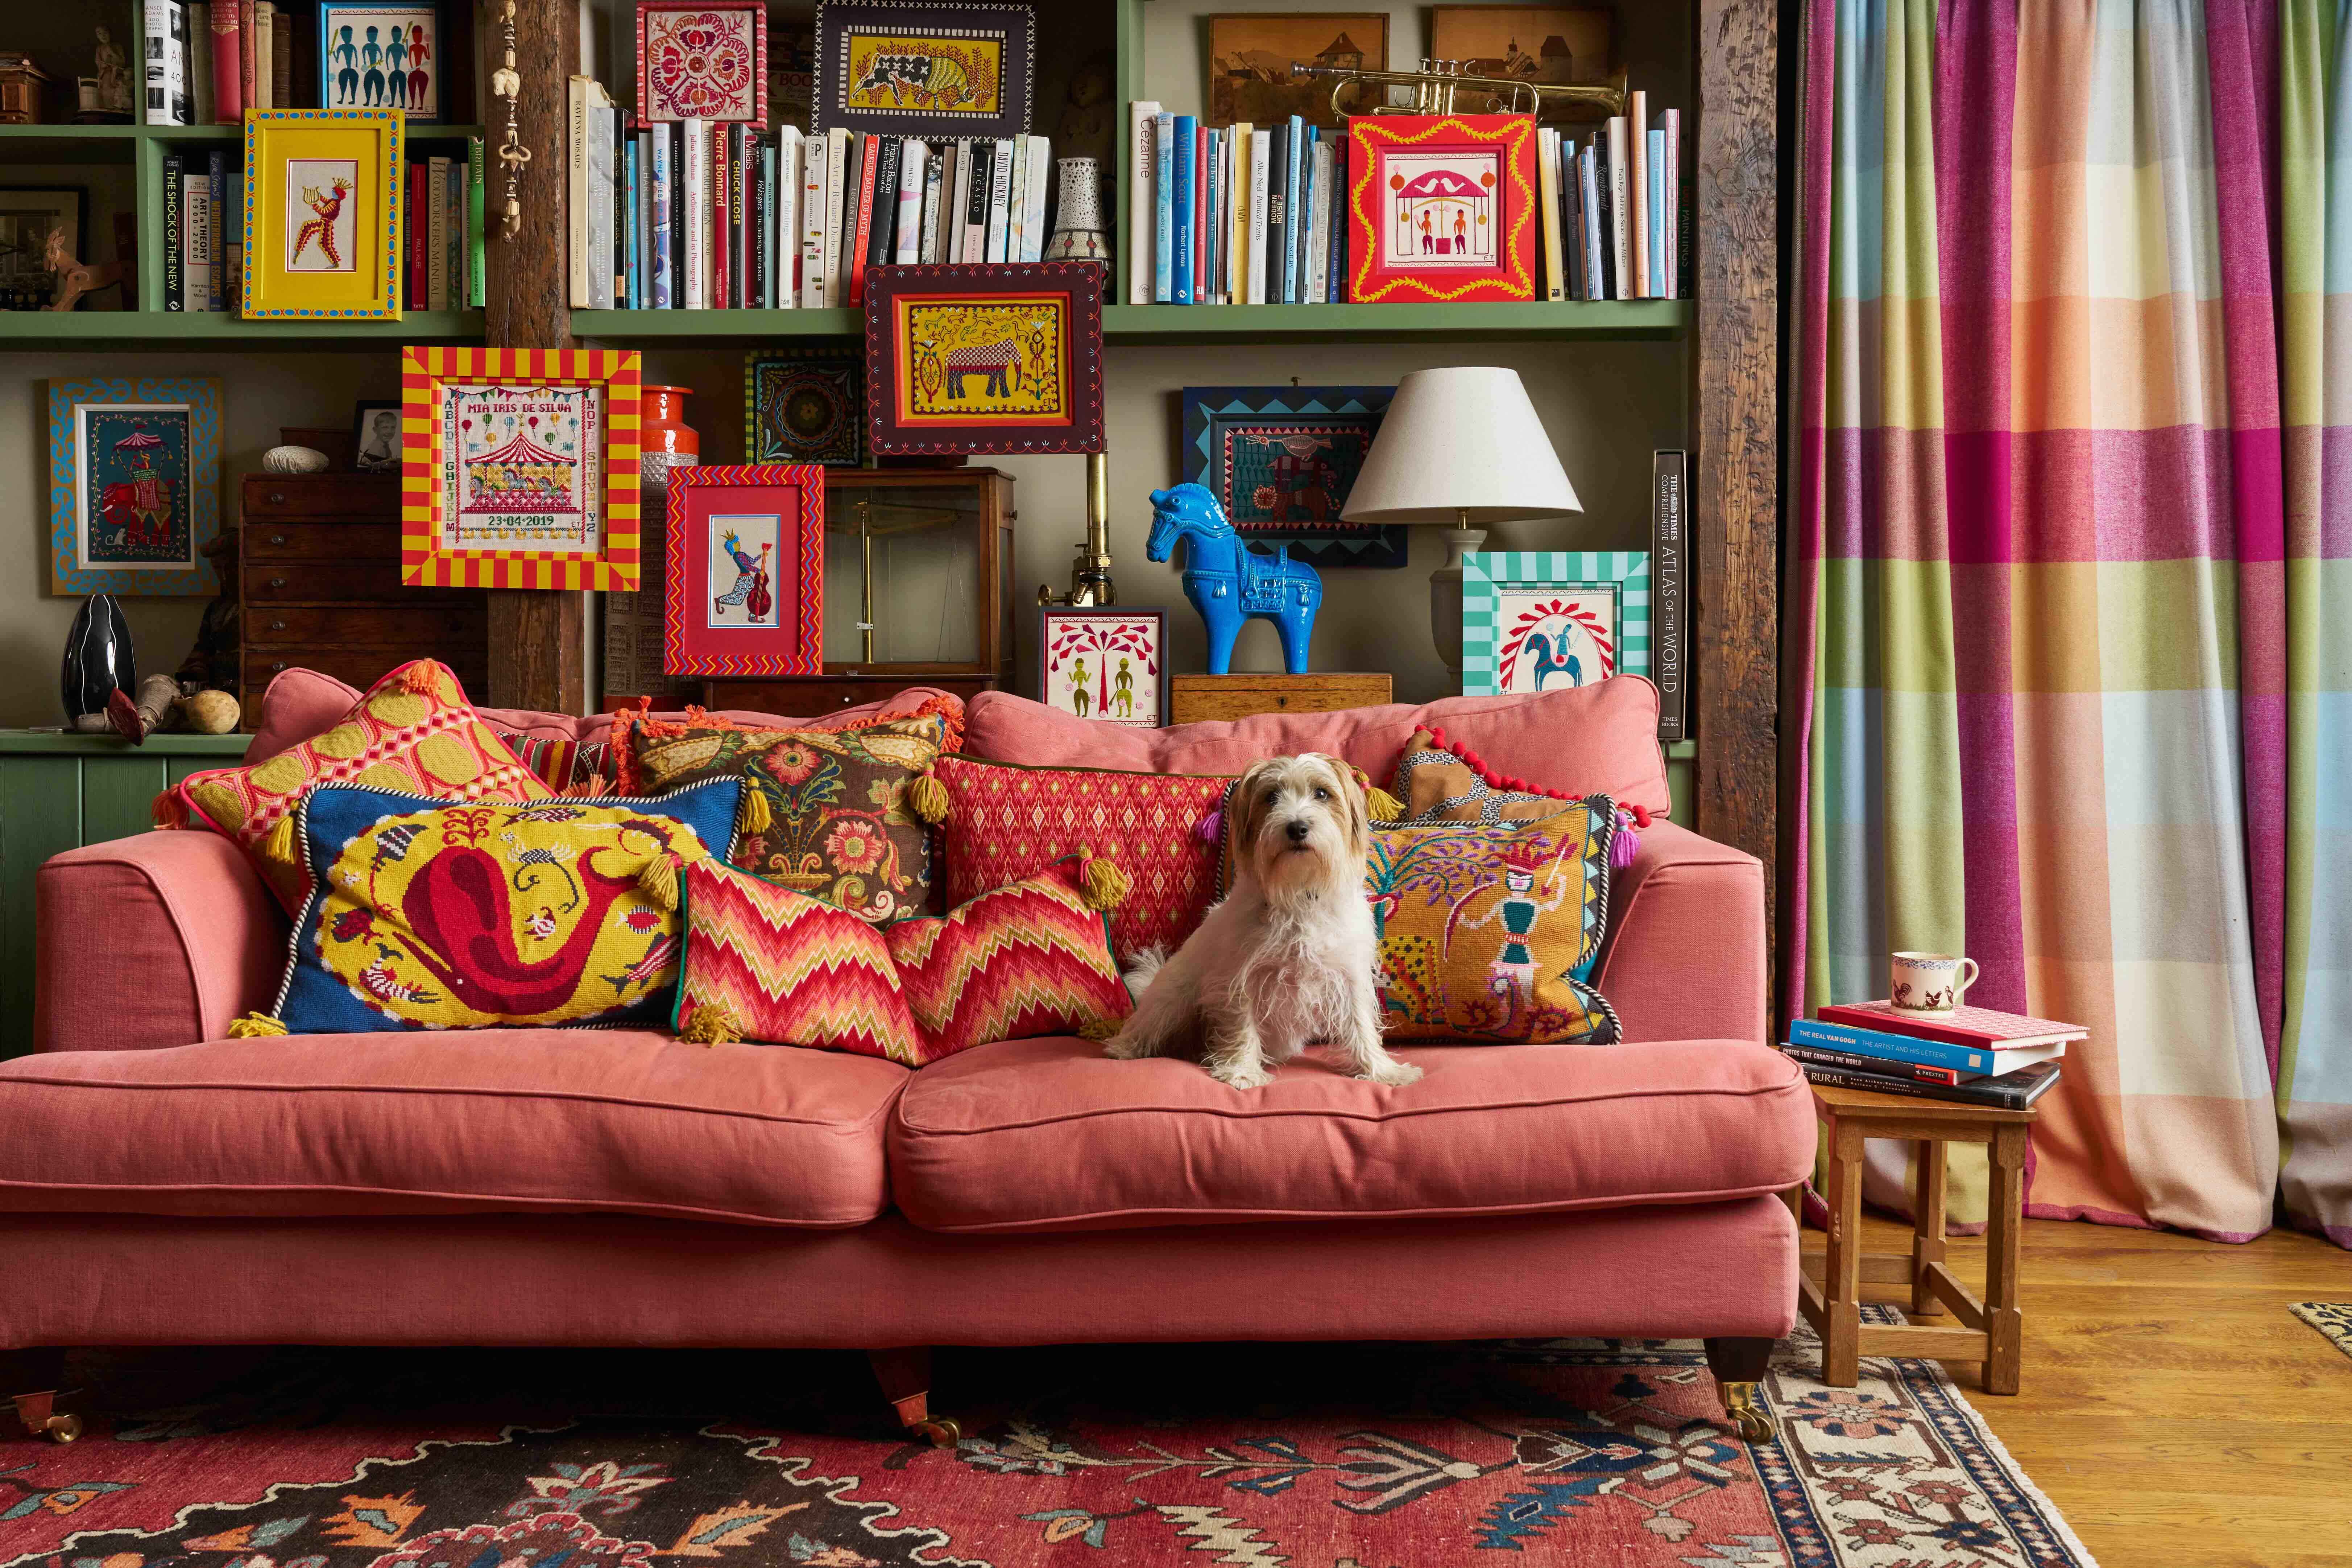
I love a mixed media gallery wall – the more variety the better. A mixed media wall can include things like:
- Paintings
- Drawings
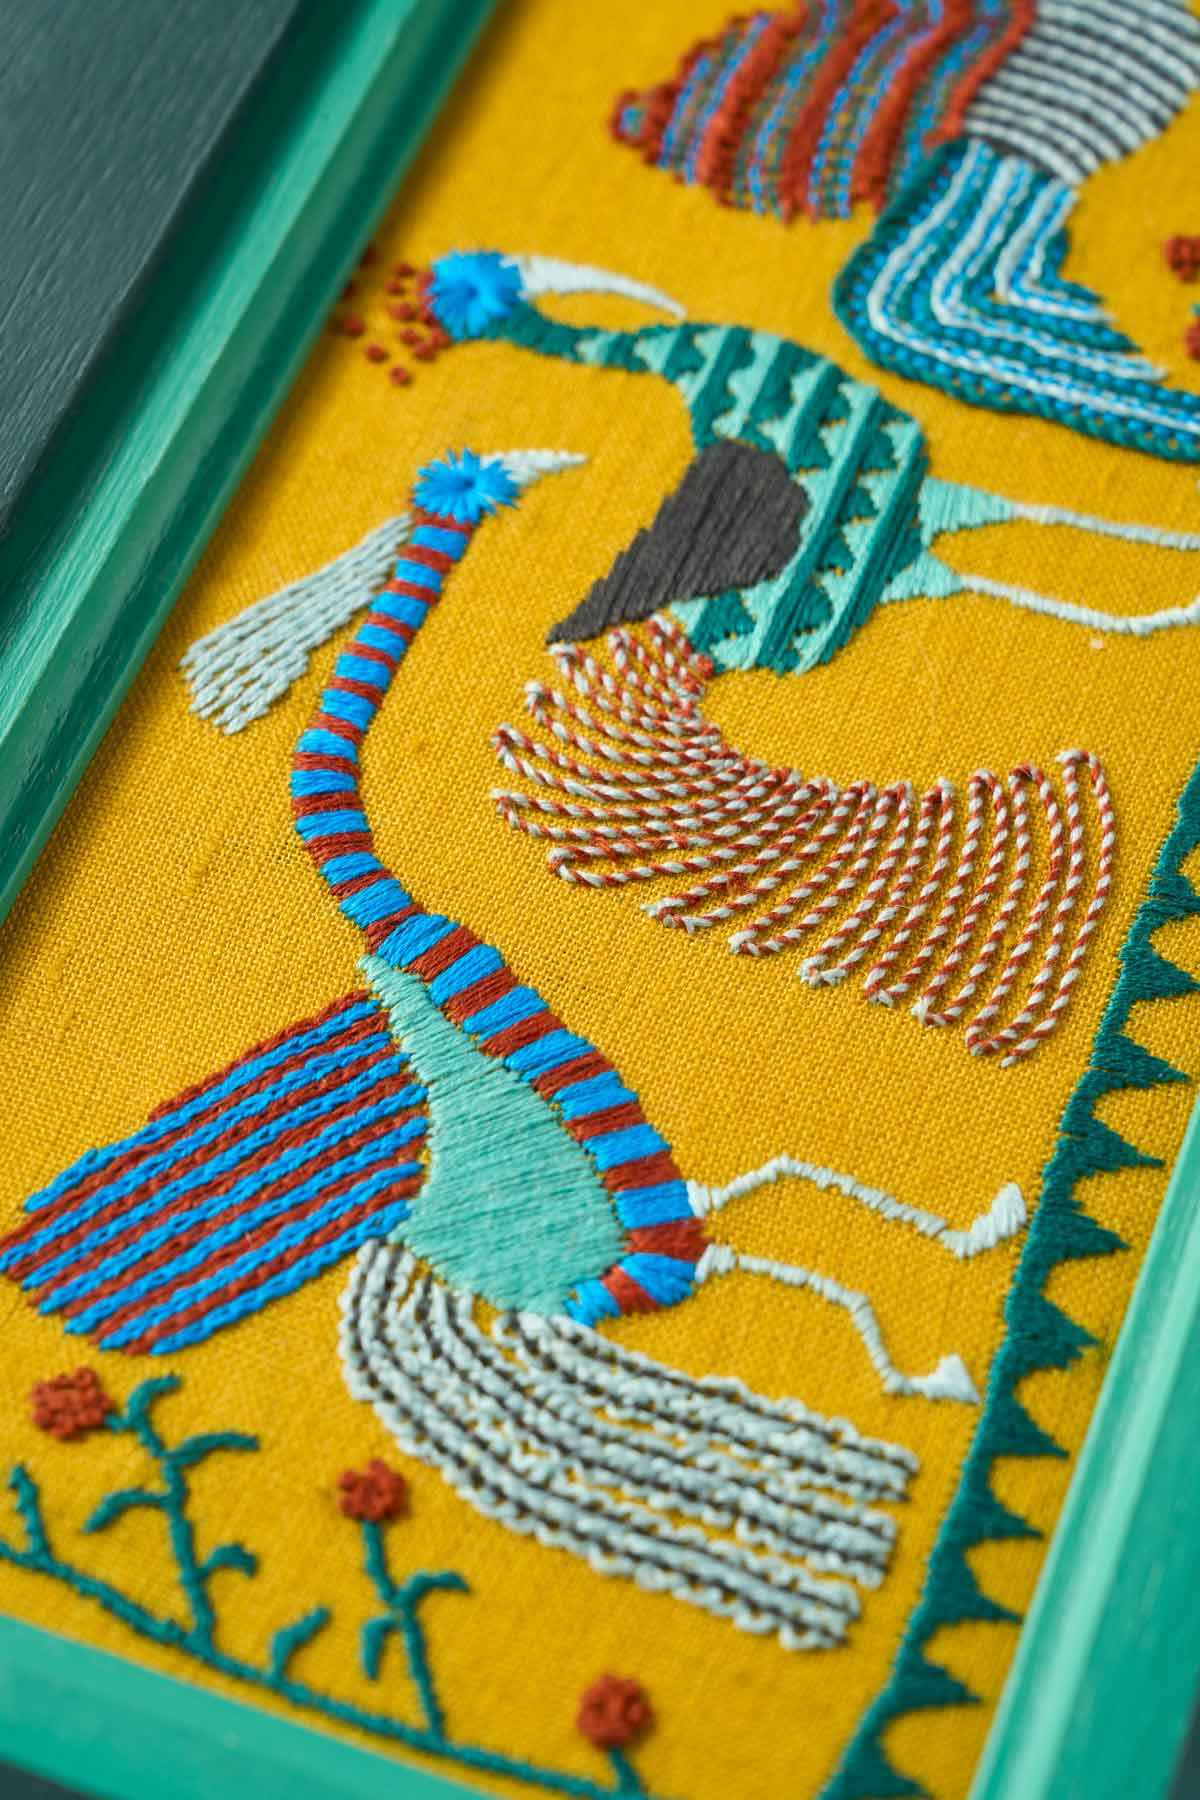
- Embroidery
- Photographs
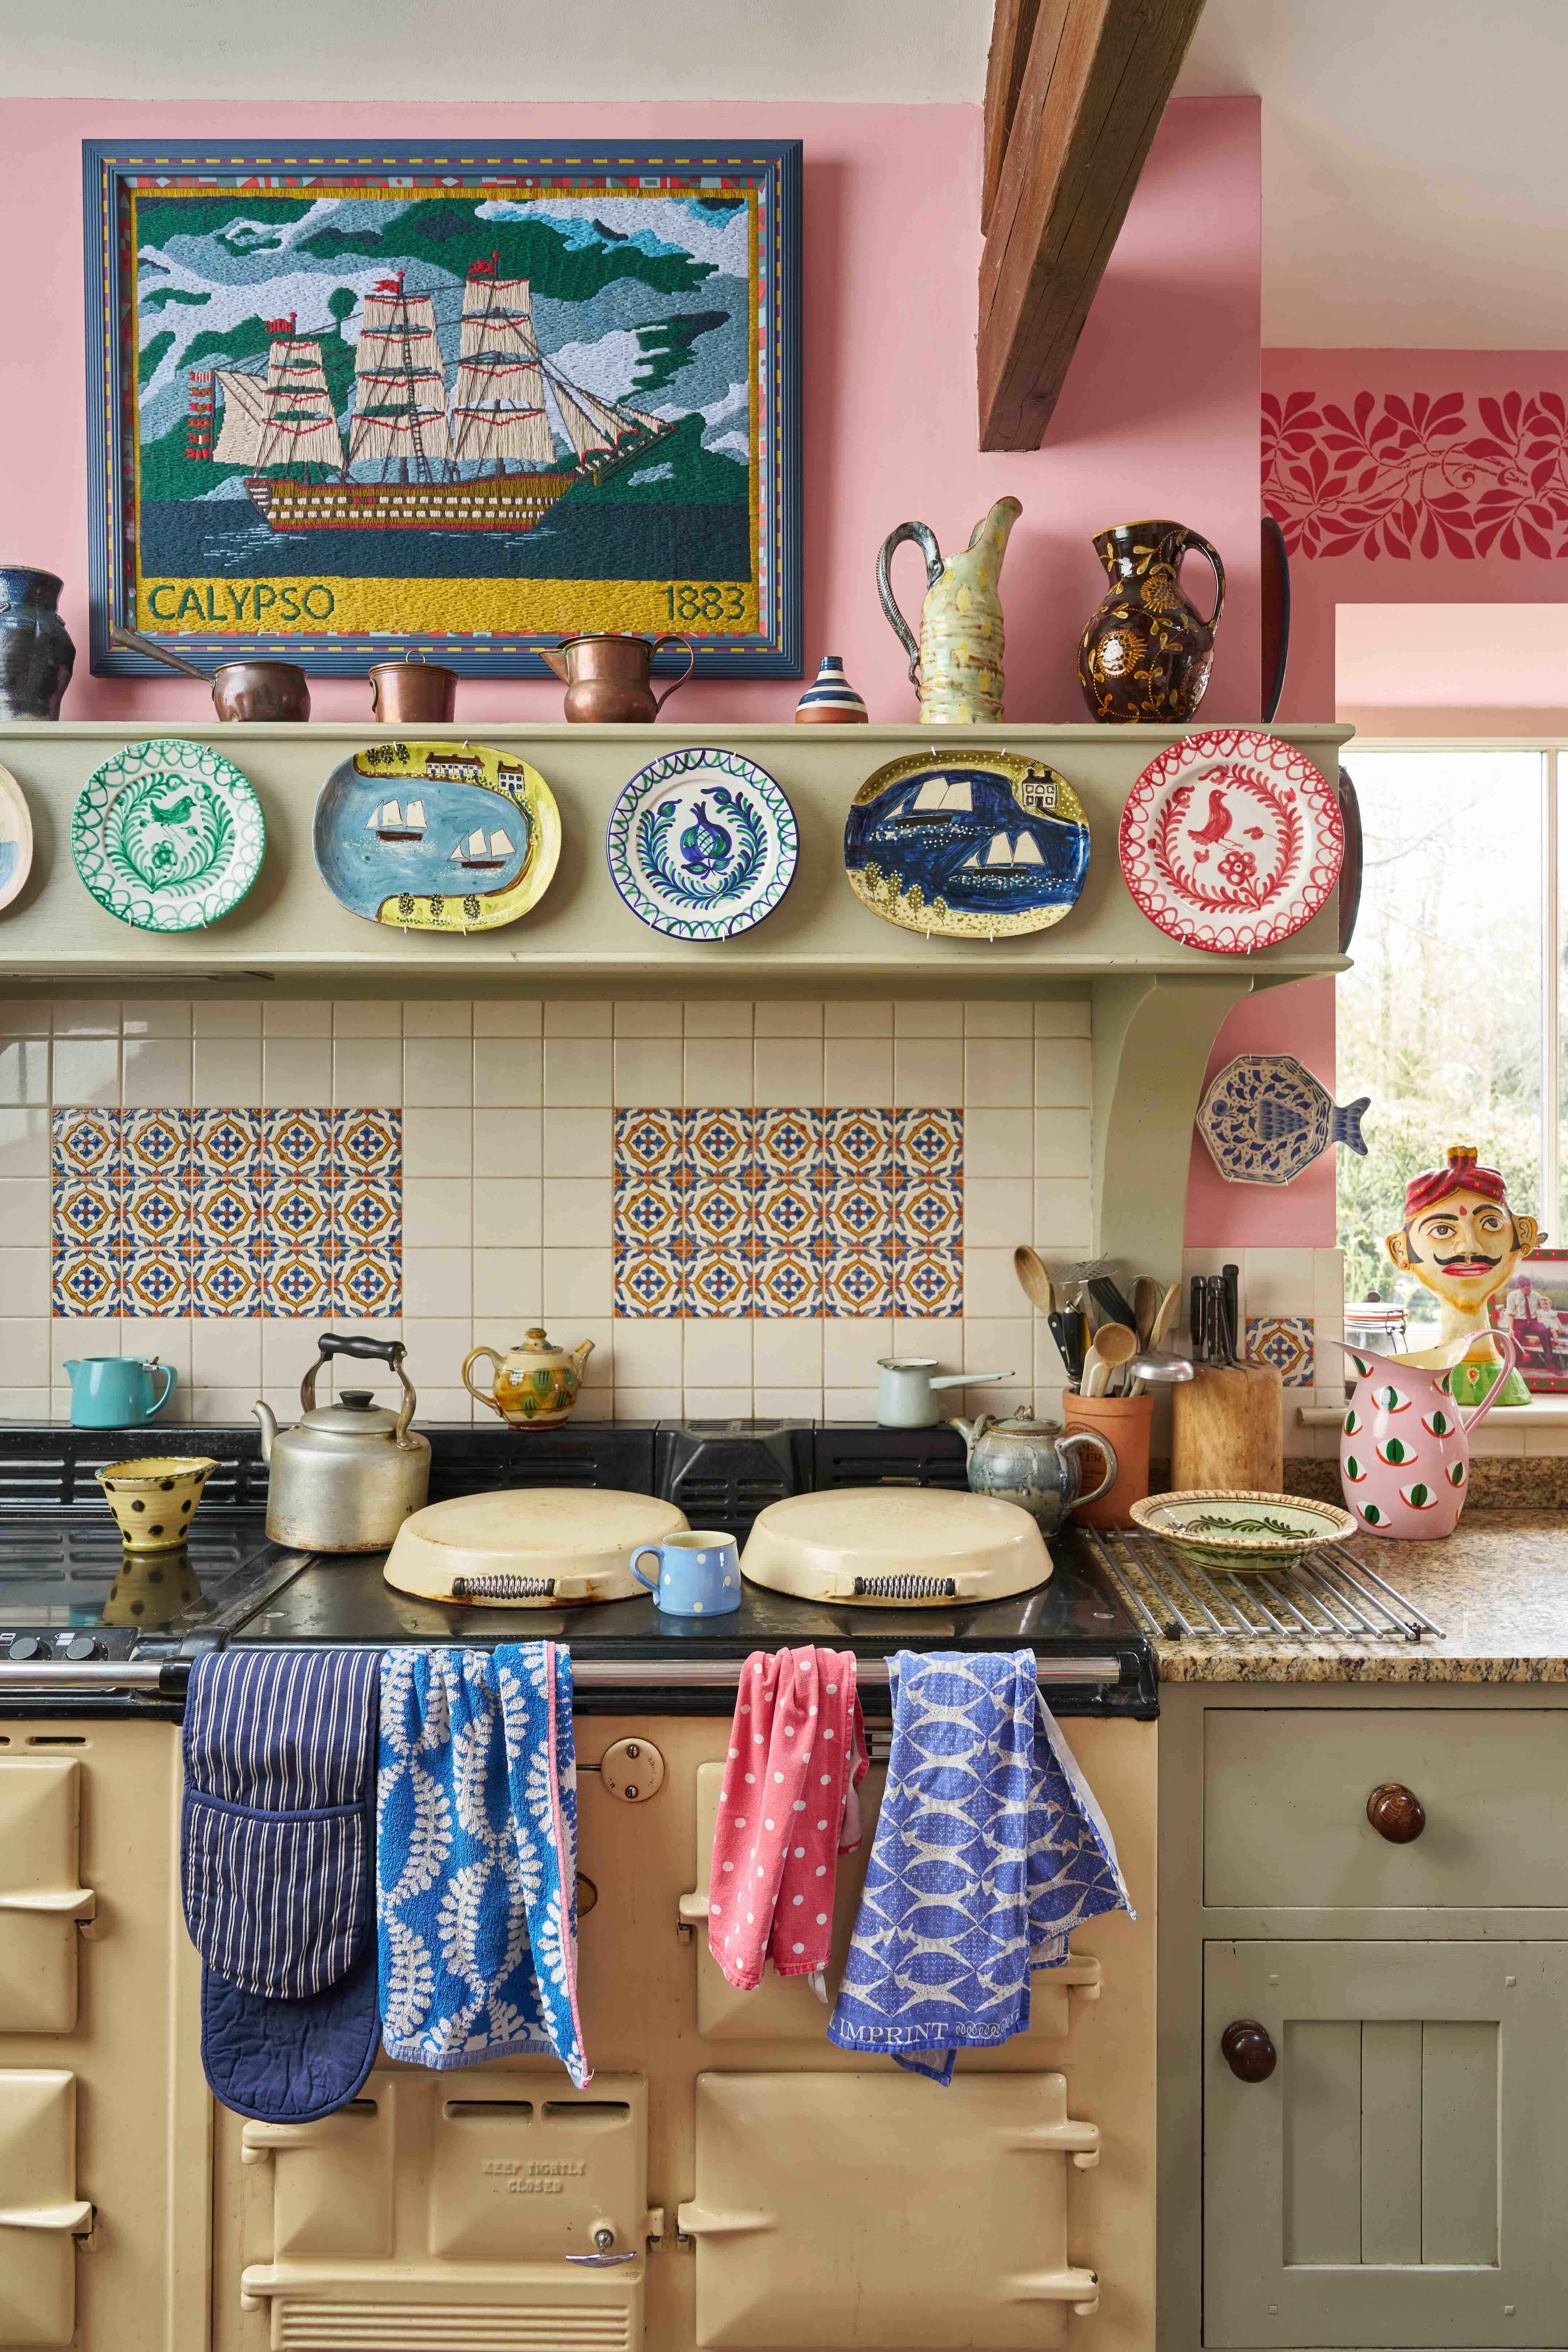
- Plates
- Postcards
- Textile pieces
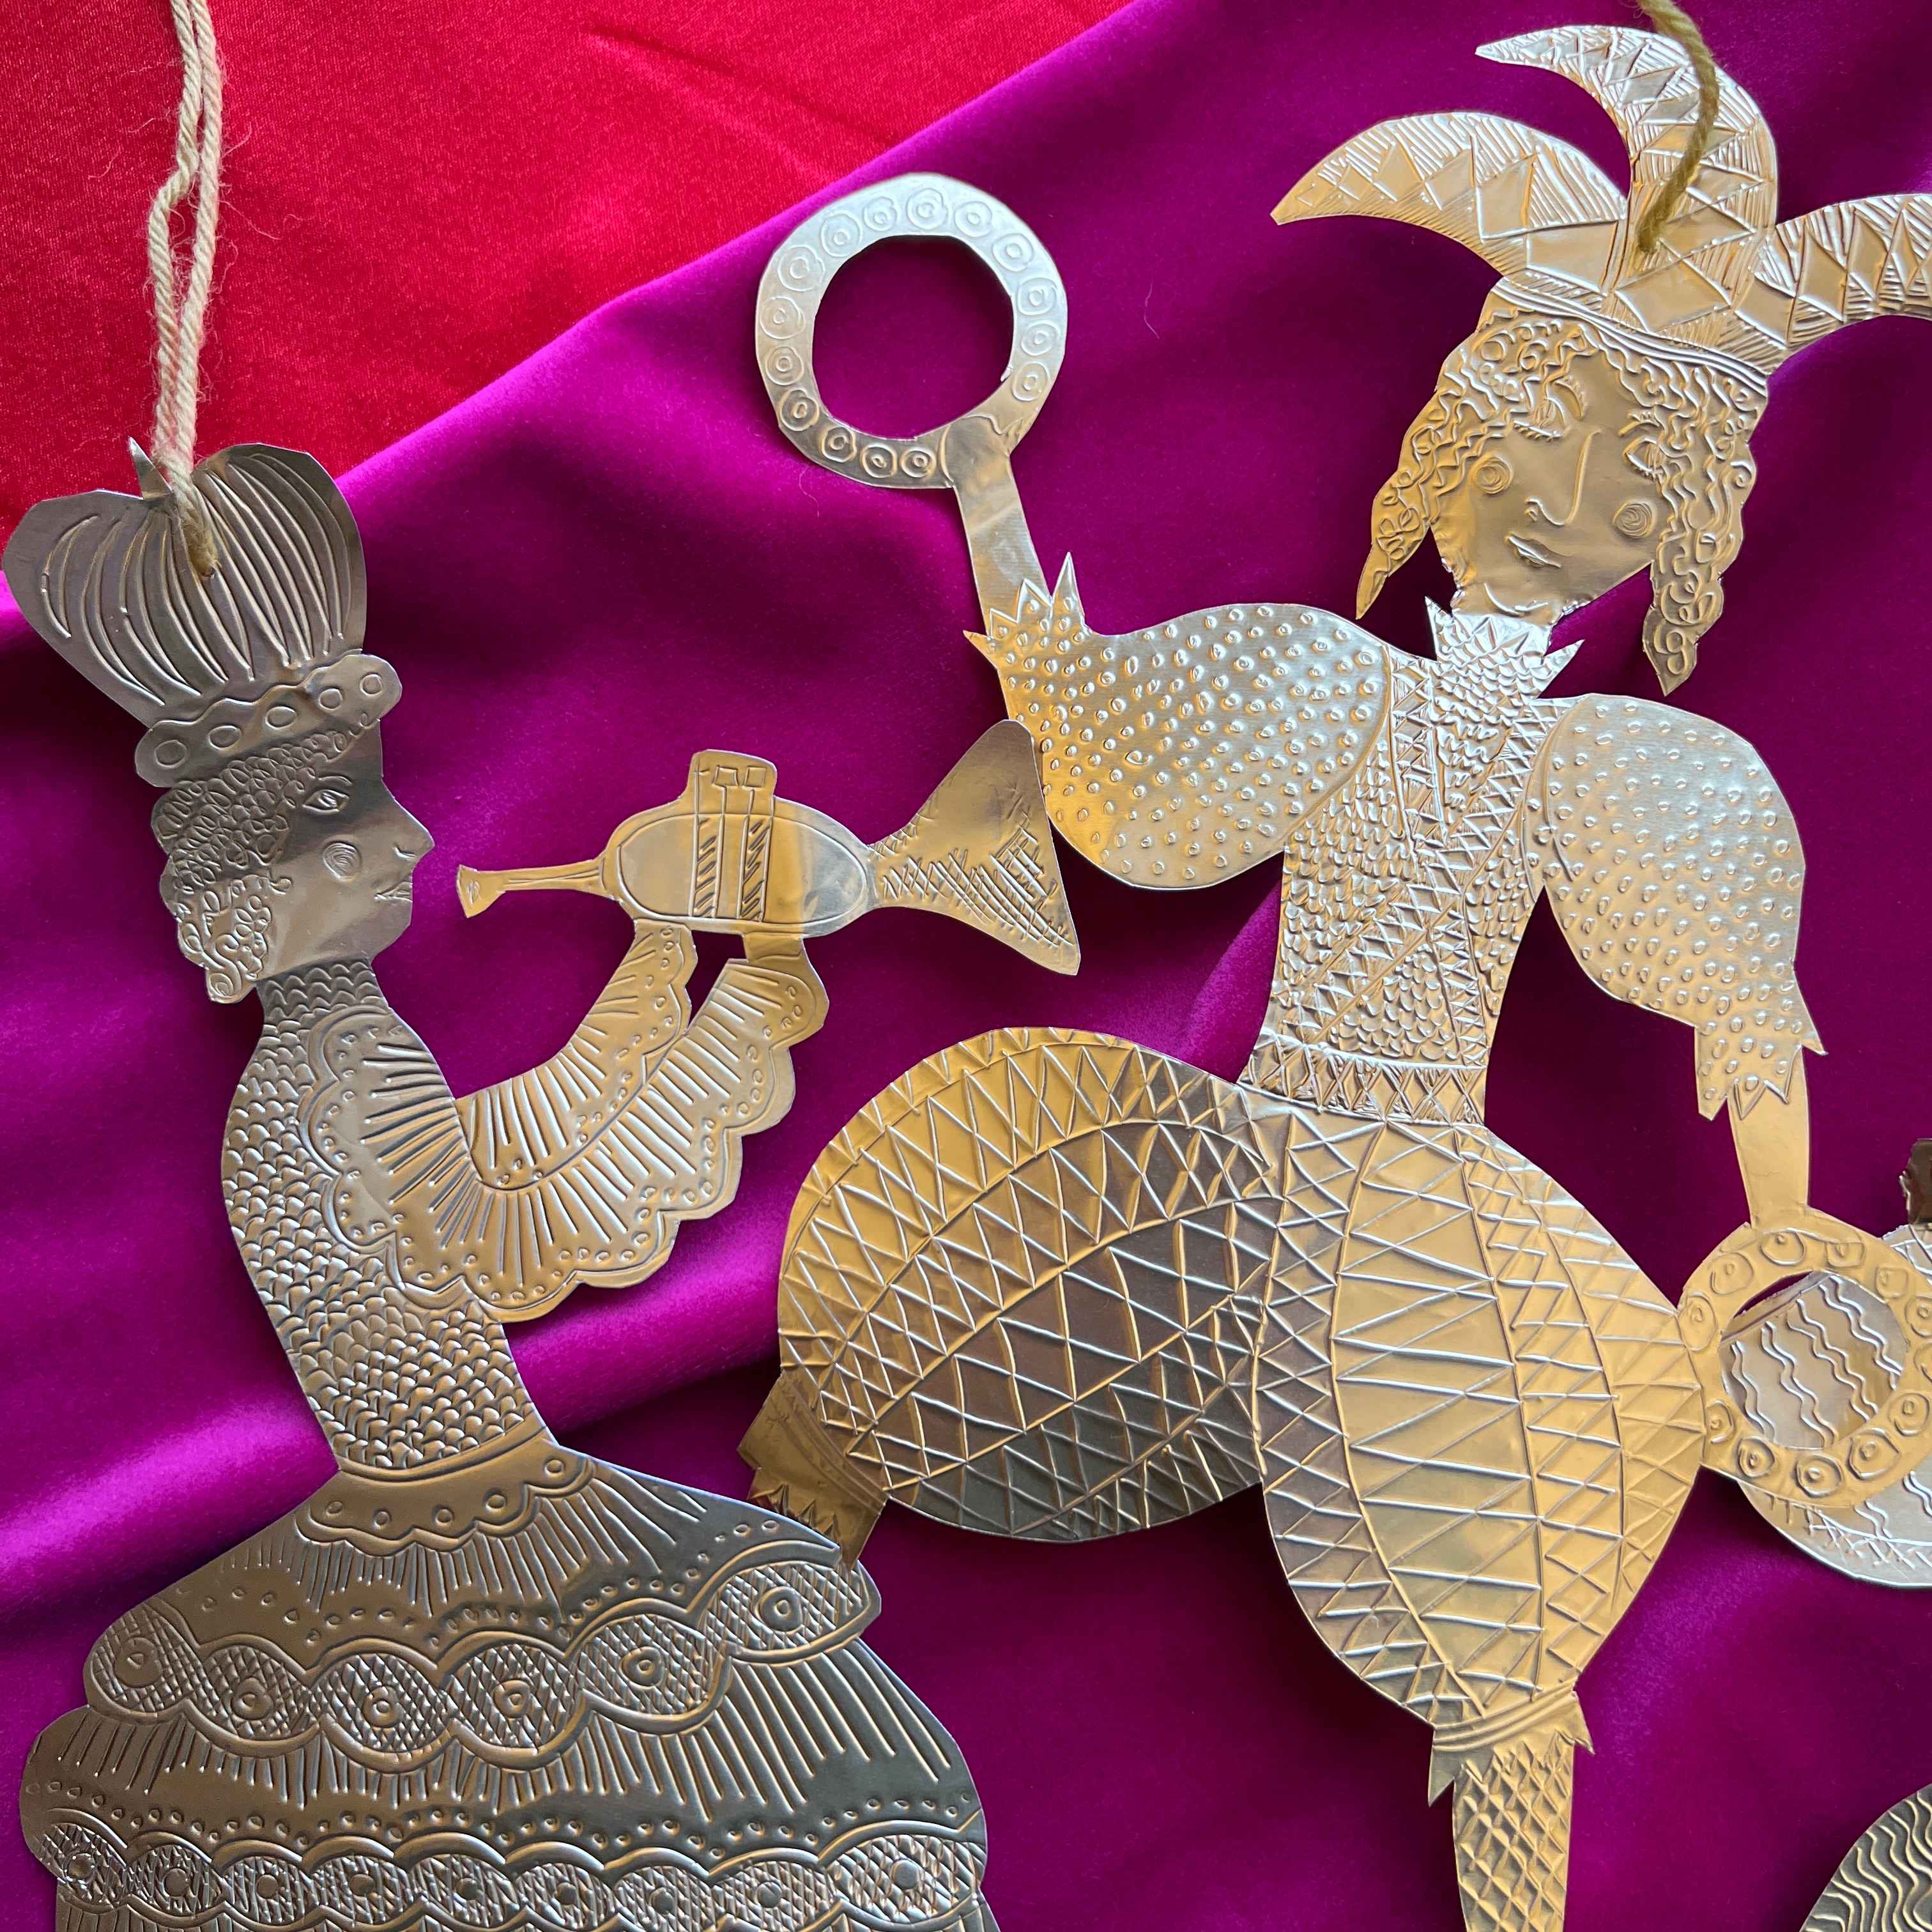
- Metal pieces
Not everything has to be framed! Textiles look lovely hanging directly on the wall, and decorated plates add a variety of shape to your gallery. Smaller pieces, like postcards or pressed flowers can be made to look more impressive if they’re framed.
And not every piece needs to be dramatic or impressive. I framed up a box of matches and it's such a simple piece, but it feels personal and original. Add drawings by your children, menus or receipts from a restaurant you love, postcards from friends, embossed metal... think outside the box and make your picture wall into a feast for your eyes, so that you’ll want to admire it every day.
Don’t worry about whether things go together or not. The very fact you chose them all means that there will be a link regardless of whether you can see it.
It can be really nice to have a variety of frame styles. You can include some with mounts, decorated frames, painted wood, raw wood or metal. Not only is this more visually exciting, but it also means that if you want to add any artwork in the future, you don’t have to worry about the risk of a particular frame style being discontinued.
This is partly why we have chosen to vary the design of the frames we sell for our kits. The Jabberwocky kits come in box frames, the Musician series have mounts, the Woolies frames are reeded, the Fables are flat and the Botanicals are in stained wooden frames.
Our painted frames


If you prefer to decorate the frames yourself, we also sell raw, unpainted frames.
Paint-your-own-frames


If you’re unsure how to paint your own frames, then we’ve put together a guide which takes you through the whole process. We also have a course on decoratively painting frames. You can use this process to upcycle old frames, giving them a new life while adding colour and pattern to your wall.
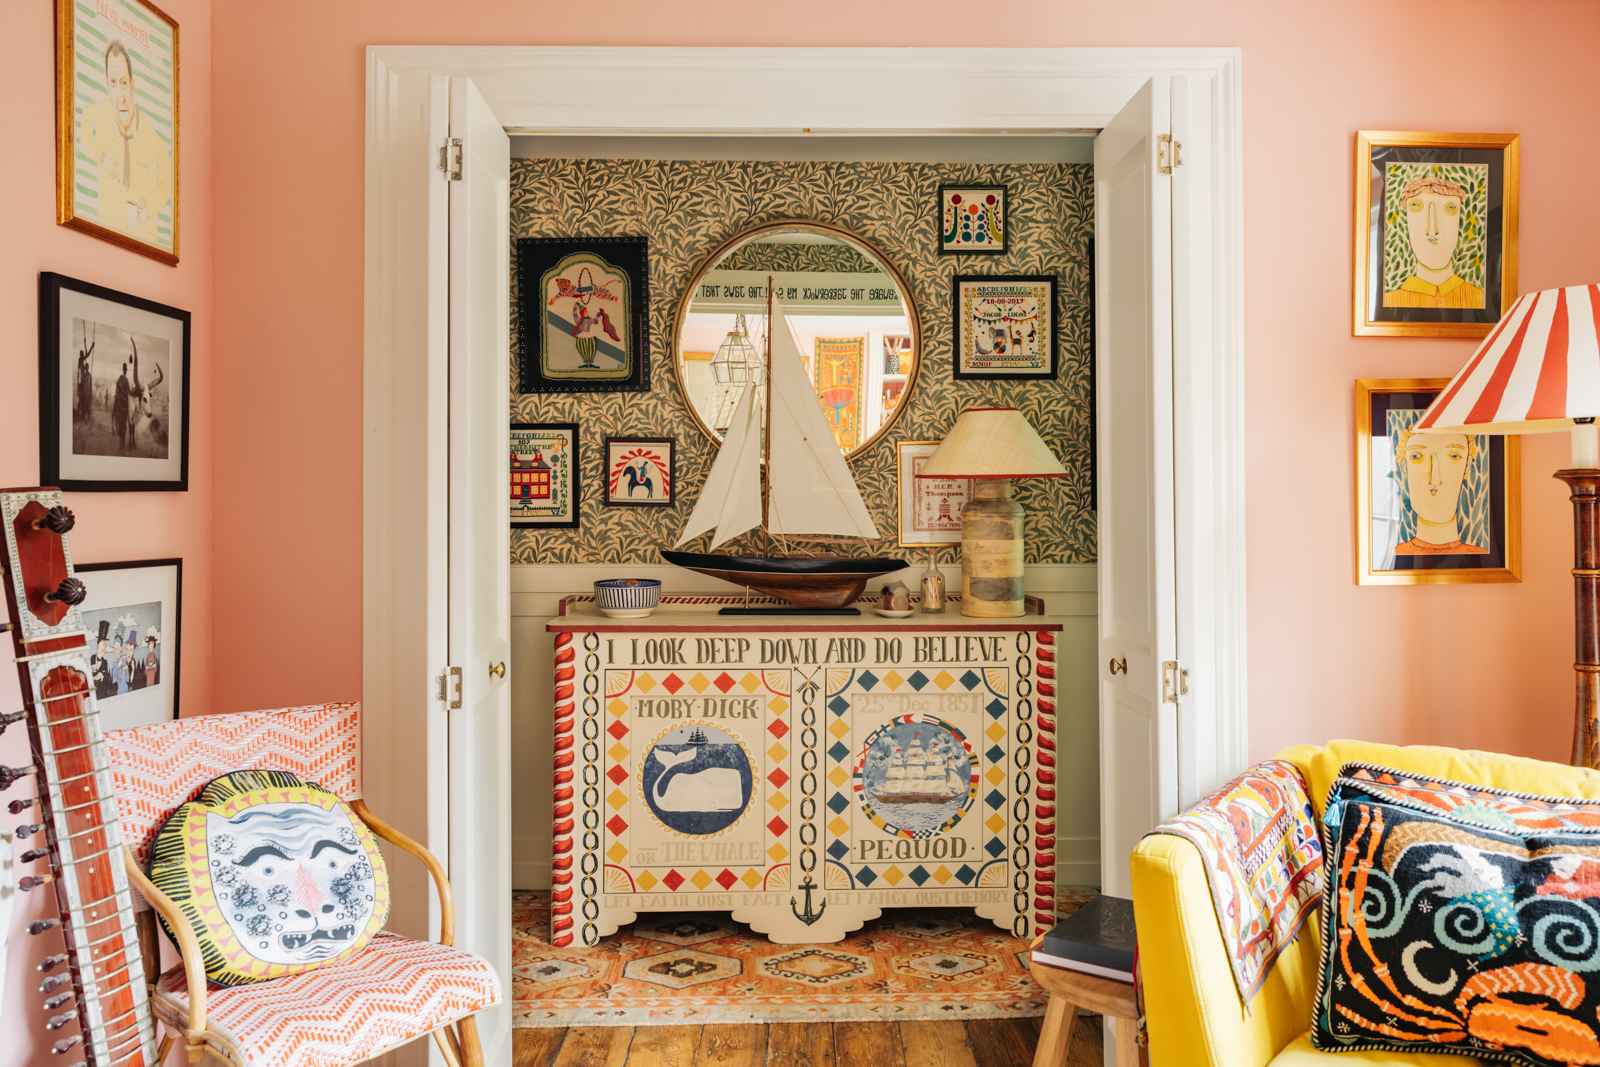
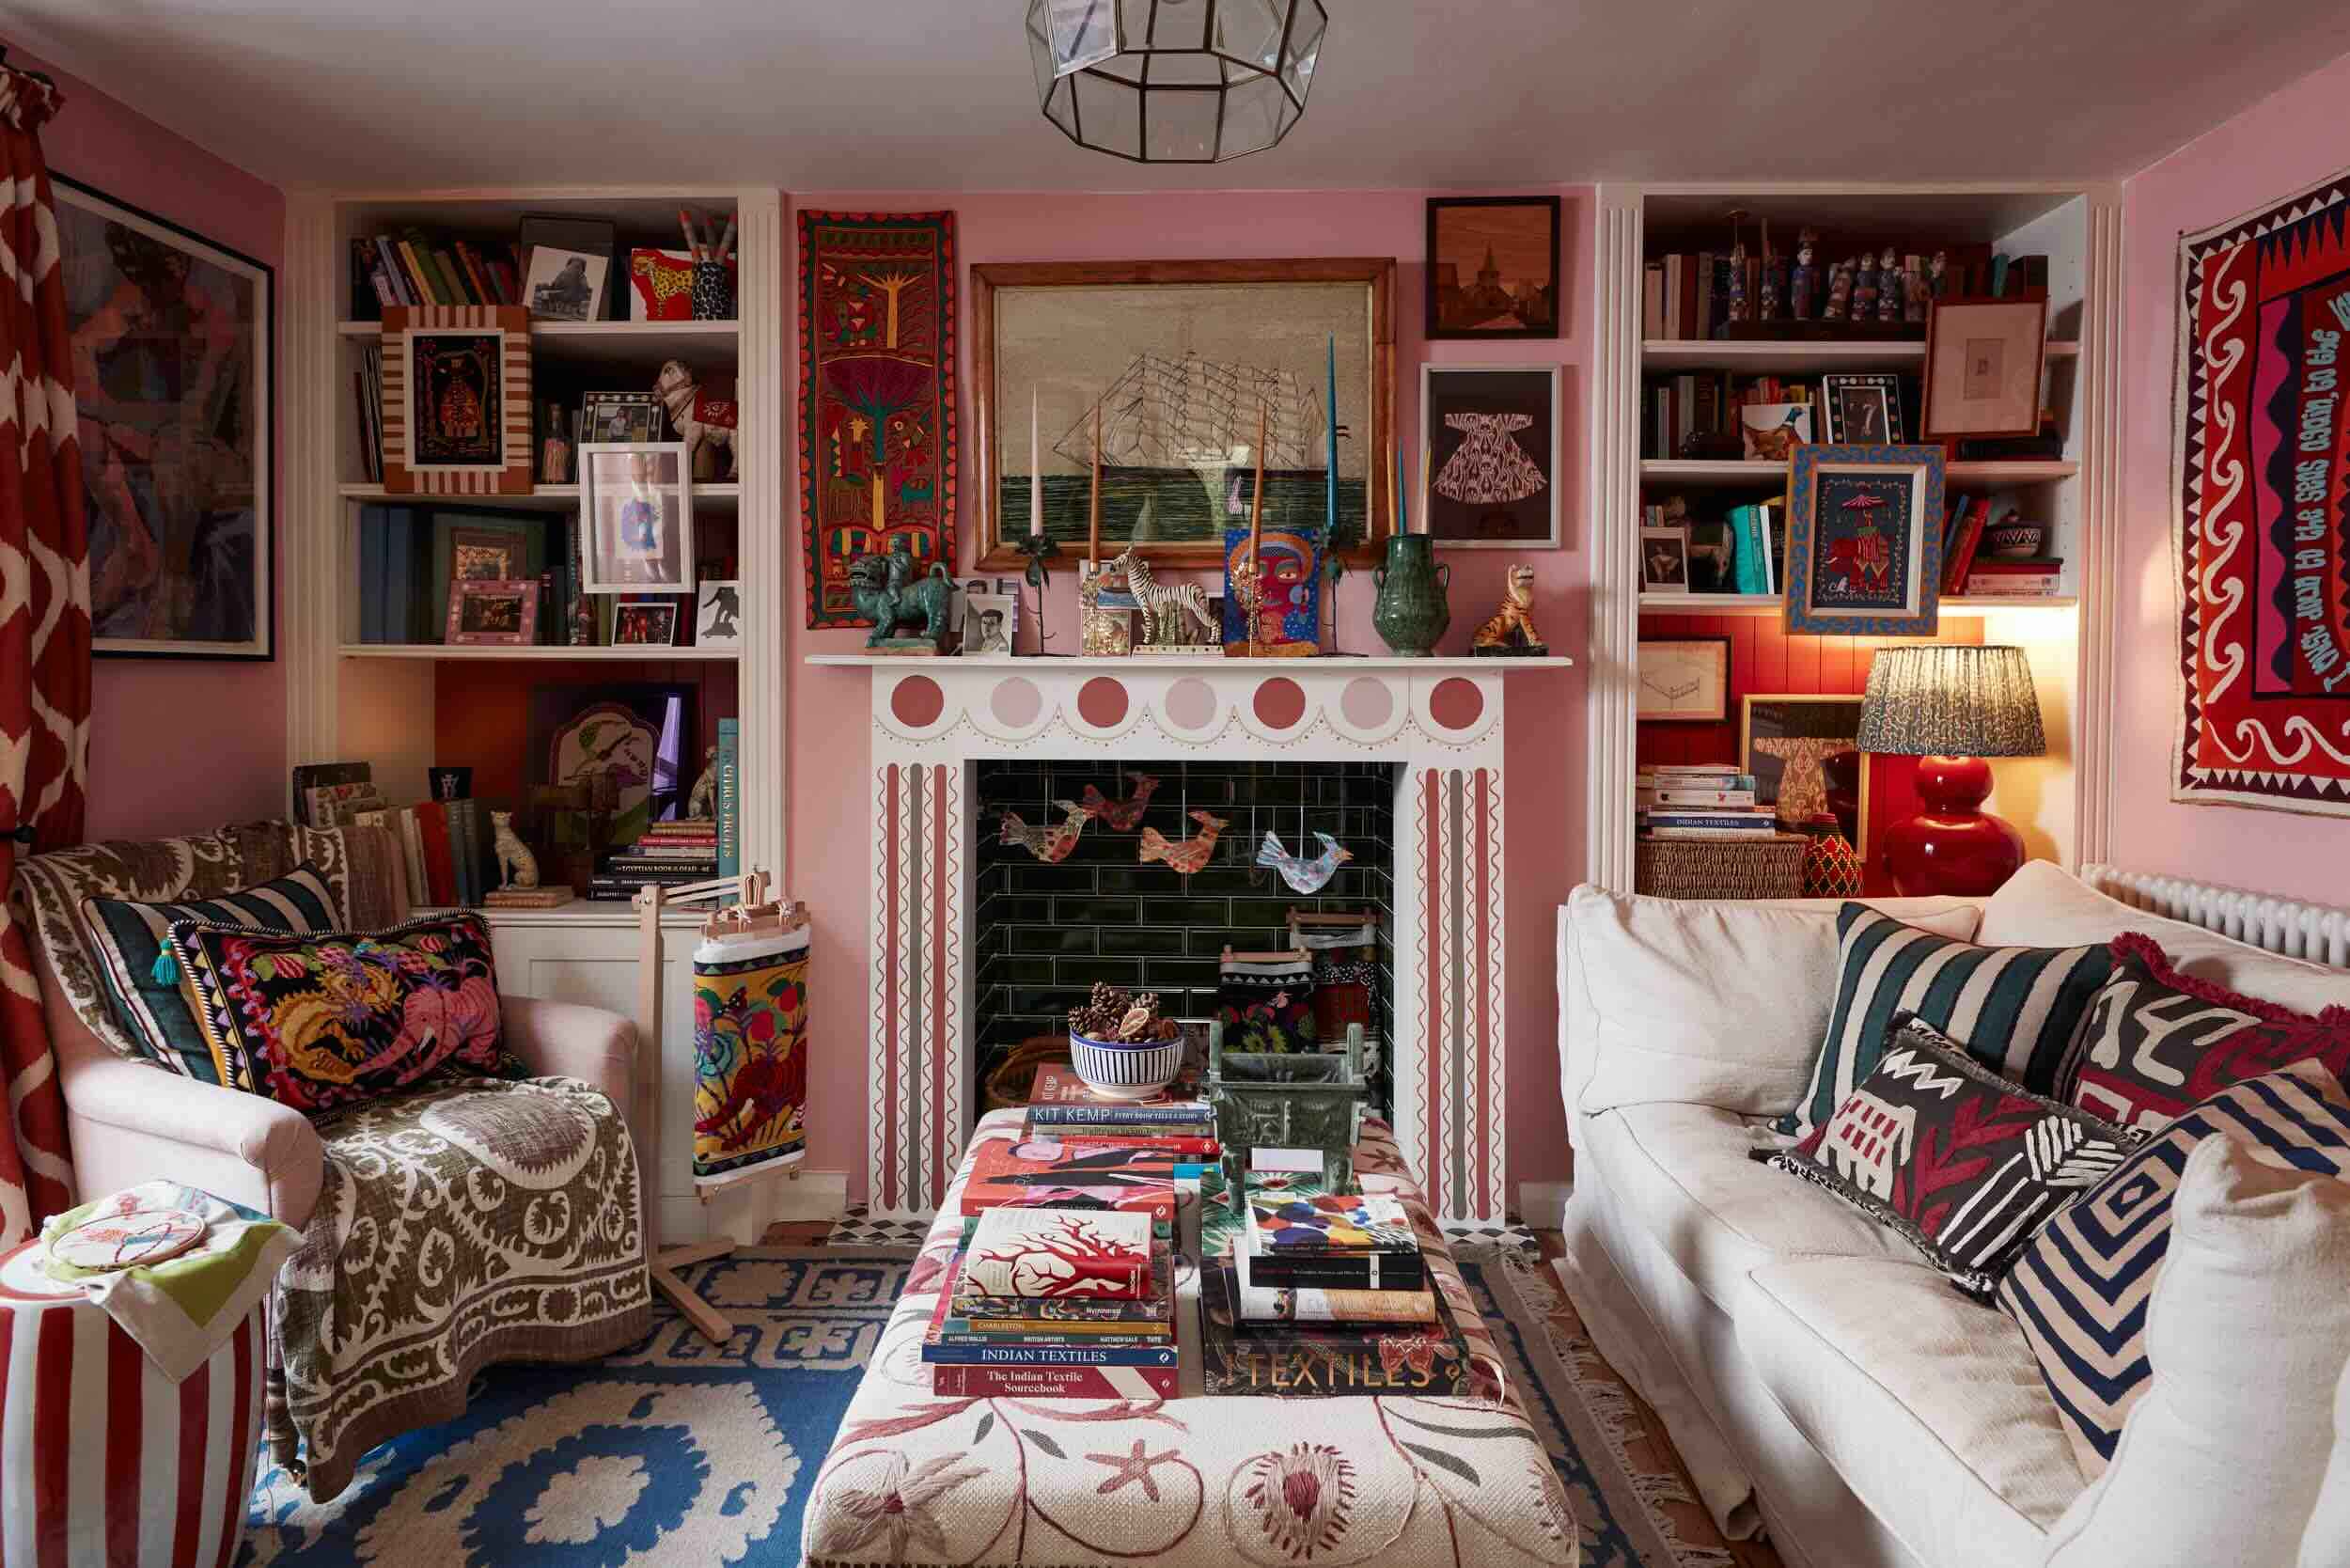
Although we love decorative frame painting, you don’t need to decorate all the frames in your picture wall! It’s good to have some simpler pieces in and amongst the pattern, so that it isn’t too overwhelming (yes, our studio wall is absolutely filled with decorated frames, but we’re aware that not everyone wants to go as all-out-maximalist as that in their home!). Have a few boldly decorated frames amidst other plainer ones and your wall will look more effective.
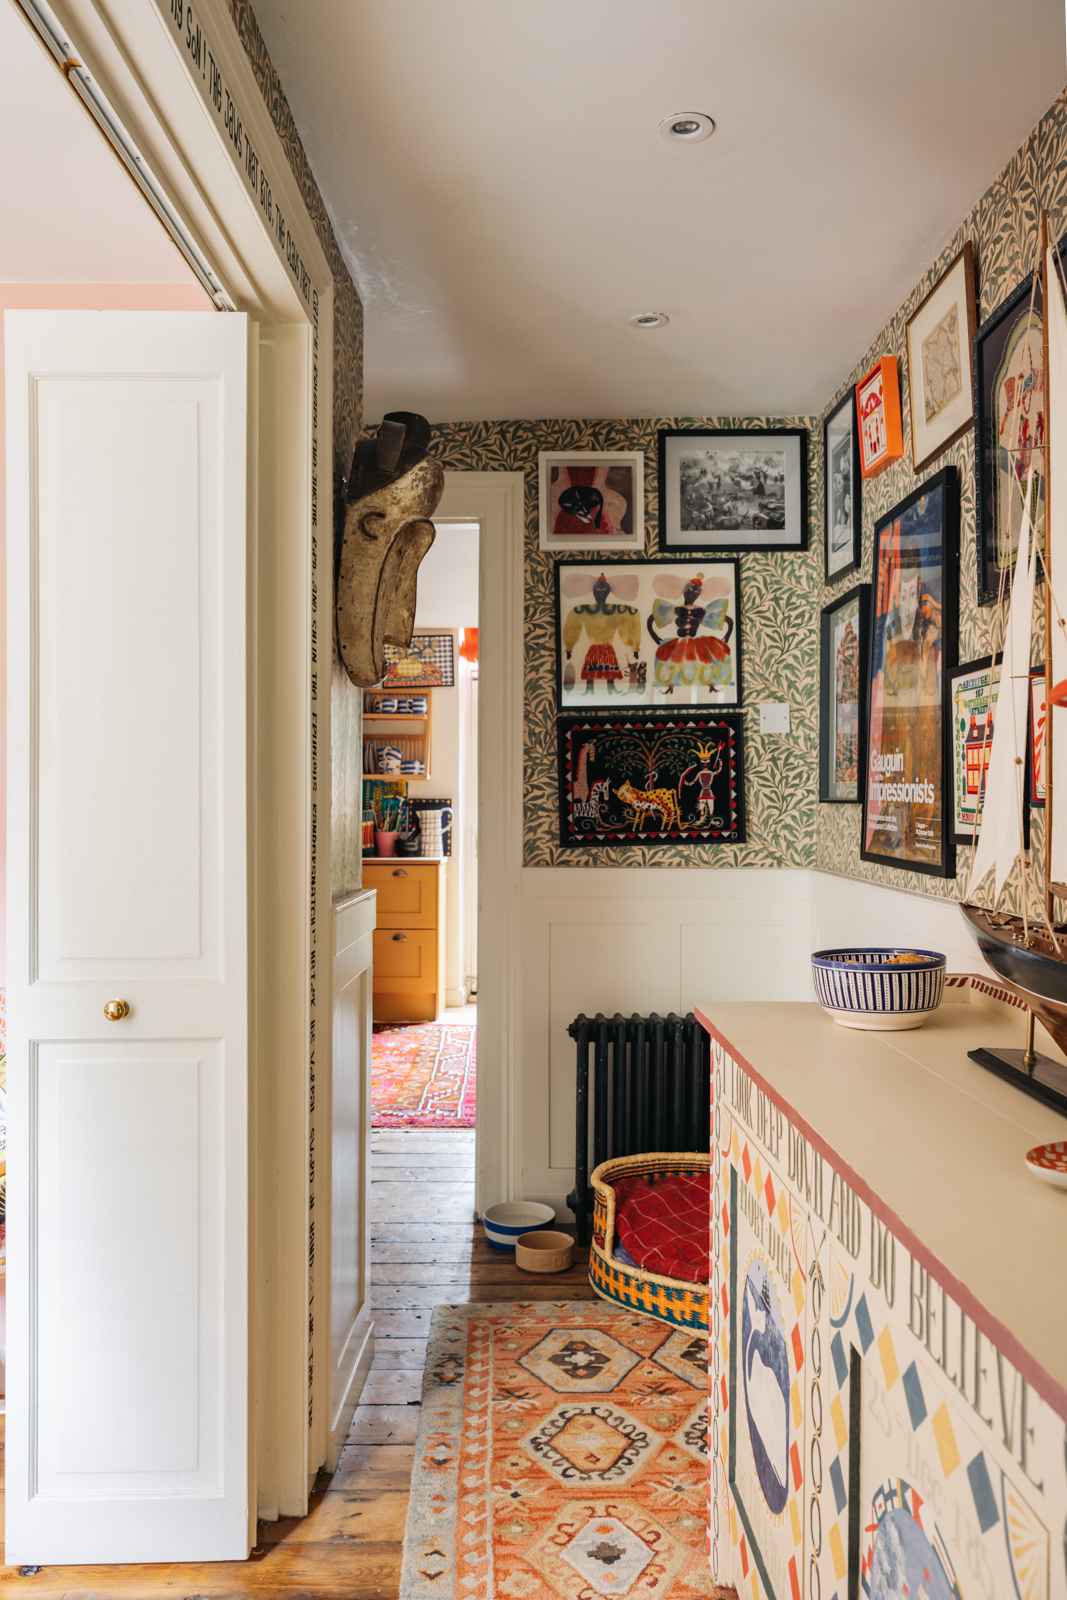
Another option is to leave your frames relatively simple and instead choose to decoratively paint the wall or furniture surrounding your picture gallery. If you choose to do this have a look at our guide on decorative painting, which has a section on stencilling motifs directly onto the wall.


Some people like to plan and others prefer to dive straight in – everyone's different so it depends what works for you! My sister actually lived in a room with cut out pieces of brown parcel paper stuck to the wall for a month, to see how she felt living with that layout before she actually hung her pictures. I do a simple layout on the floor then get hanging without measuring at all. So, I’ve split my advice into ‘the planners’ and ‘the impatient’ so that you can choose the advice that you think works best for you:
- Lay the pieces of art out on the floor first to get a rough sense of the layout and check it will fill the space
- Start with the two outer edges first and then work inwards – you can correct the spacing more easily that way
- Intentionally avoid lining anything up (e.g don’t have tops of pictures ending at the same height or equal spacing between pieces). This means you won’t notice if things don’t look even later
- Cut out pieces of paper to the size of each element for your picture wall. Then stick these cut-out pieces to the wall to work out your layout. This way you can tweak the layout before making any holes
- Aim for 5-7cm between each piece so it feels full – more than that can feel sparse
- Take photos of various layout options so you can flick through them on your phone and decide
Embroidery is a great addition to your picture wall because it adds a different texture and softness amongst your other artwork.
To display your embroidery you’ll have to make sure it’s mounted and framed so that the fabric is stretched tight and it’s ready to be displayed. If you haven't mounted an embroidery before, we take you through the process in this article. If the embroidery is quite small, then consider using a card or paper mount or a wider frame to give it more gravitas.
Here's a selection of our pieces that we think are really suited to a gallery wall:


It’s important to let your picture wall evolve overtime. Keep adding things, and don’t worry about moving things around. You can cover older nail holes with a frame so don’t feel like you have to commit to a specific arrangement just because that’s where your picture hooks are! In this House and Garden article, Violet Dents says that she has millions of holes behind each picture in her home.
Remember that a picture wall is personal, so don’t try and copy anyone else’s wall, and just choose the things you love.
Can a picture wall work in a small room?
- Yes, absolutely! Generally picture walls are seen in larger spaces, or rooms with high cielings, but you can definitely hang a picture wall in a small room. The 'central piece' layout works particularly well in smaller spaces. You could also use a mirror as part of your gallery or another wall in the room to create the illusion of a larger space.
How many pictures should be in a picture wall?
- It depends on the size of your wall and the scale of your pictures, but generally the more the merrier! If you only have a few pieces then you might be tempted to have larger spaces between each element, which can make it feel a little disconnected.
How high should pictures be hung?
- I’d avoid going too close to the ceiling, though if you’re opting for a salon-style layout then you’ll want to fill most of the wall. Just make sure to leave a good few inches between the top of your highest frames and the ceiling to allow your picture gallery to breathe a little.
What happens if I hang everything and it looks wrong?
- You can re-hang! Don’t worry, it doesn’t matter if there are extra holes behind your frames, nobody will know. Try and work out if it’s the order of the pieces that isn’t quite working, by switching which elements go next to each other. It could also be the layout – perhaps your pieces are better suited to a grid layout, or to a salon-style wall. Just keep trying and it doesn’t matter if it doesn’t feel right, because you can always change it!
Can I mix embroidery and artwork in the same wall?
- Yes! Adding embroidery to your picture wall creates a range of textures. In fact I’d encourage you to add as many mixes of media as possible to your picture wall. I love combining pictures with embroidery, decorative plates, prints, collage... the more variety the better!
Is it okay to hang pictures without measuring?
- Definitely! I never measure, but if you prefer to plan and make it perfect then do measure beforehand.
Should picture walls be symmetrical?
- It depends on the layout style you’ve opted for – if you’ve gone for a grid layout then it’s best to make it symmetrical, but if you’ve gone for a salon-style option then keep it random and asymmetrical!