embroidery
My Top Embroidery Tips for Beginners
I am a self-taught stitcher, and whilst I had the guidance of both my grannies along the way, I have also learned a lot of little tricks through trial and error. In all our embroidery kits and how-to videos, I'll often do things in a certain way, but haven't ever really explained why. For example, why do we use a small embroidery hoop for our embroideries, what needles do we use for embroidery, how should you split embroidery thread.
So I wanted to share with you my top tips for anyone starting embroidery. These are little things I have learnt along the way, and whilst I am sure if you are an experienced embroiderer, you'll already be doing these, for those just setting out, they will hopefully help. If you are more of a reader than a watcher, then I have also written out the same advice below.
10 Things I Wish I'd Known When I Started Sewing
Top Tips for Learning Embroidery
1 | Always use an embroidery hoop
When I started stitching, for a while I worked either without an embroidery hoop or with one of these wide rectangle rolling frames. Whilst these frames work well for needlepoint, they are a nightmare for embroidery as they aren't as good at maintaining tension in your fabric. Why does tension when embroidering matter? Firstly, by having tension in the fabric it means you won't pull your stitches to tight and create creases in the fabric which you can't get out when you later stretch your piece. Secondly, taught fabric makes it much easier to create neat stitches. Doing french knots without an embroidery hoop is near on impossible to achieve a neat knot (video here on how to do french knots). Finally, you will find it much easier to position your needle accurately on the back of the fabric whilst stitching, making the whole process quicker!
2 | You don't have to fit your entire design in the hoop
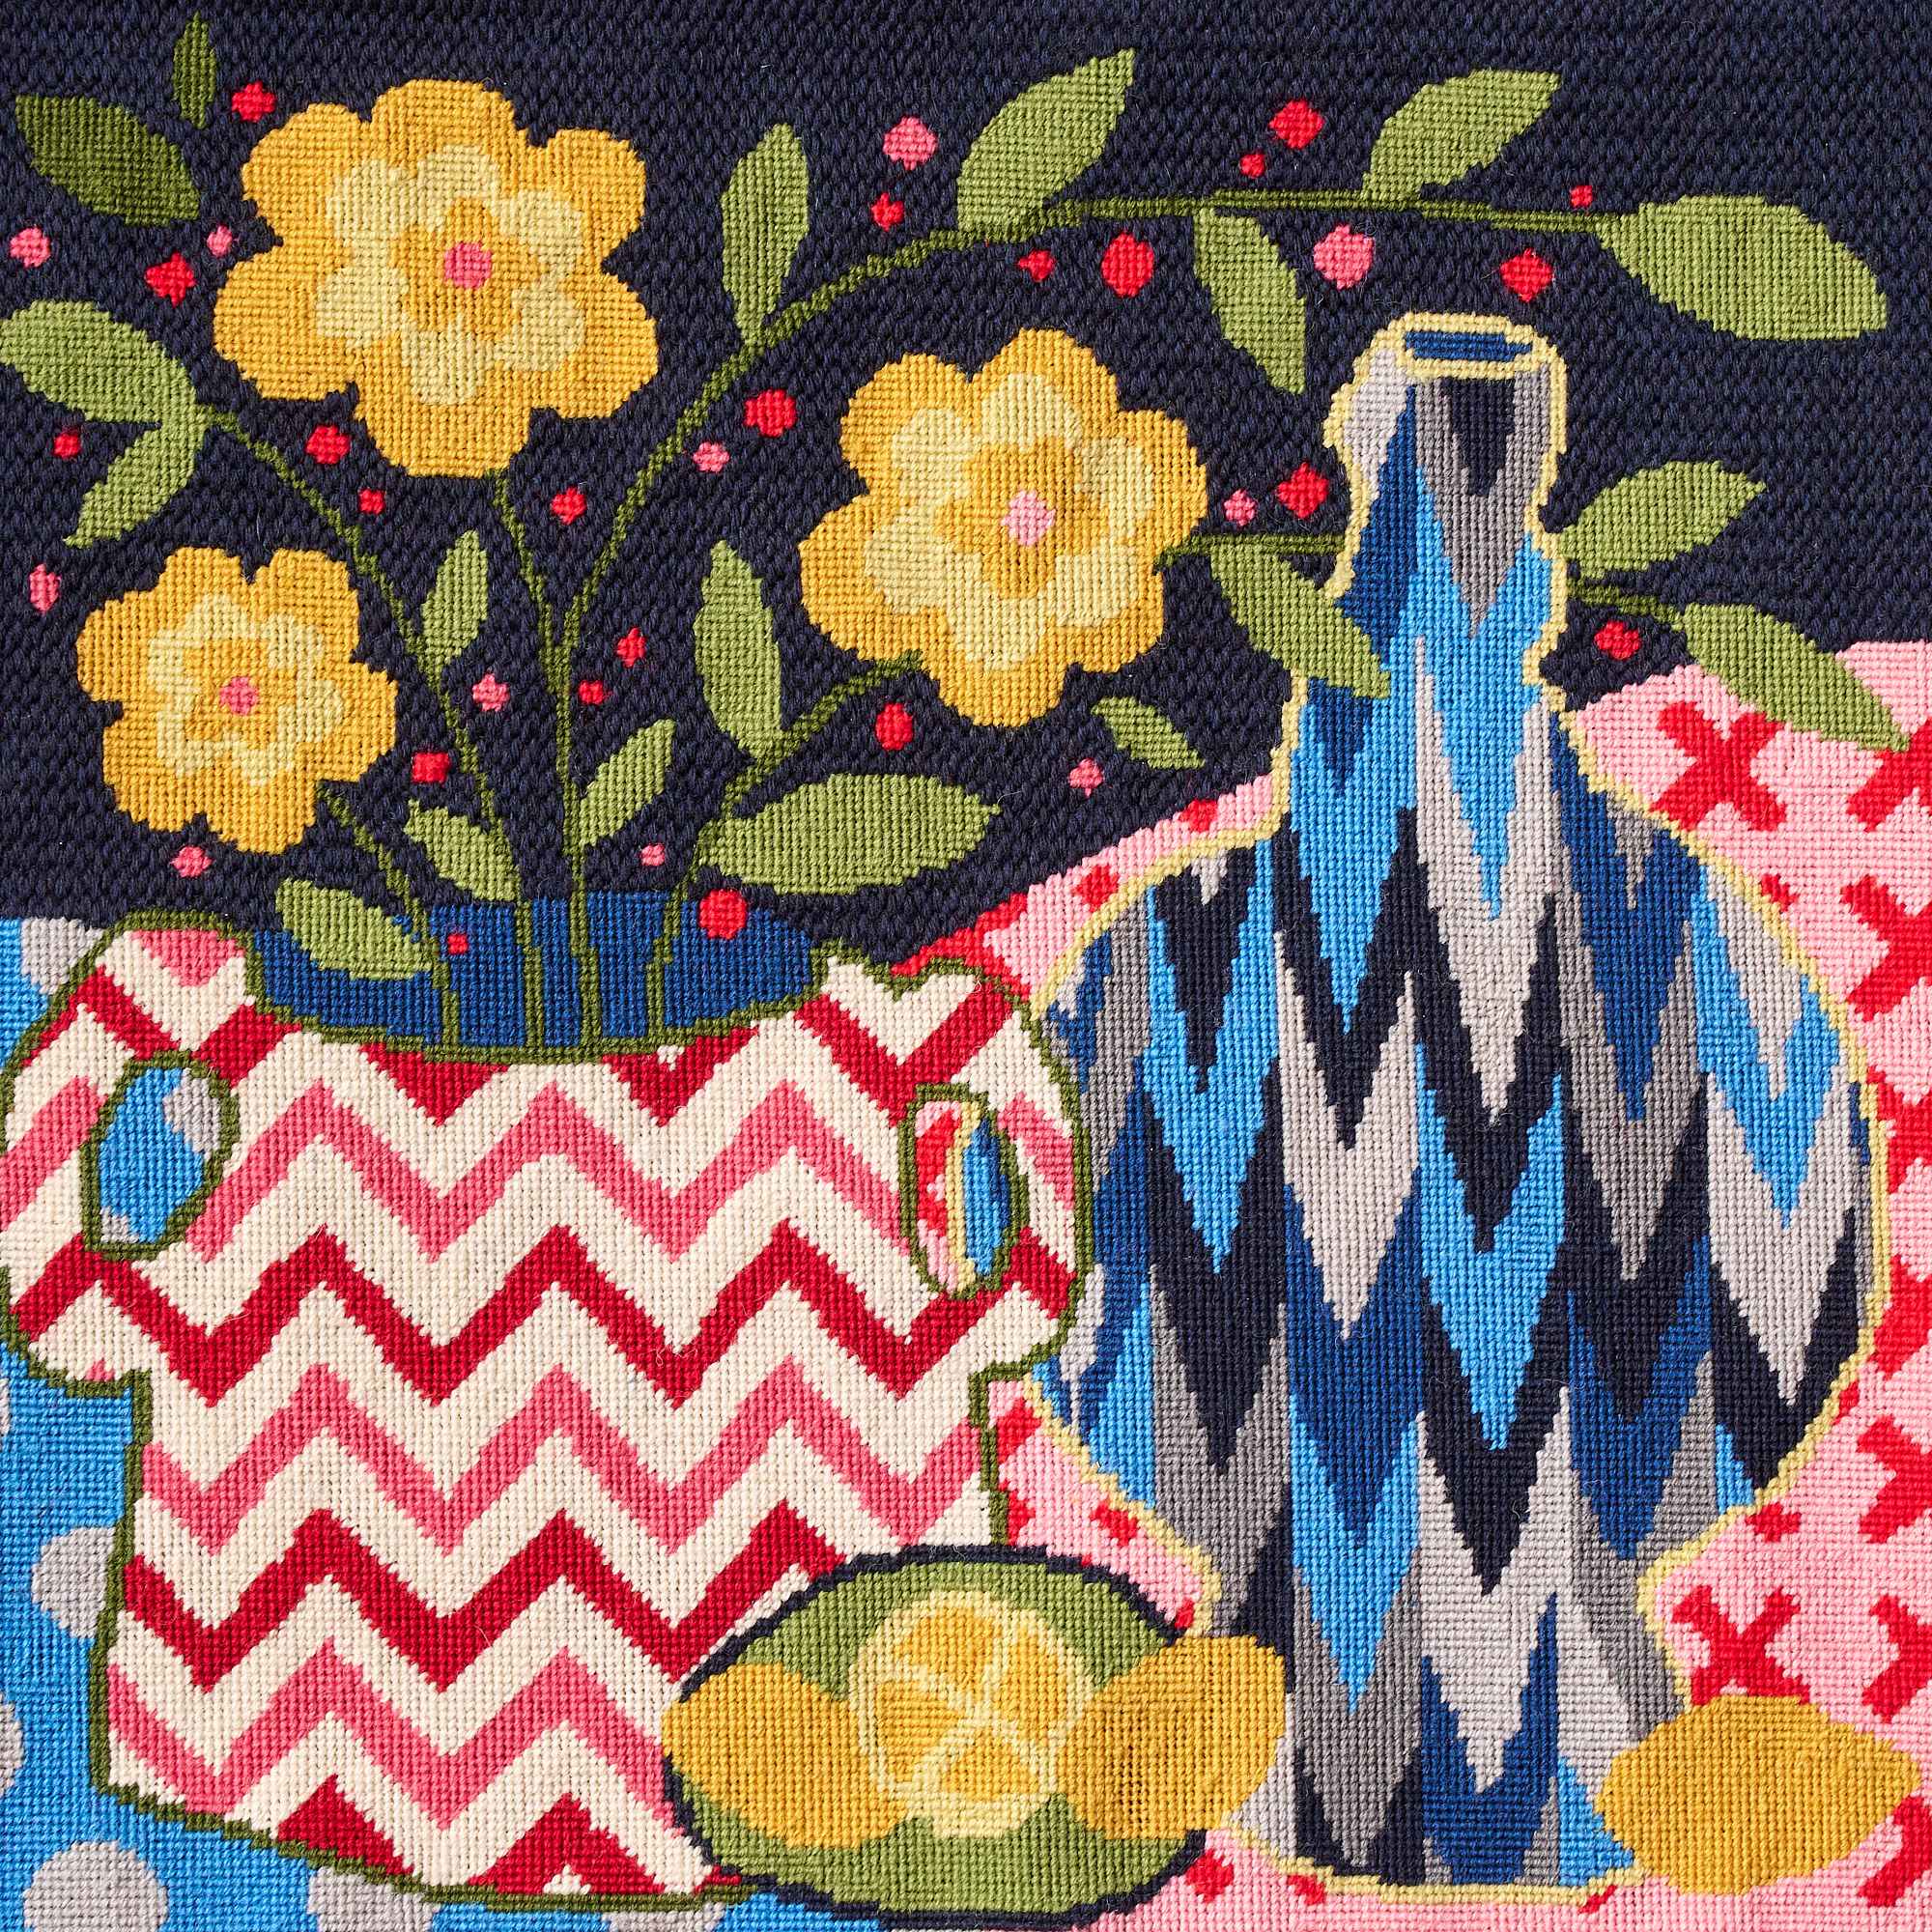
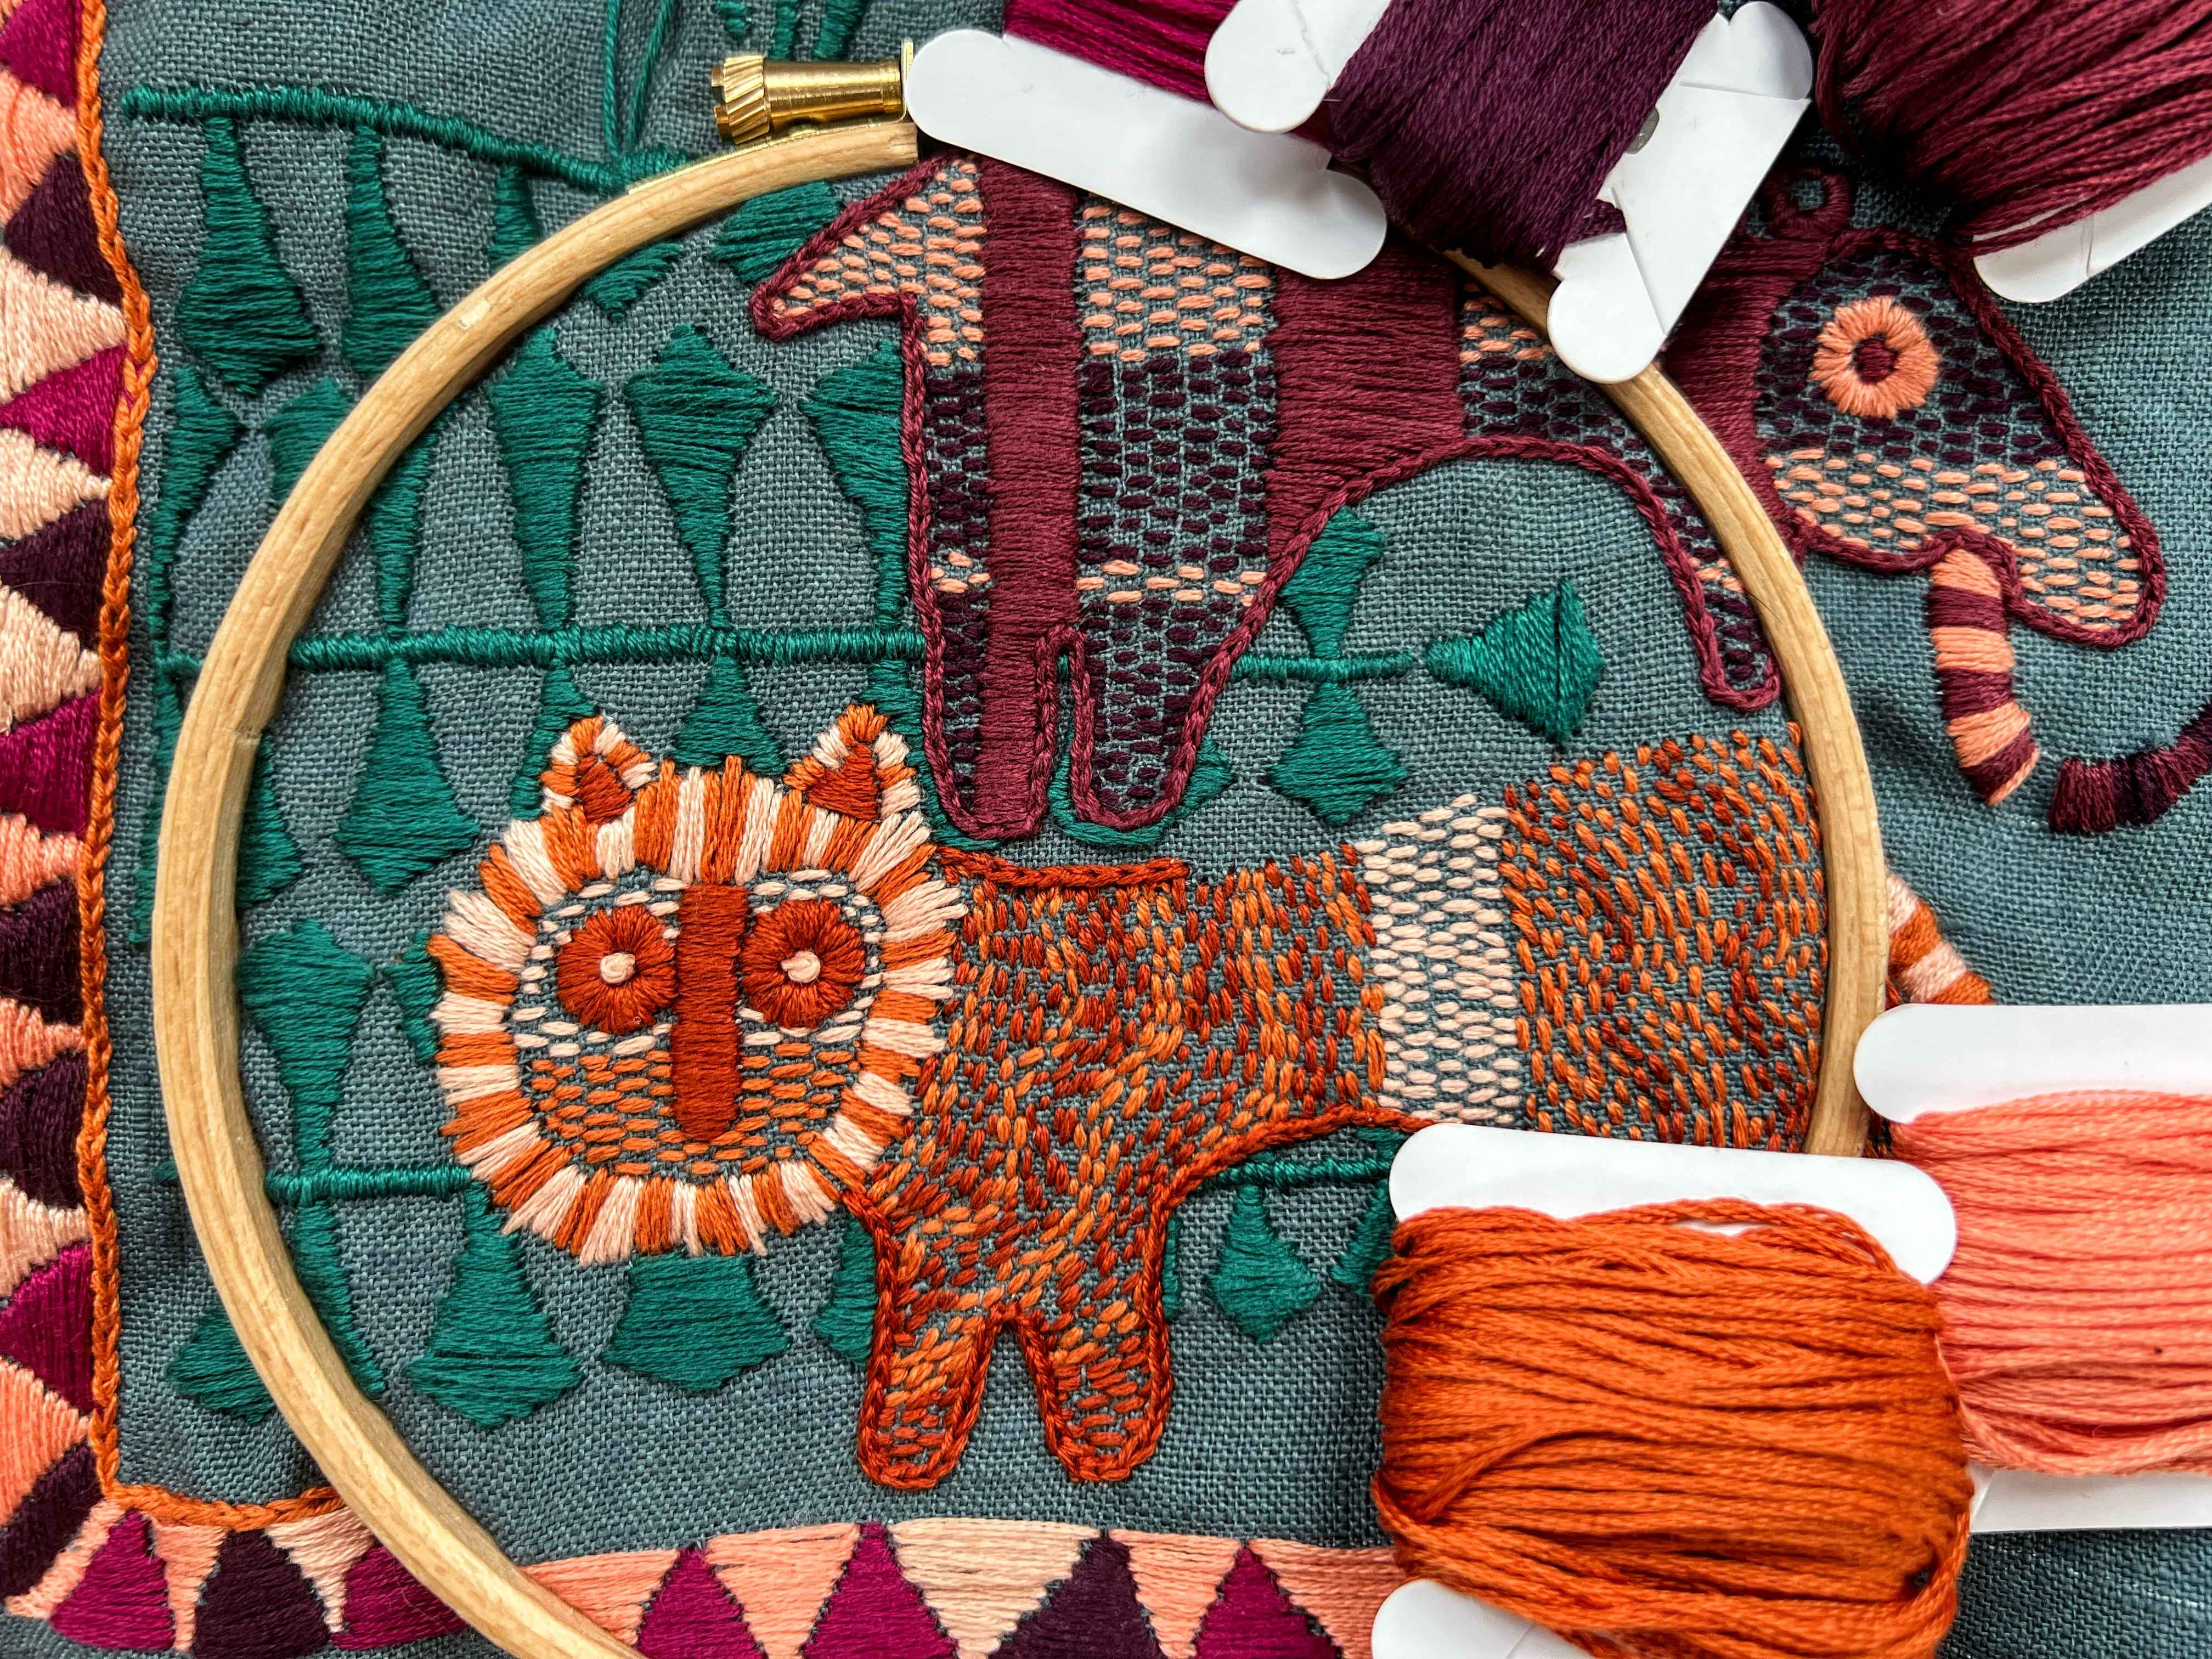
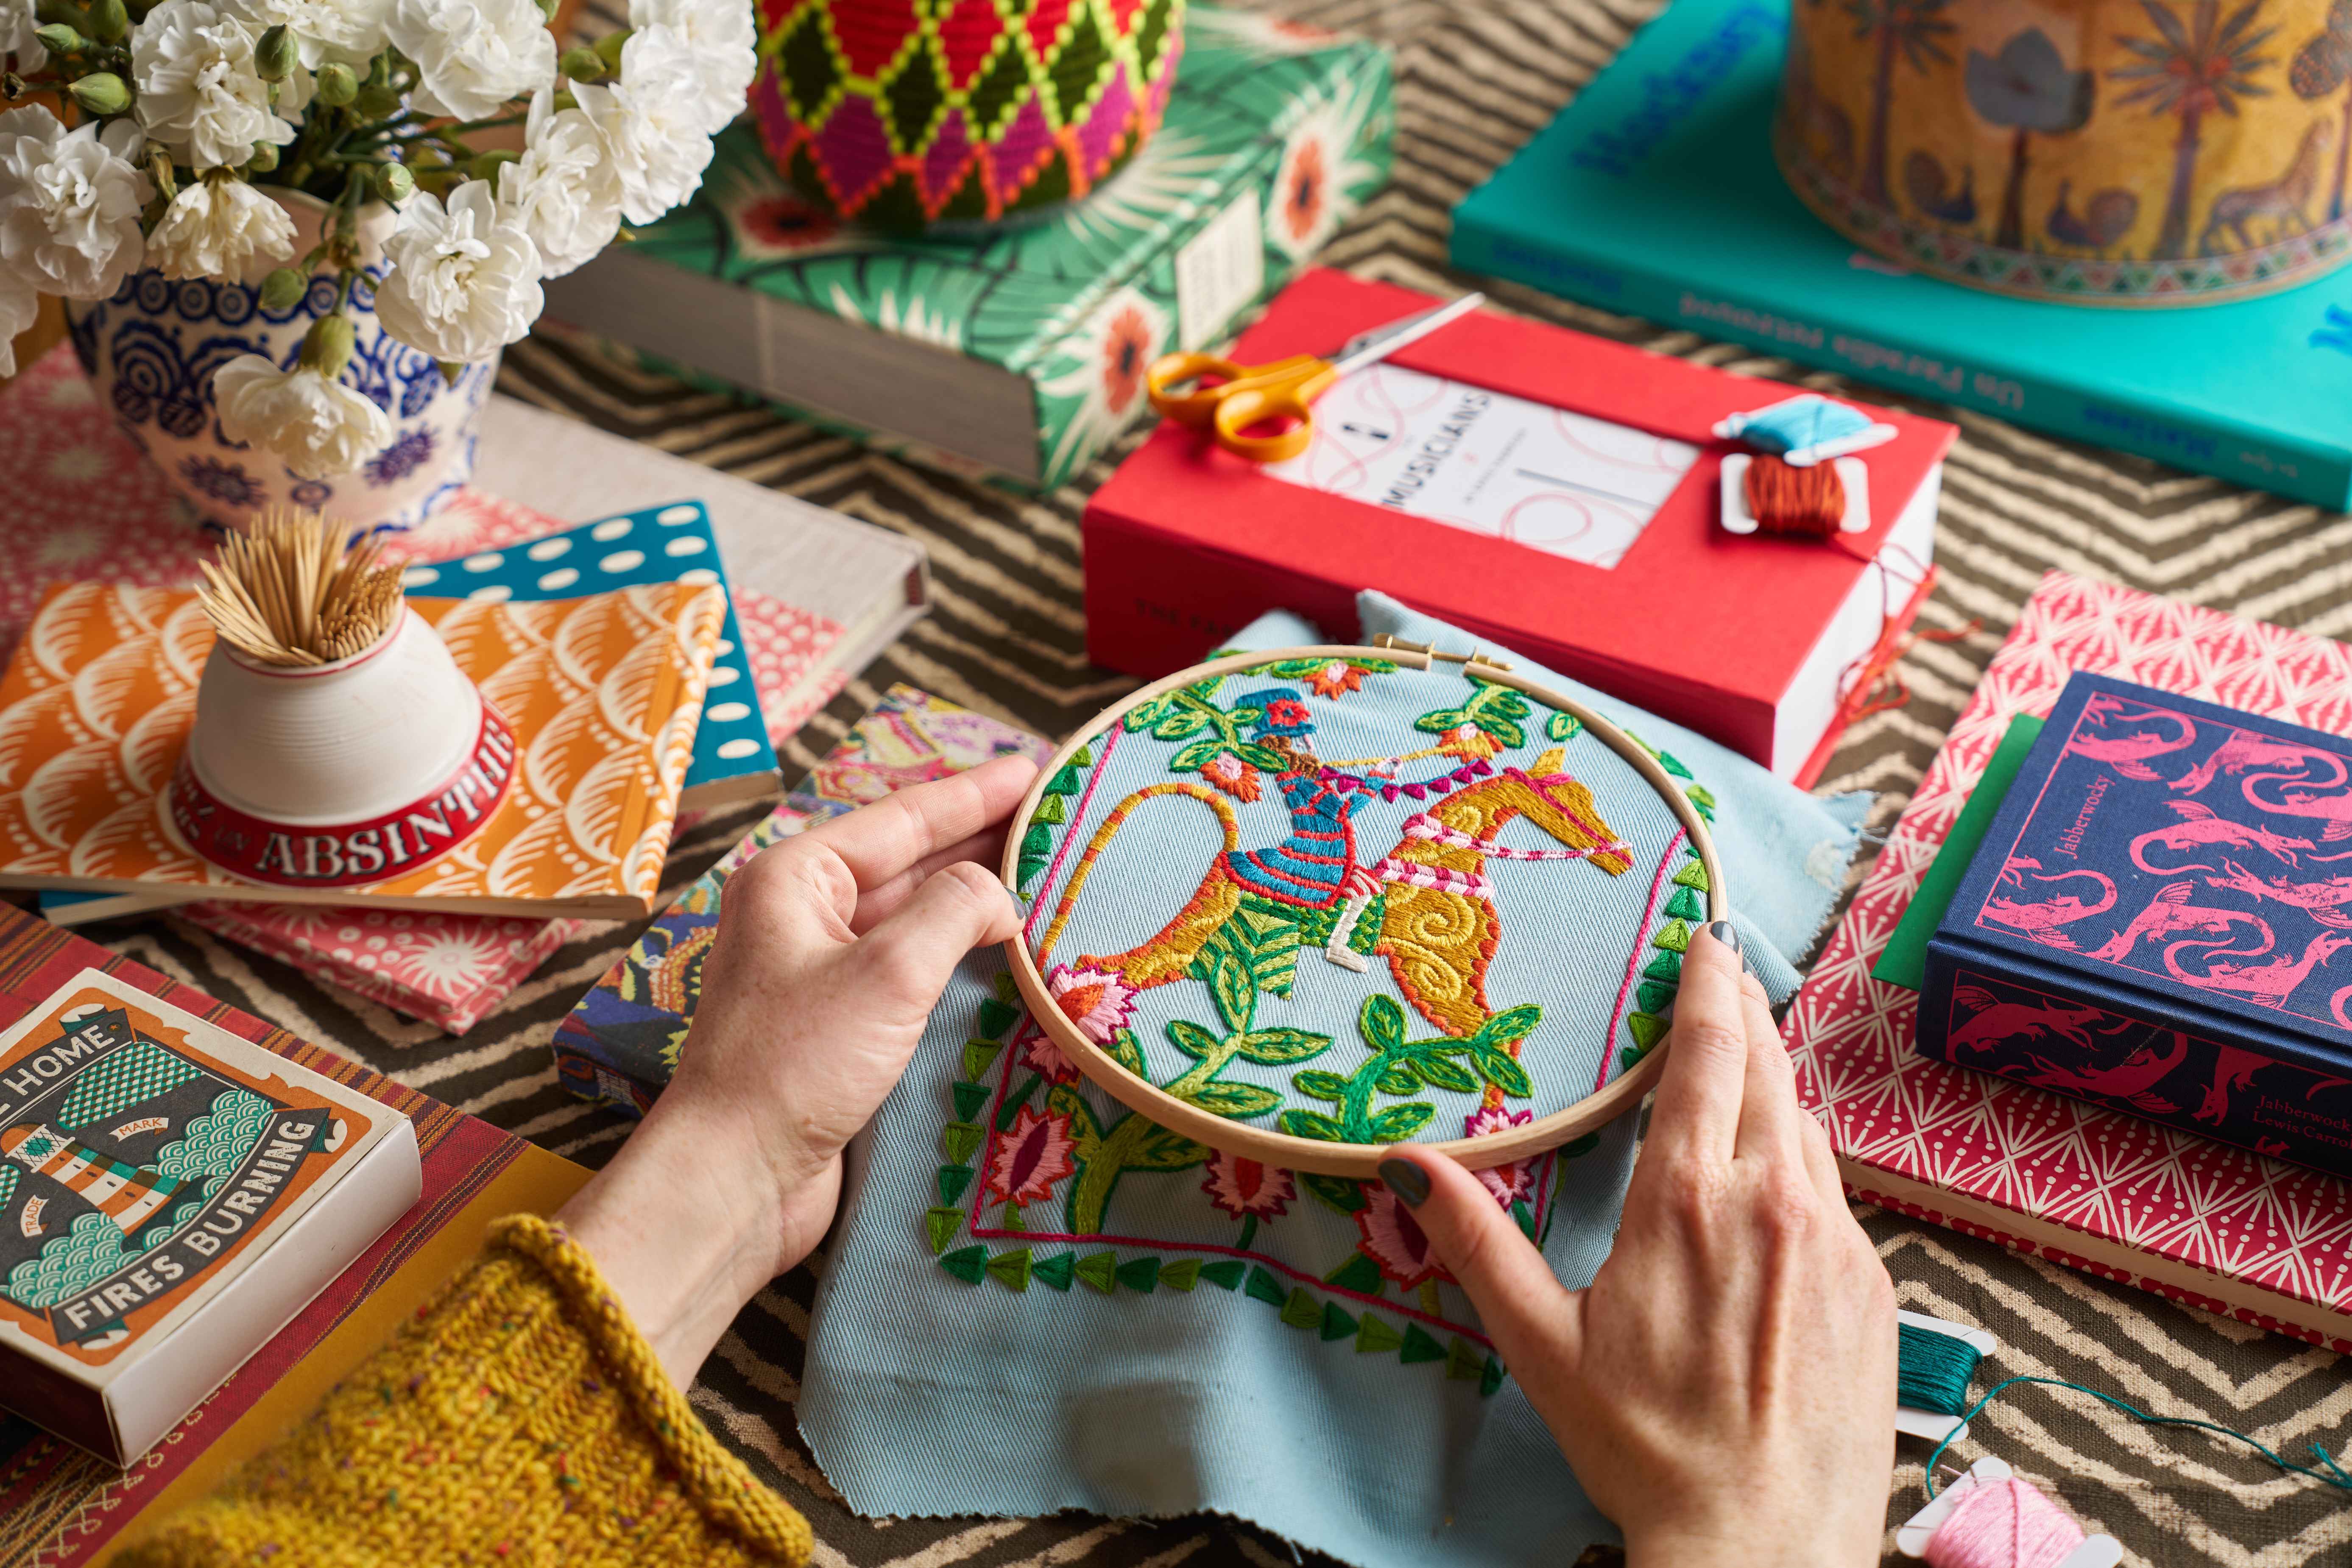
When I first started stitching, I bought embroidery hoops which would fit the entire design in, meaning sometimes they would be over 12"! These hoops were always terrible at maintaining good tension in the middle. So over time I switched, and started stitching all my embroidery designs with a 5" or 6" embroidery hoop regardless of the size of piece. I just move the hoop across the fabric as I stitch. This doesn't cause any damage to the stitches underneath the hoops, helps keep the tension and makes the whole embrodery set more portable. That is why we include those smaller hoops in all our kits.
3 | You don't need to use an embroidery needle
Over the past 4 years I have met hundreds of people who love the idea of sewing but cannot bear threading needles. It's a shame how much this part of the process puts off potential embroiderers! However, all too often people feel that because they are doing embroidery, they have to use an embroidery needle. Not true! Embroidery needles are more delicate because if you are doing very fine and sophisticated work you want to work with as narrow a needle as possible. But if you are doing embroidery like mine, then that really doesn't matter. So instead, I highly recommend everyone uses a chenille needle for embroidery. These needles still have a relatively narrow shaft but, importantly, have a much bigger eye! You can see below the chenille needle size I recommend which is the perfect for embroidery (believe me - I have tried a lot of needles...). The only scenario when I still use an embroidery needle is when I am stitching french knots. French knots are hard to keep neat, and a smaller needle with a narrower shaft will make them easier.

Pair of Chenille Needles (Size 22)
£1.00

Pair of Embroidery Needles (Size 5)
£1.00

Needle Threader (Pack of 3)
£1.50
4 | Find a method for splitting threads
When you start stitching, you will find yourself splitting A LOT of thread. So from the beginning, it's worth finding yourself a method you enjoy for splitting the threads. Taking it back a step in case you aren't familiar with why we do this, the majority of embroidery floss is 6 fine cotton strands wound together. The simplest way to vary the appearance of your embroidery is through varying the number of strands of thread you stitch with - for a small detailed piece you'll use one or two strands, or for a big bold piece (i.e. pretty much all of mine!) you'll use four to six strands. I explain this fully in our Start Stitching virtual course if you want to know more.
My method for splitting threads
This is quite an old video, so we will re-record it (to make it a bit slicker!) but it shows you the method!
5 | Don't use very long threads
In my workshops I have seen all manner of different approaches to sewing. There certainly isn't a right or wrong way, it's whatever you enjoy. But one thing I often see is those stitchers turning the whole process into an acrobatic exercise by cutting incredibly long strands of thread. I think actually this becomes habit for those who hate threading needles - the longer the thread, the less often you need to thread the needle so the logic goes. However, long thread is hard to split and more easily knots. My optimum length is an arms length of thread, so around 50cm - 80cm.
6 | Don't be too stingy with the threads
I am from Yorkshire, so have that stereotypical northern temperament of wanting to make the most of every penny. So, when it comes to embroidery, that means clinging on to every last millimeter of thread as I stitch. I'll always think I can get one more row out of a thread than I actually can. This makes the whole stitching process so much more stressful as it becomes much harder to secure your thread on the back of the fabric, and you'll find you needle accidentally become unthreaded a hundred times to get to the end. So while I am all for saving your thread and using it efficiently, I would say always stop stitching with about 8cm left on the needle. It will make it all a lot less stressful!
7 | Embroidering with gold thread is the WORST
Don't worry, there is nothing wrong with you... embroidering with gold thread is the worst! Even for an experienced stitcher like myself, gold can be so annoying to work with. However the results of gold in a piece are wonderful - the little sparkle is what makes our Musicians range.
So there are a few tips for working with gold, which I explain much better in this video (go to 4:03 minutes)

The Drummer
£50.00

The Flute
£50.00

The Tamborine
£50.00

The Accordion
£50.00
8 I Don't unpick anything
As a self-taught stitcher, everything I have learnt has either been picked up from books or videos, or passed down to me from my grannys. My 101-year old granny, Pam, has many stitching mantras but her one I believe in the most is to never unpick. When you are embroidering, you spend so much time looking closely at a piece and therefore see little imperfections which you no one else will spot, or more importantly, don't make any difference to the overall effect of the finished piece. The reasons to unpick often are either a perfectionism, or a feeling that the design isn't working. More often than not, the design is working but you just haven't stitched enough of it to see it all coming together - maintaining the faith whilst stitching is something I cover in detail in our Freestyle Embroidery course. So whilst you may have a few scenarios which need unpicking (for example, a spelling mistake!), I would so recommend avoiding it! Just accept the mistakes - you'll be happier stitcher for it.
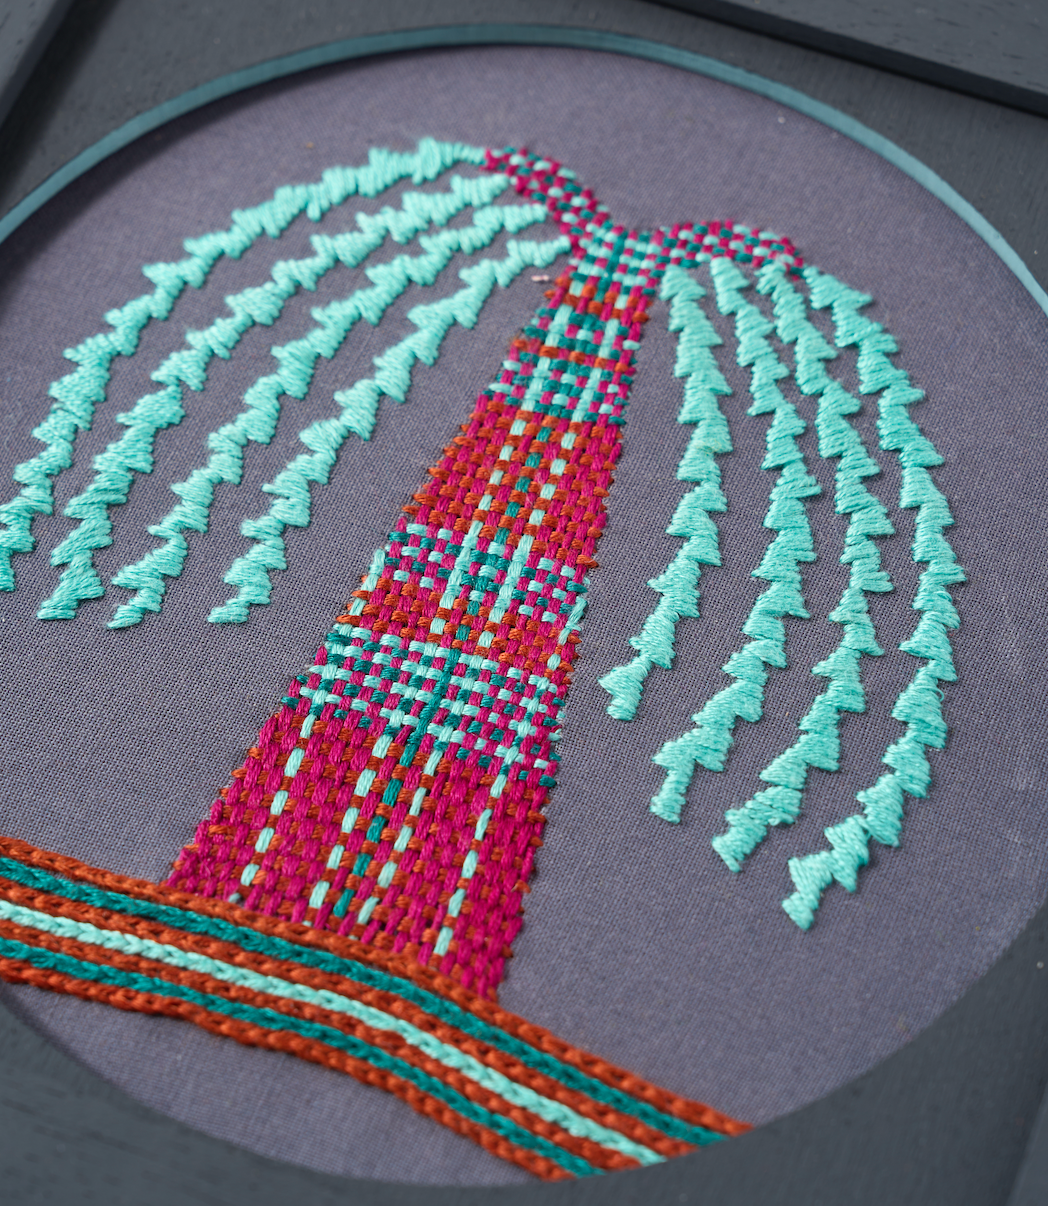
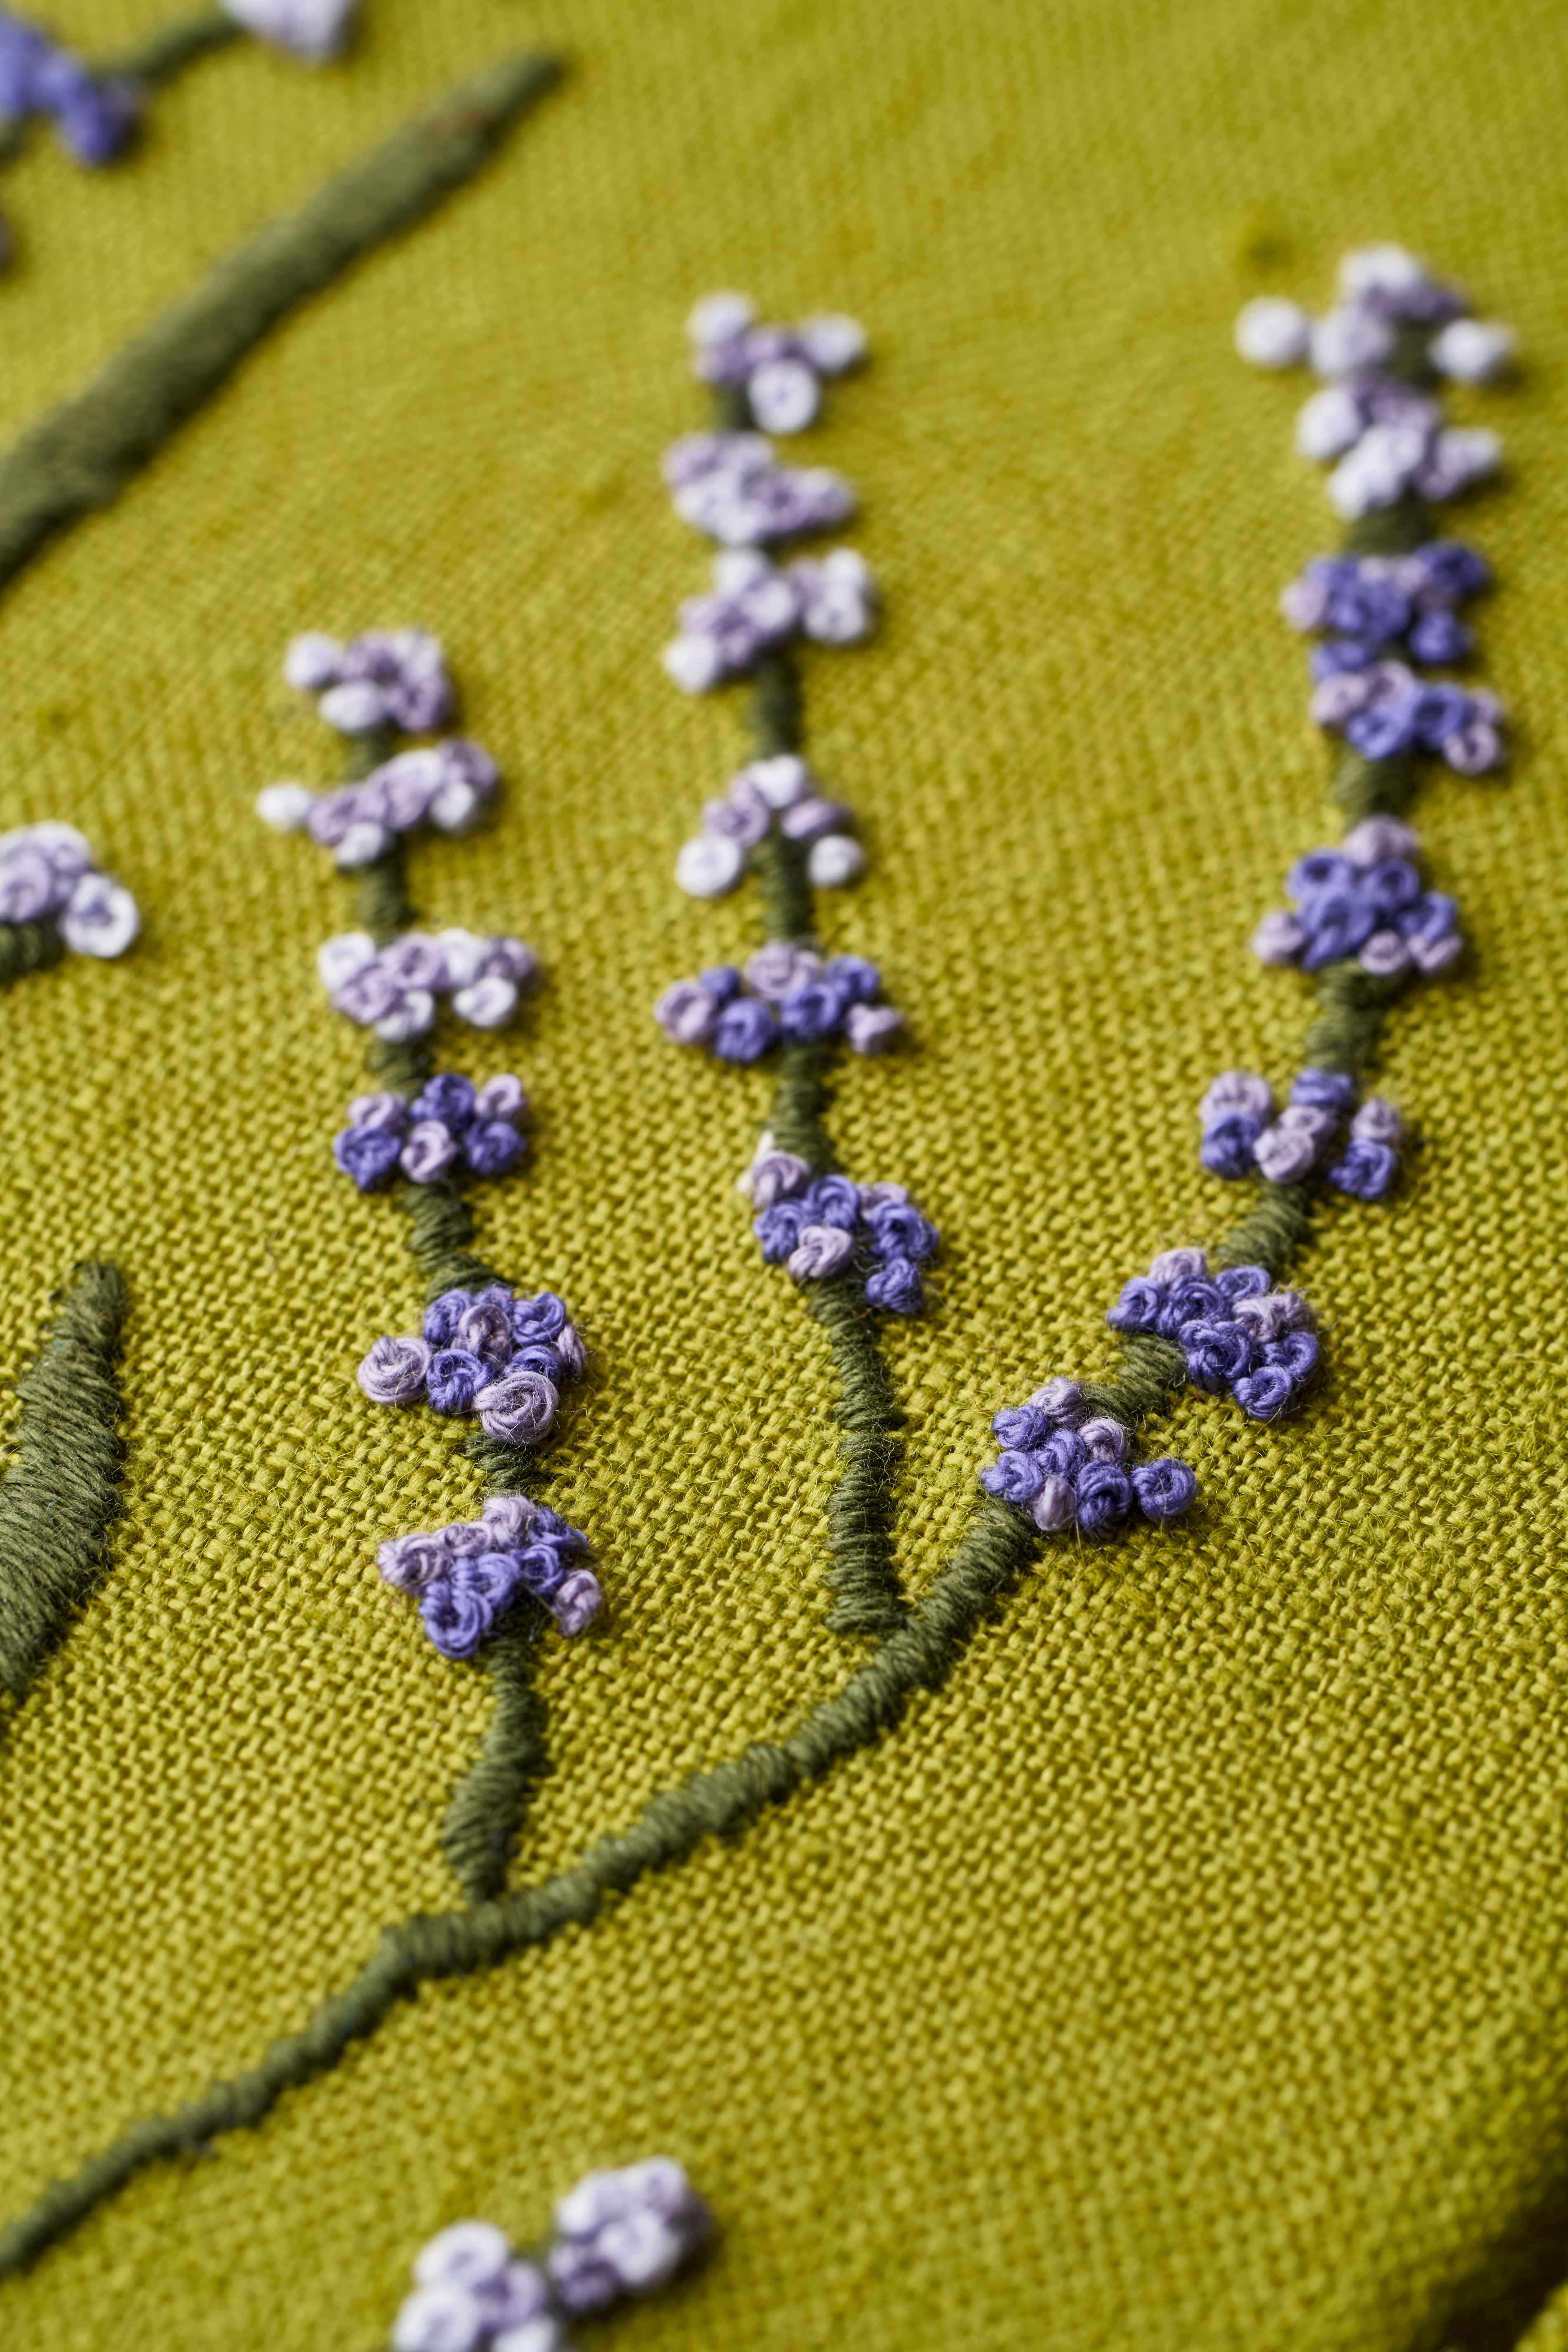
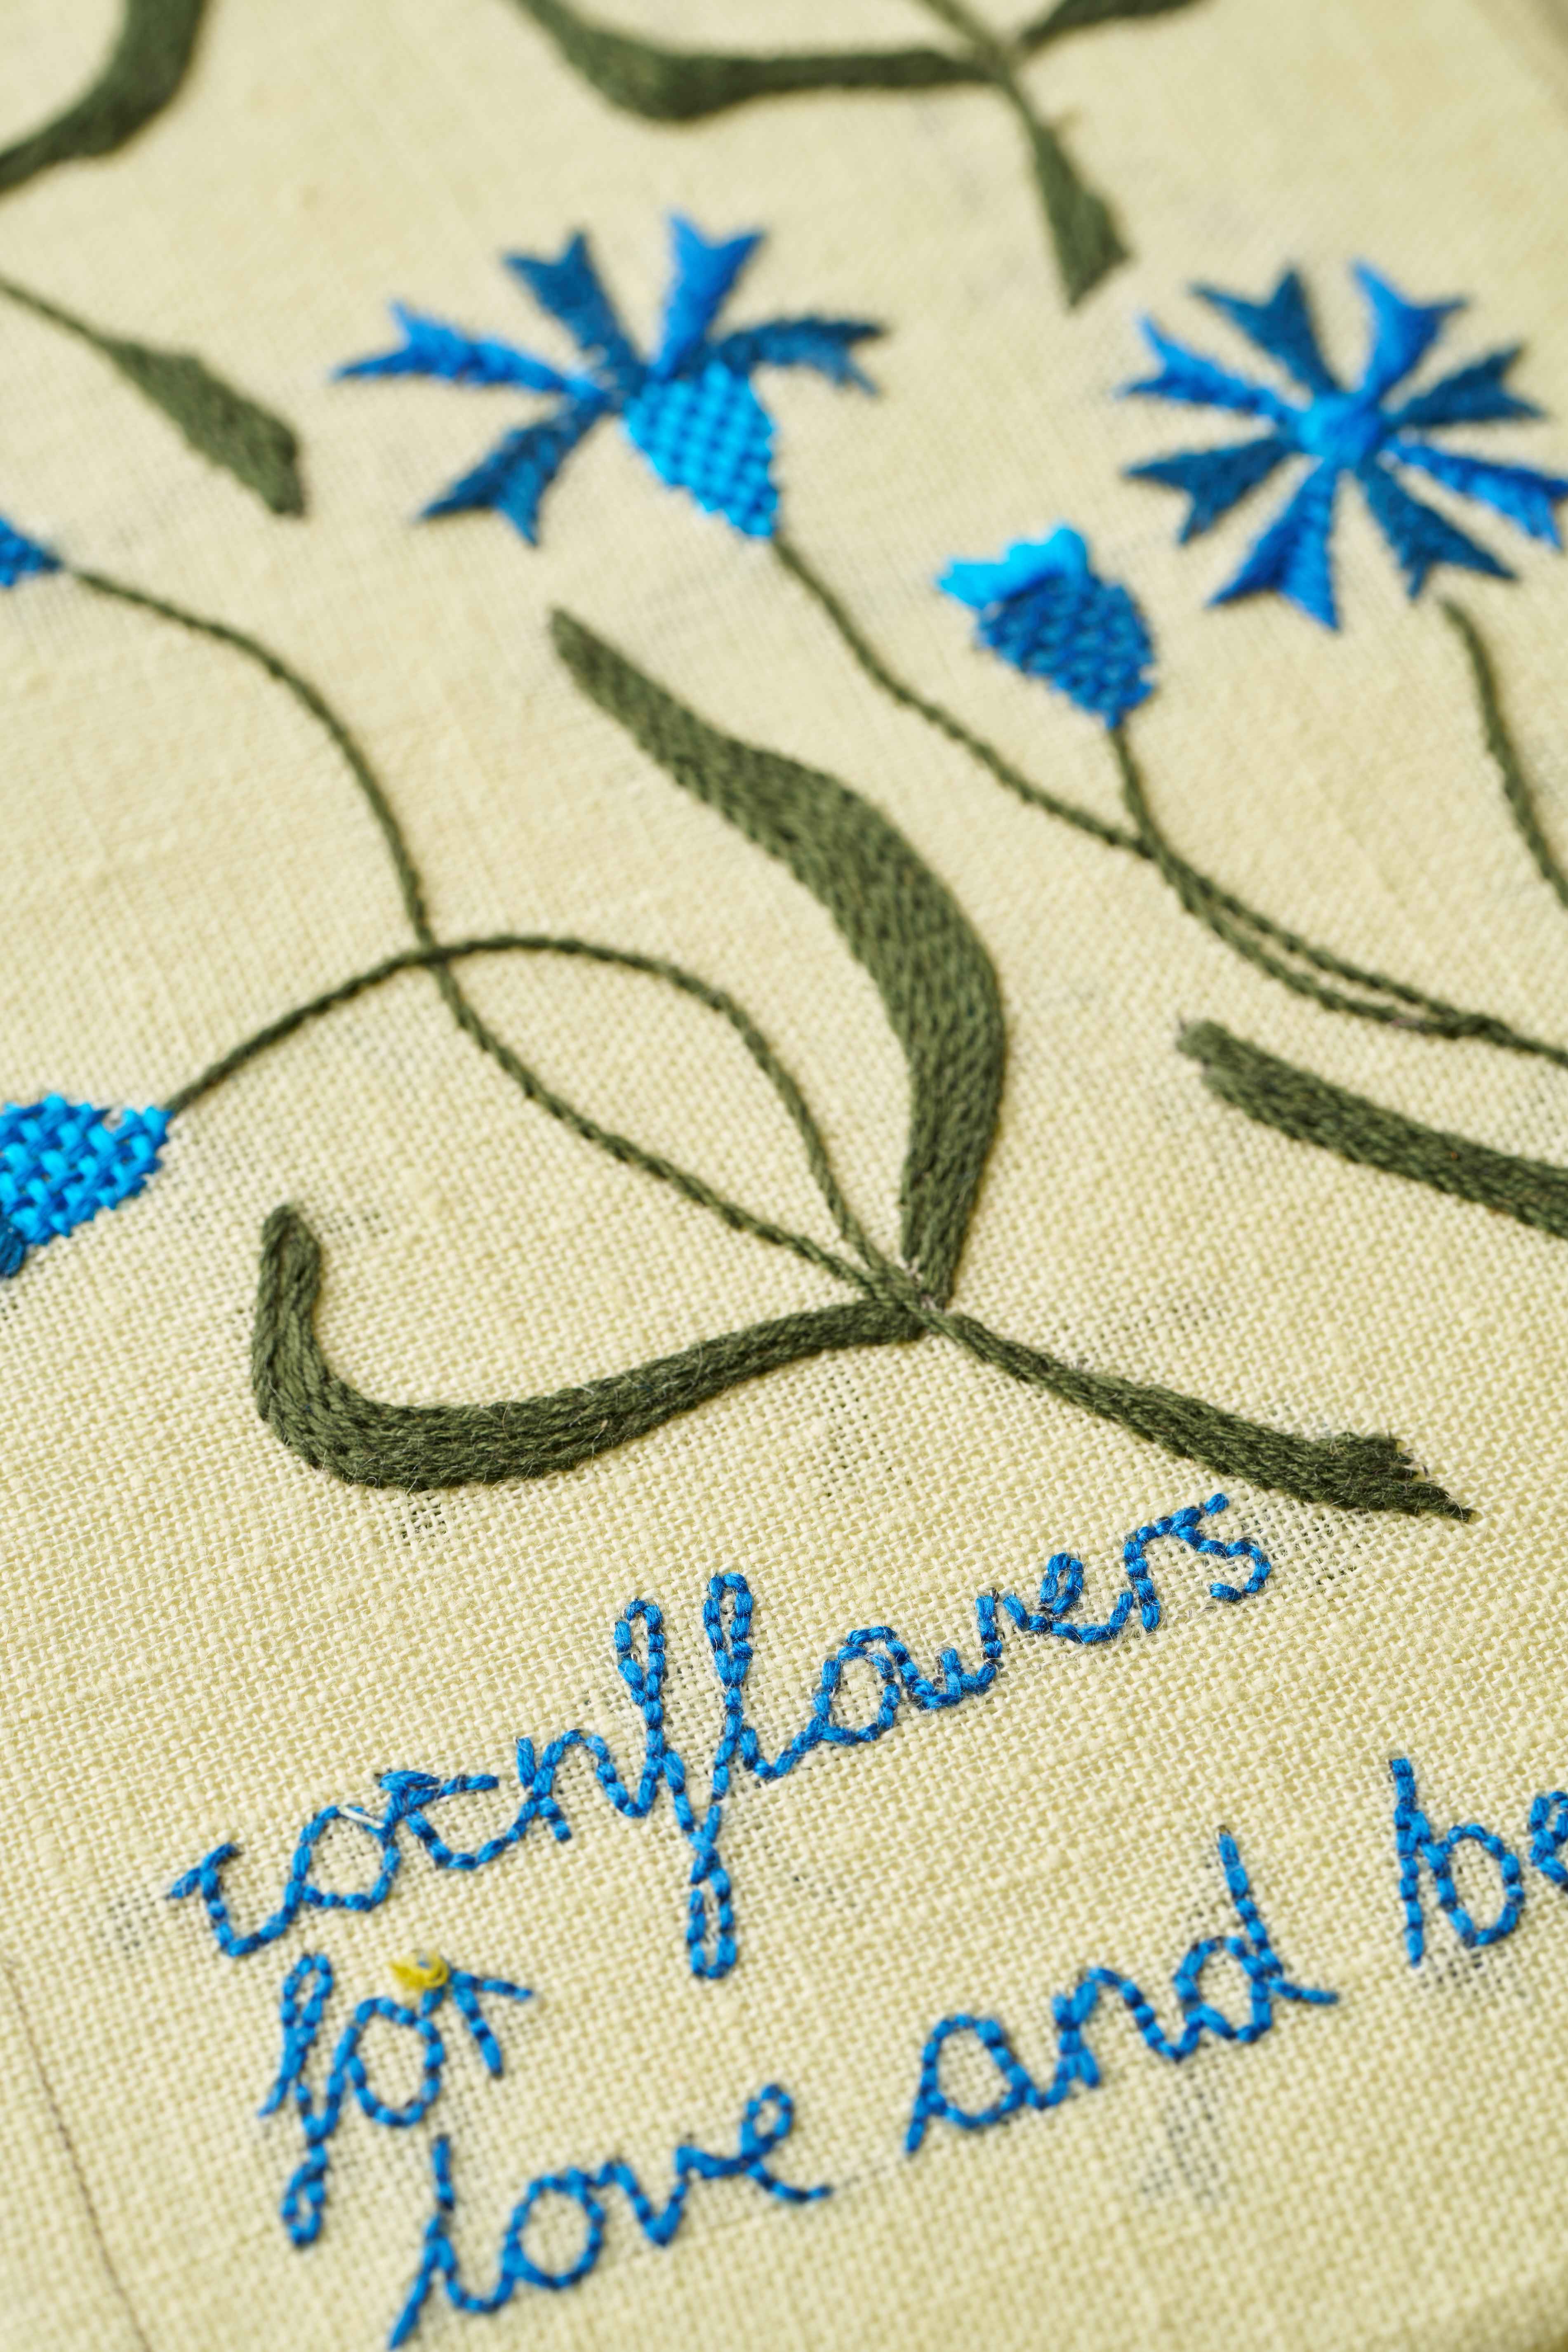
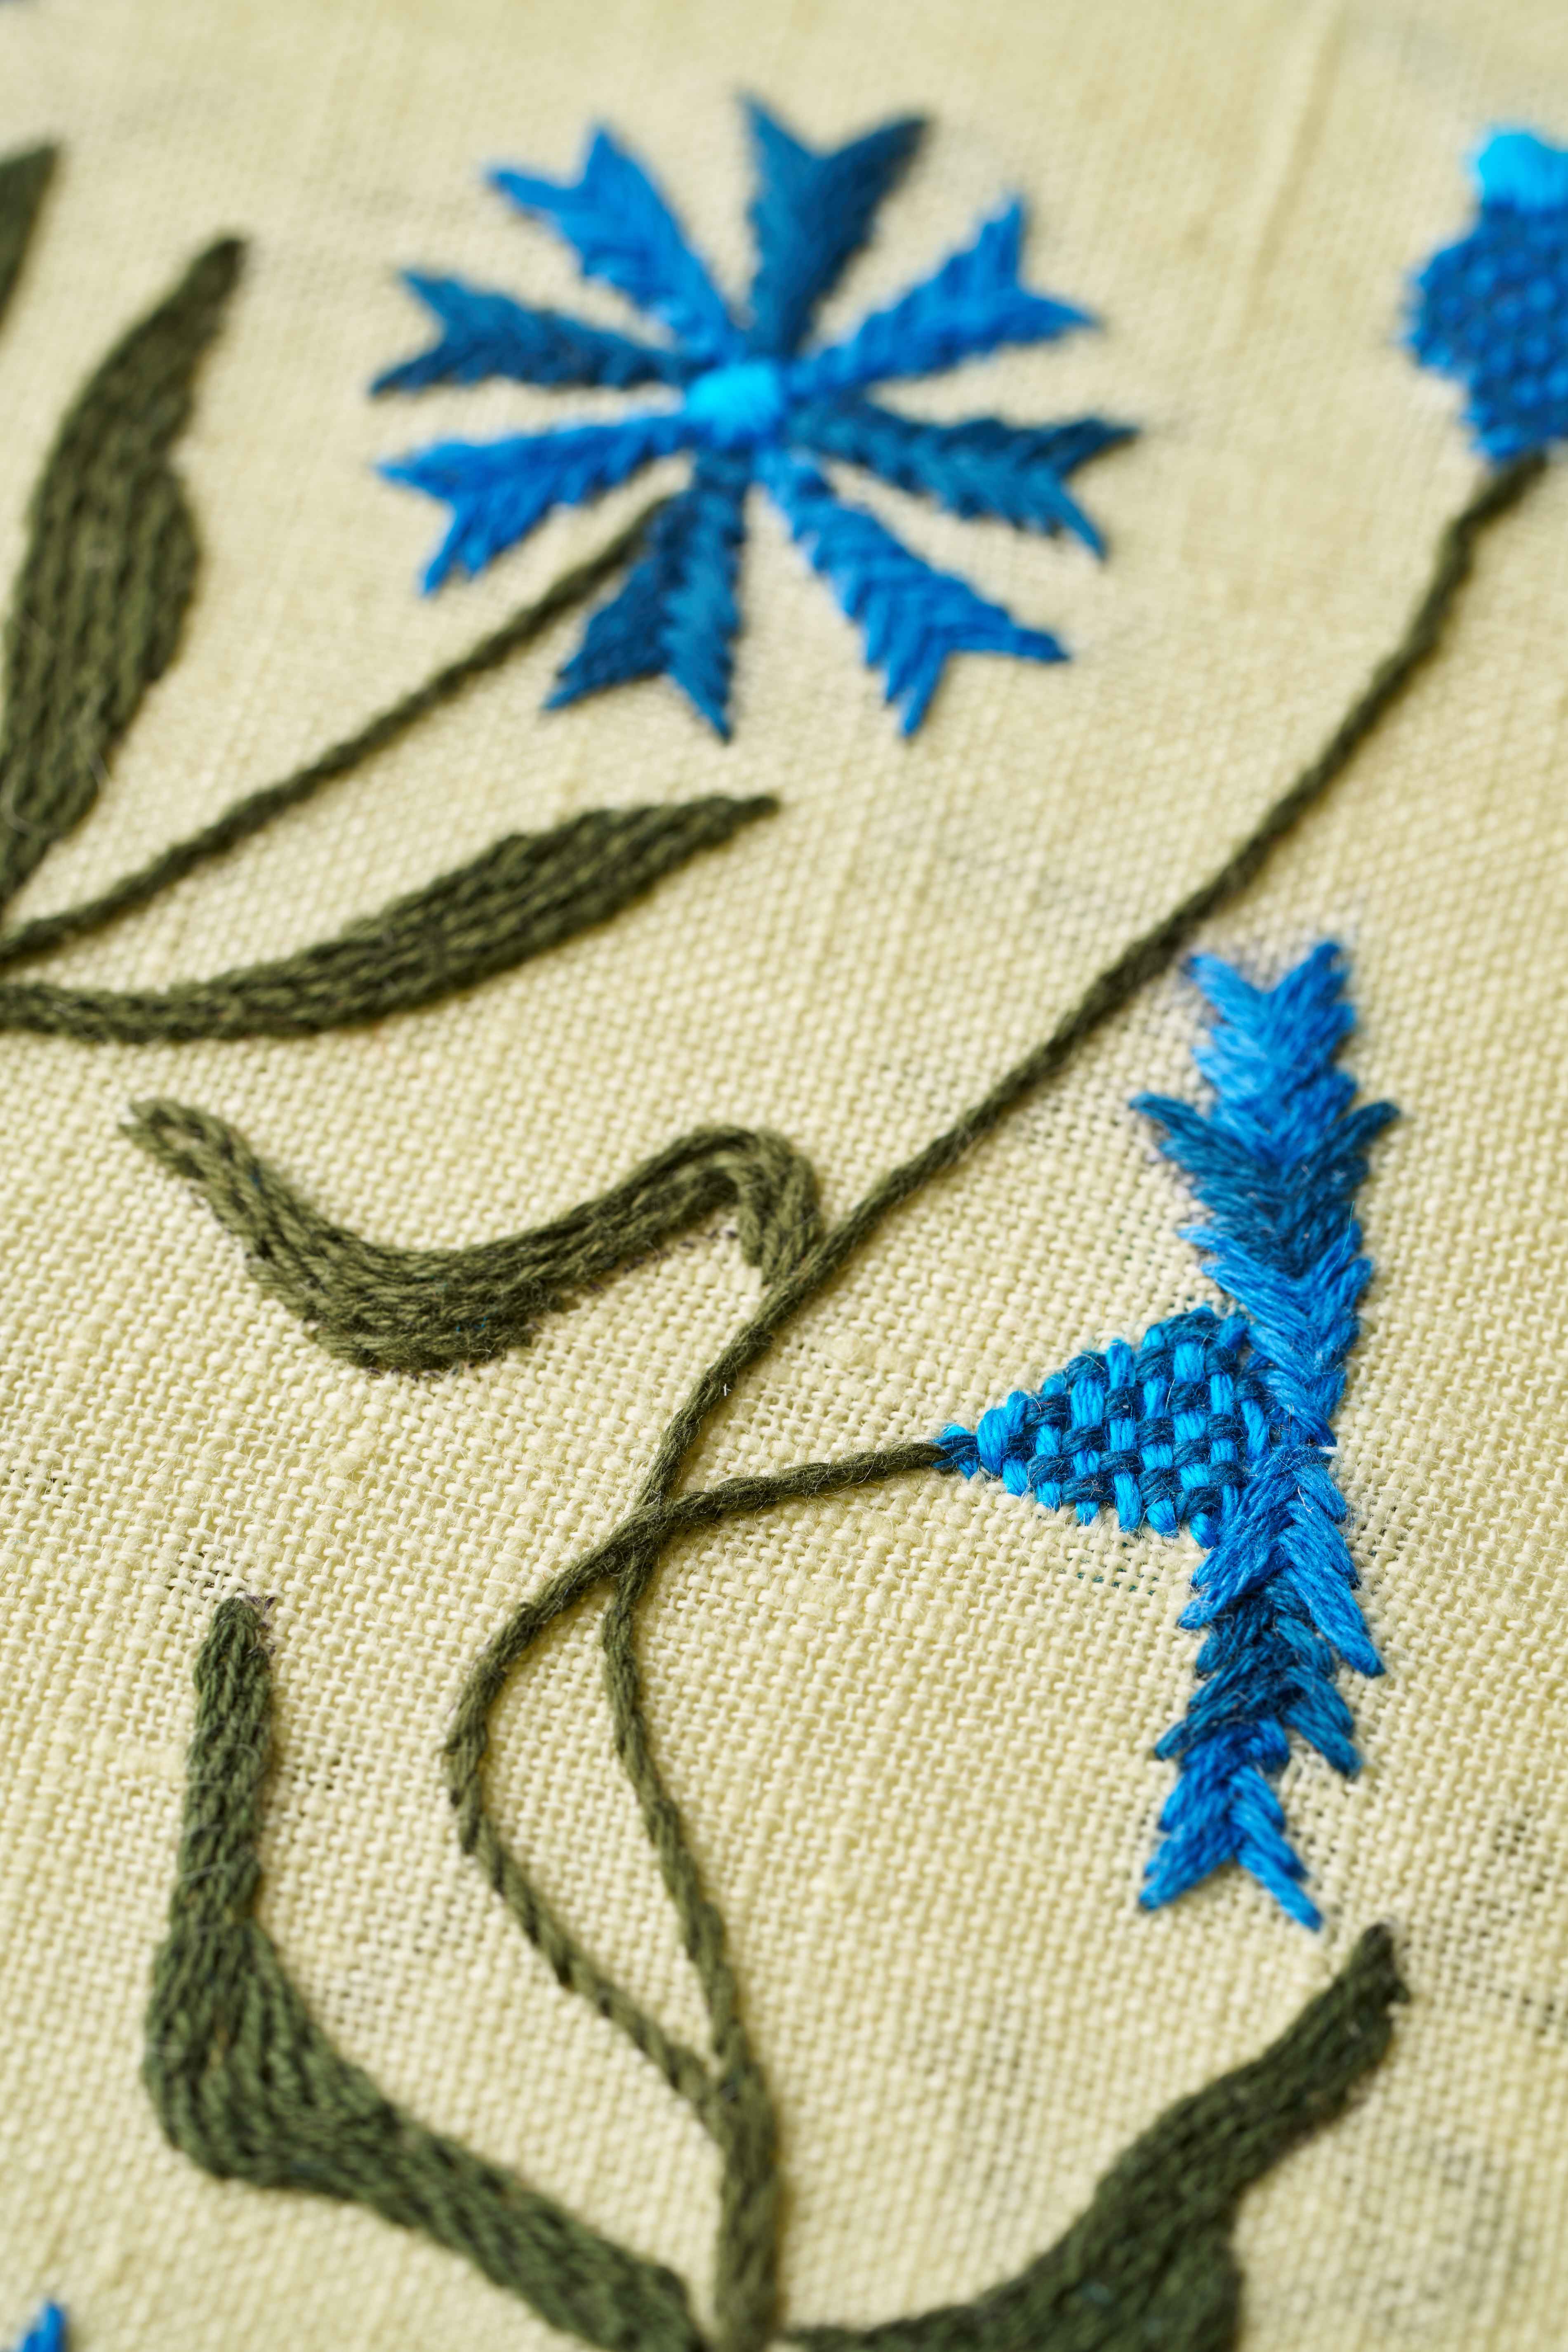
9 | Keep a neat back when embroidering on light fabric
Now this one is a little bit the antipathy to the last. Whilst the last piece is all about avoiding perfectionism in embroidered art, this one could be considered a little excessive. I am not a neat stitcher - the backs of my embroideries are covered in trailing threads, knots, loose strands, you name it. Which is all well and good when stitching on a dark fabric, but can become a bit of an issue when stitching on a pale fabric. Once you mount up your embroidery, if the fabric is lightweight and pale (for example, our ). To try show you what I mean, here are a few close ups below from our Cornflowers kit. In order to avoid this, don't trail the threads between two separate sections, and trim off any loose thread before you mount your finished piece.
10 I Take the time to stretch your embroidery
One of the things which most breaks my heart when it comes to embroidery is when I see a beautiful piece of embroidery which is framed loose, rather than being mounted and stretched. The mounting process absolutely transforms a piece of embroidered art. When you pull out all the creases and mount the embroidered onto a piece of hard board, it not only enables all the stitches to sit as they should, but it also pushes all the threads forwards enhancing the 3D texture of the piece. Take for example satin stitch: satin stitch has exactly the same volume on the back of the embroidery as the front, so when you mount the piece on board, you effectively double the volume for the finished piece.
I am so passionate about the fact that everyone should mount their embroidery that a few months ago we switched how we sell our frames - rather than enabling people to buy the mounting kit separately, we now include the kit with every single frame order. I want to make sure everyone knows how important this part of the step is - there is no excuse not to do it ha!
To show you what I mean, I have created a video here. This is a really basic video but it shows you the simplicity of the process.
11 I Frame your finished piece
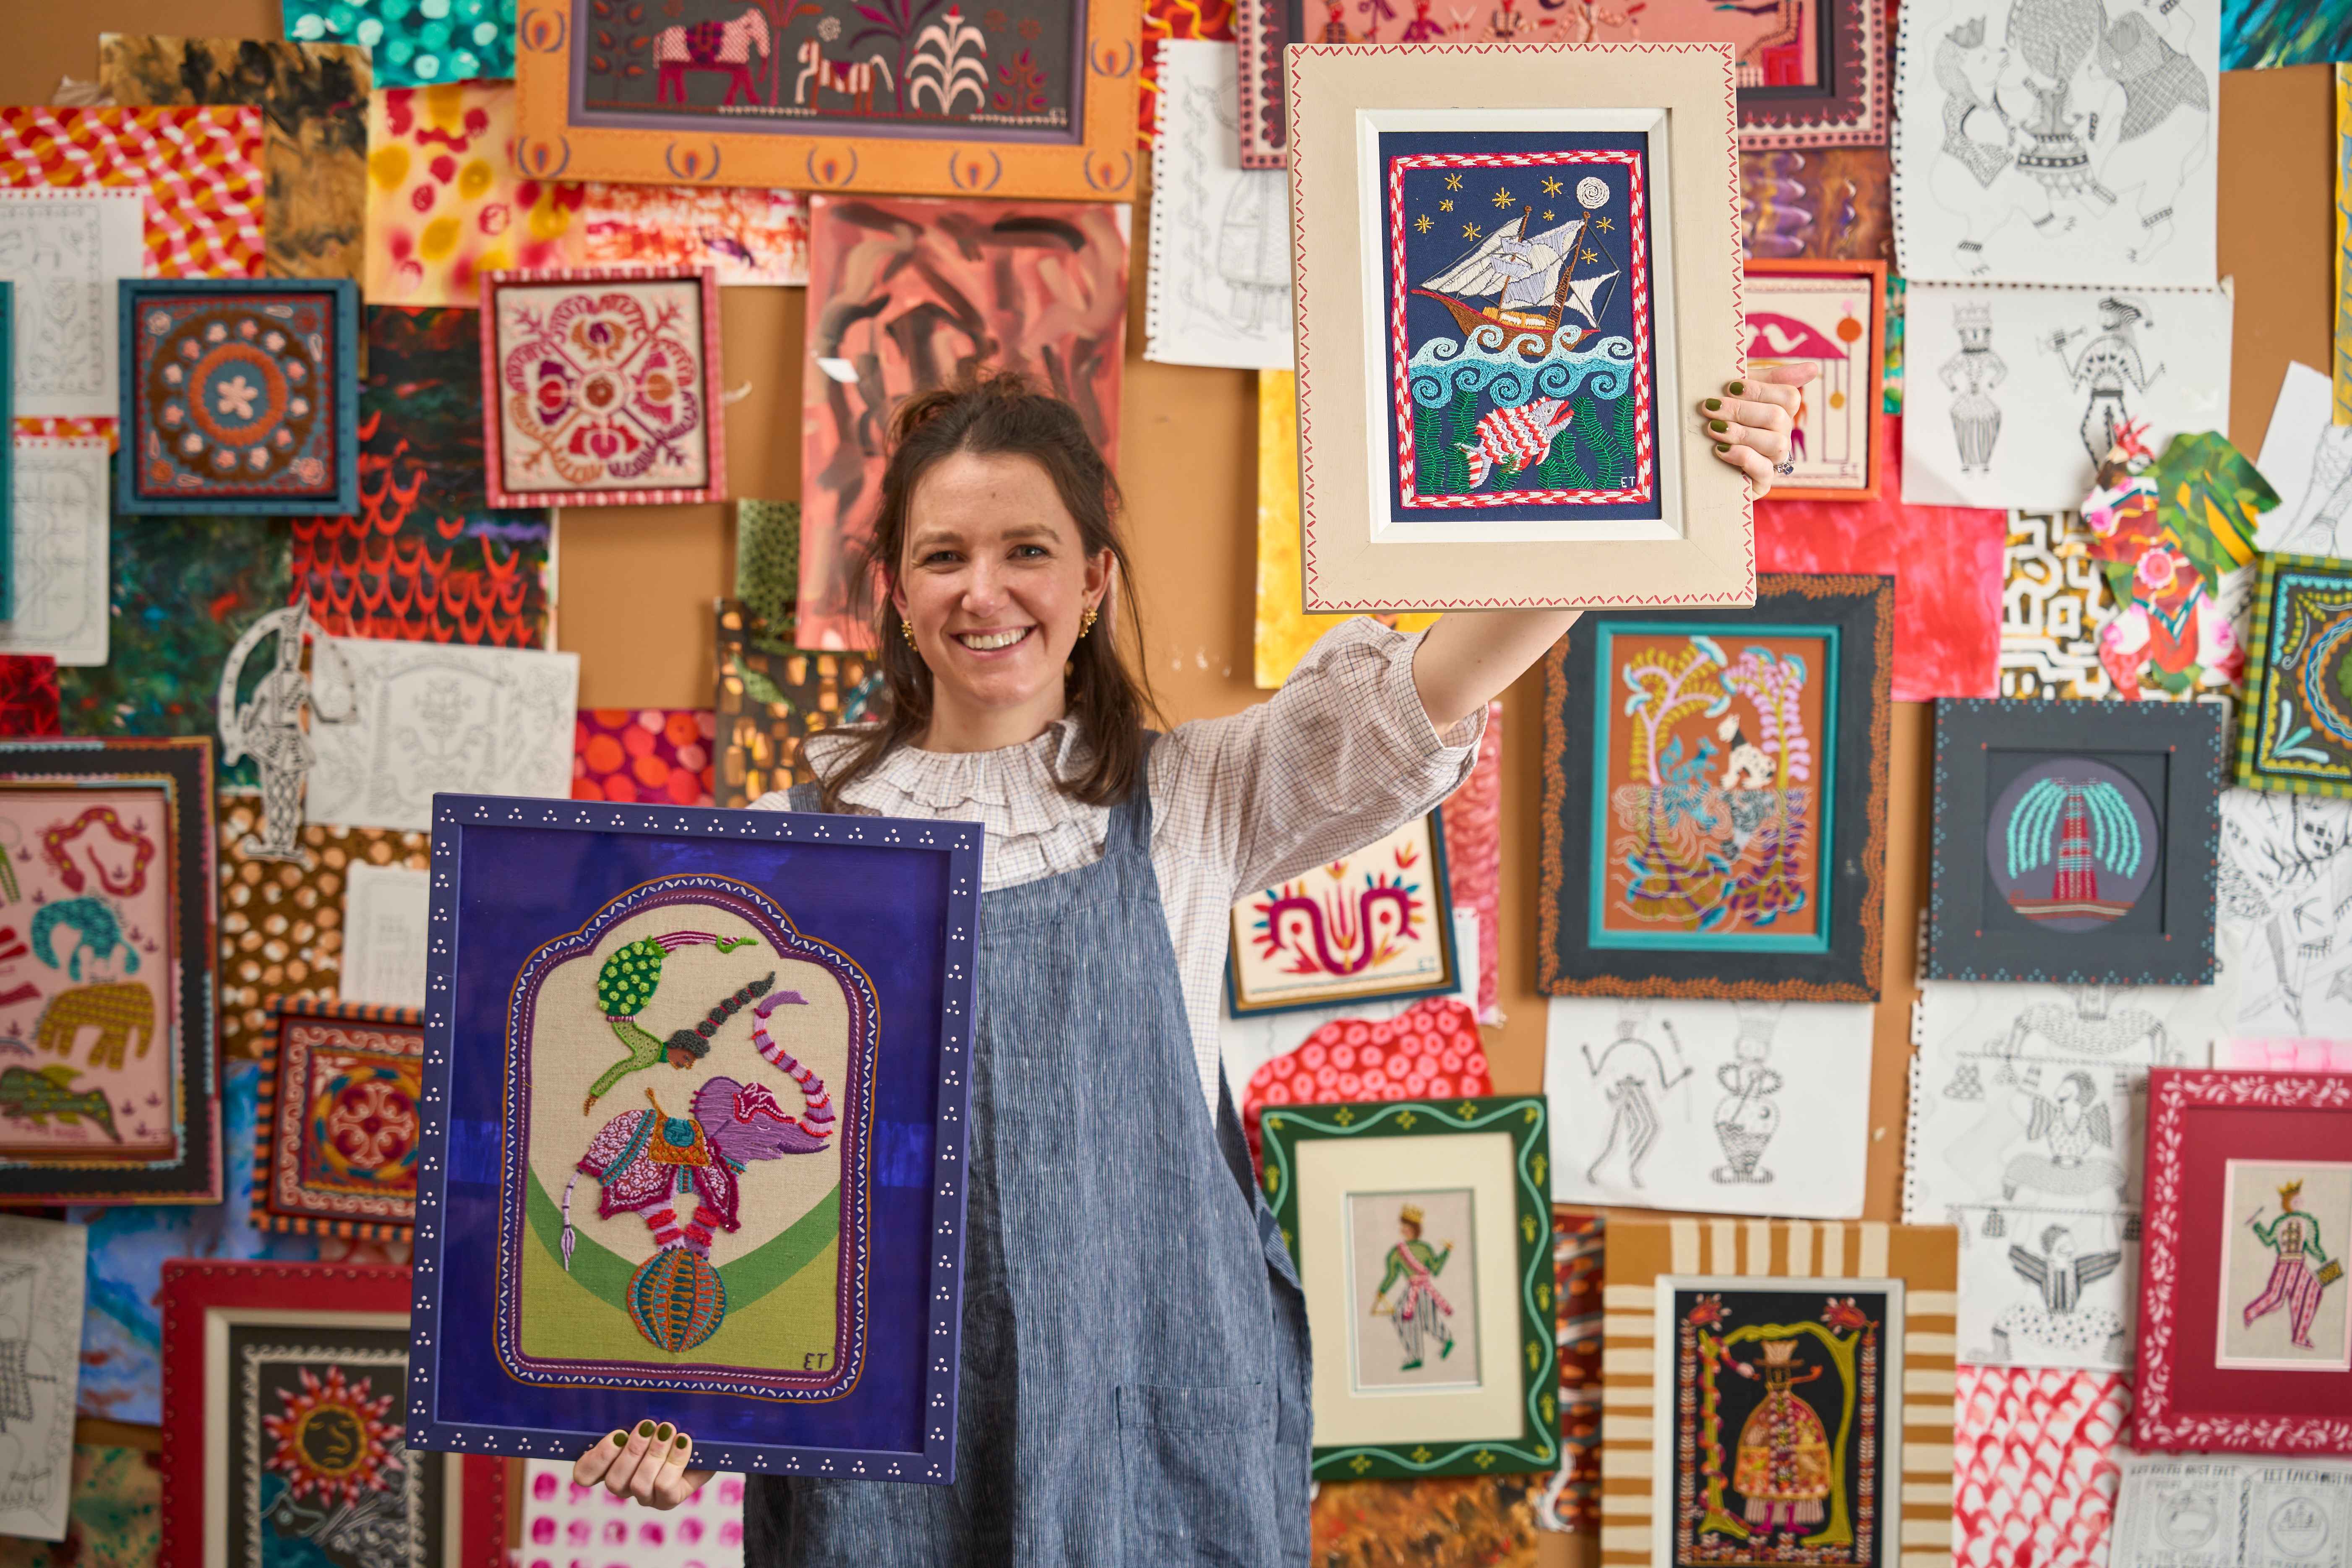
Last but not least, frame your embroidery! What you have created is a work of art so treat it as such! Don't leave your embroidery in your sewing box, don't just display it in an embroidery hoop, present it in a way worthy of all the work you have put in. Whether you frame it in a hand-painted frame (the way I do), or in any other style of frame that more suits your style, it's really worth treating the piece with care, and displaying it proudly. Whilst our range of framing options, paints, stencils etc could seem a bit of an odd combination with embroidery kits, to me framing is essential!

Frame C: Wide Rectangle
£70.00

The Musicians Frames
£125.00

Painting Bundle: 1
£20.00

Stencil: The Waves
£12.50
I am still learning as I go and discovering new tips, so do let me know yours!