My Top 5 Embroidery Stitches For Filling
Whilst I have always advocated that you shouldn't get hung up on trying to use loads of different embroidery stitches in a design, as you build your skill, you'll inevitably find yourself wanting to explore different ways of using stitches. However with hundreds and hundred of stitches out there, how do you know what stitch to choose.
Whether you're a beginner in embroidery or an experienced stitcher, selecting the right stitch for filling large or small areas in your design can take your work to the next level. So, in this article (actually on embroidery for a change!), I wanted to share my top 5 embroidery stitches for filling. Whilst they range in complexity, there is something here for both beginners and experienced embroiderers looking to add texture, color, and interest to their embroidered art. It was really hard to narrow down to 5, so I reckon I'll have to do a follow on article of all the others that didn't make the cut but are still excellent.
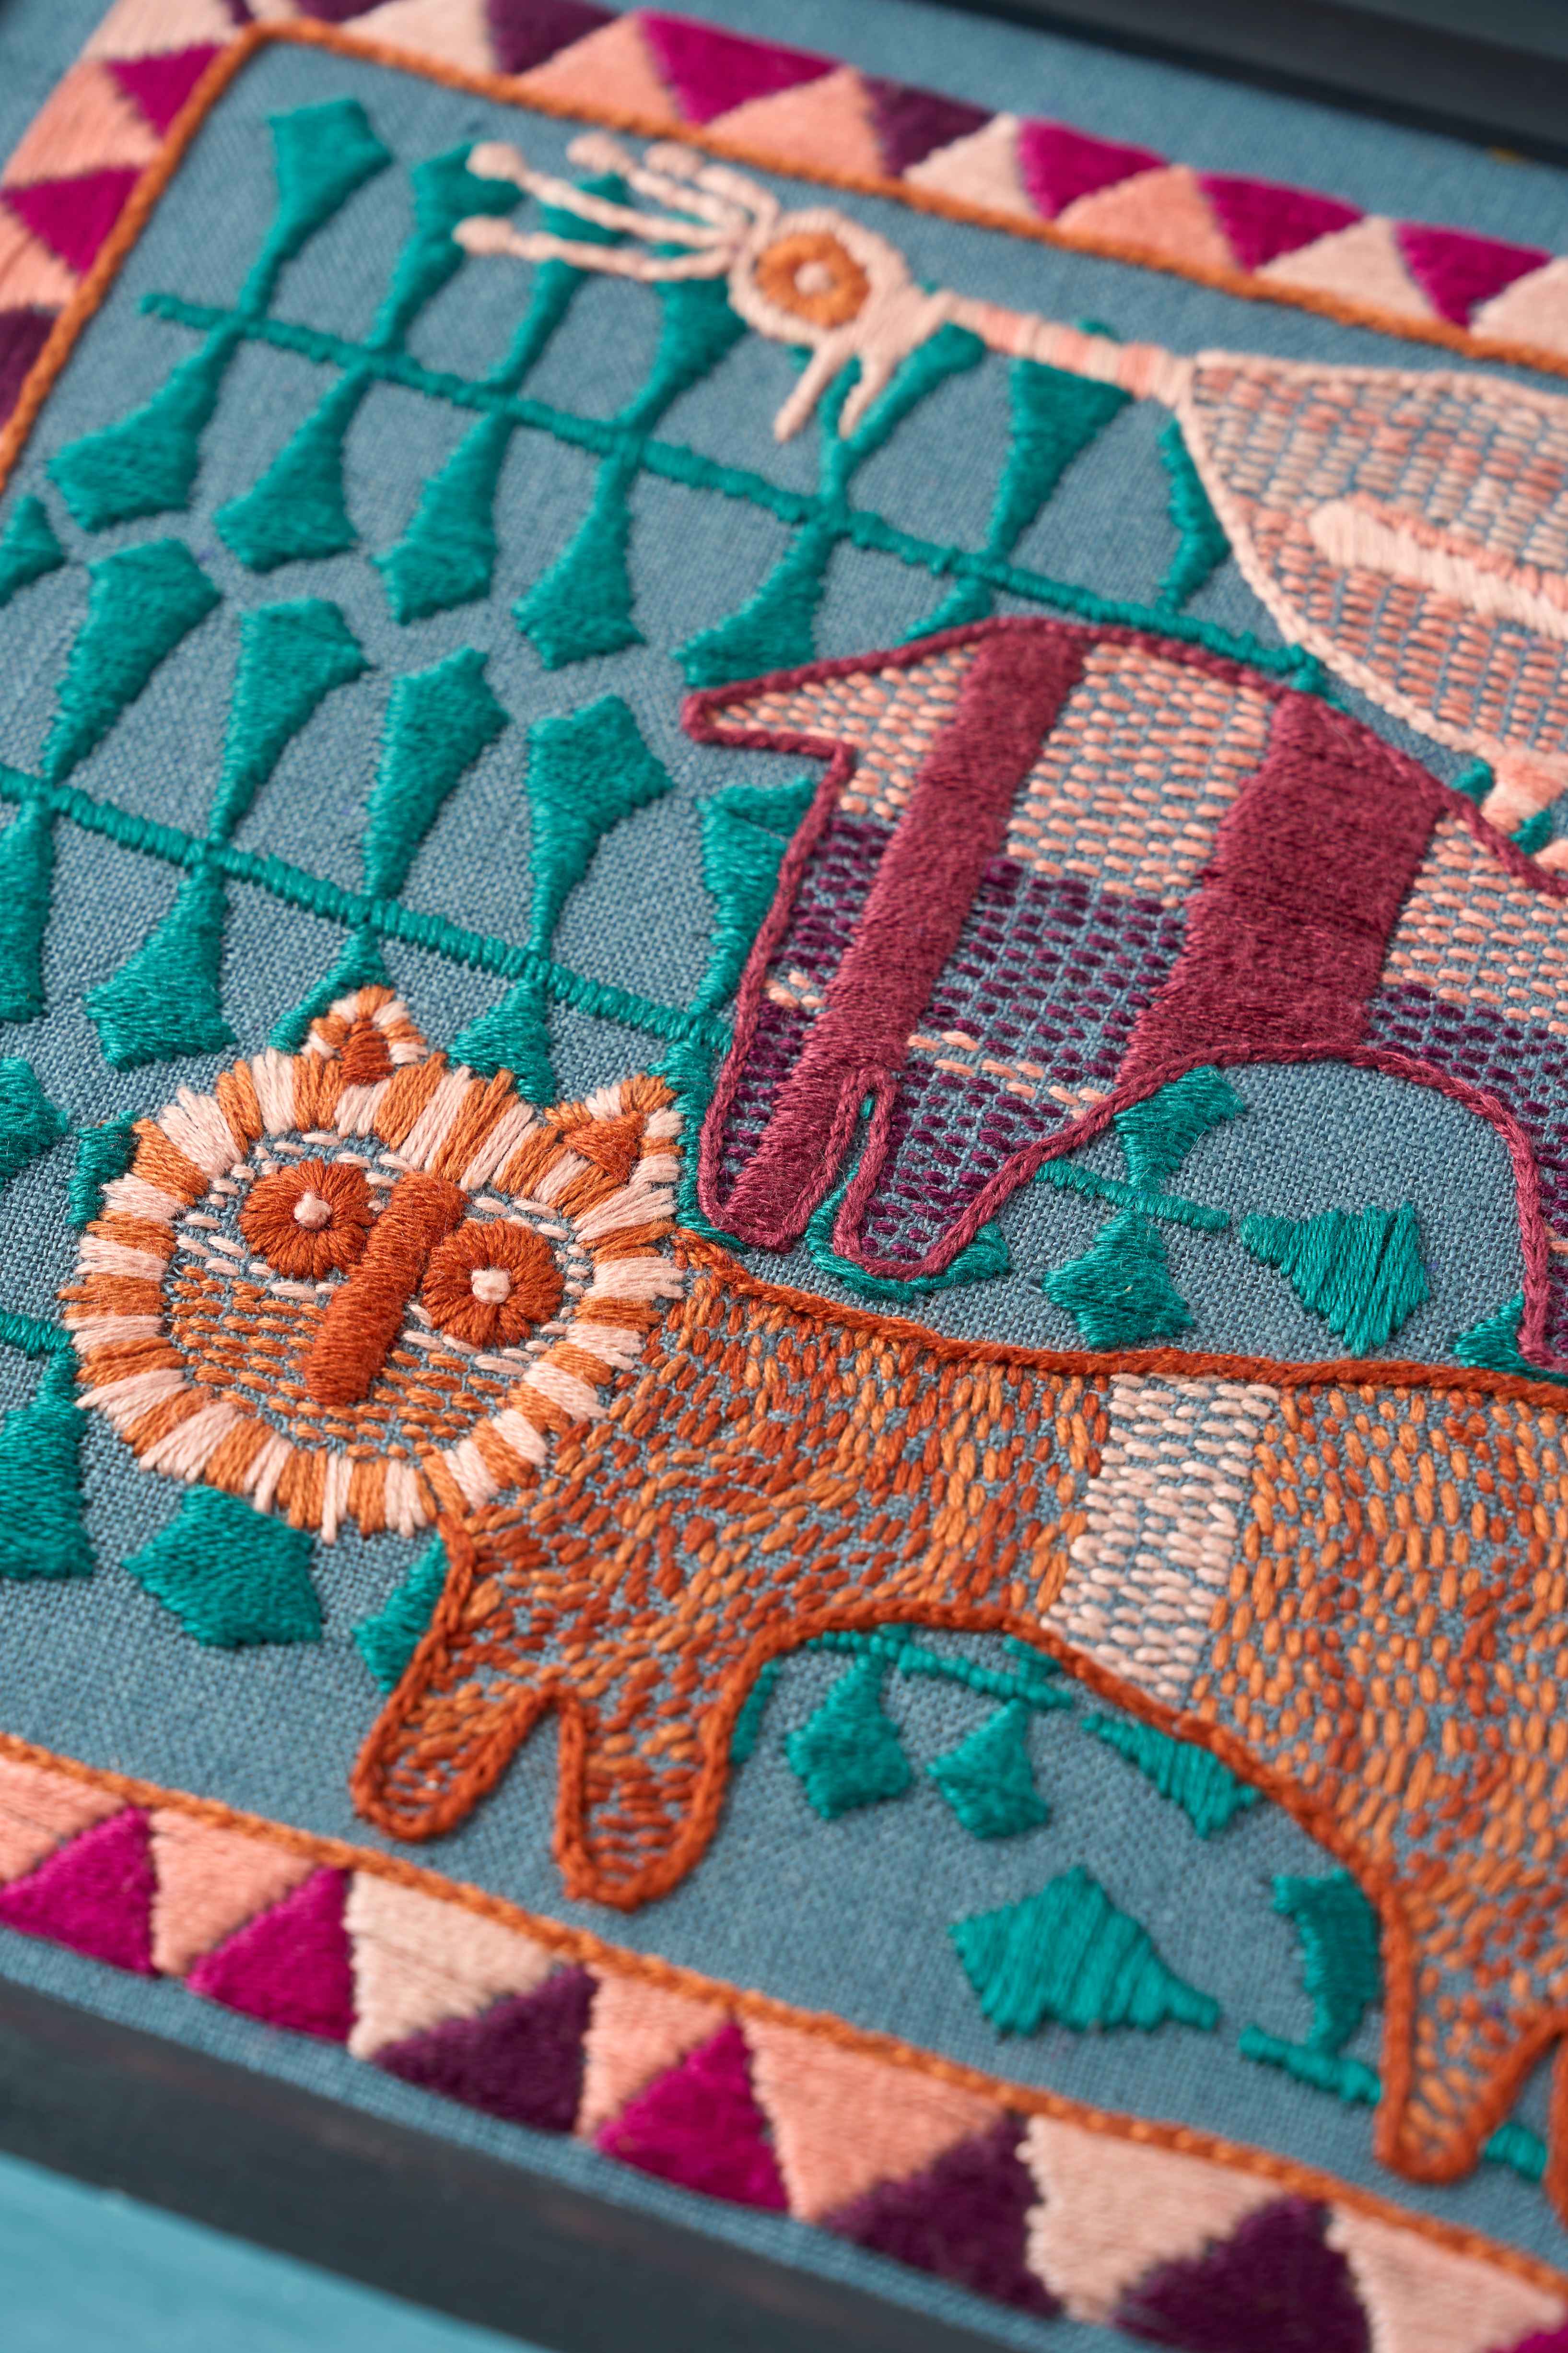
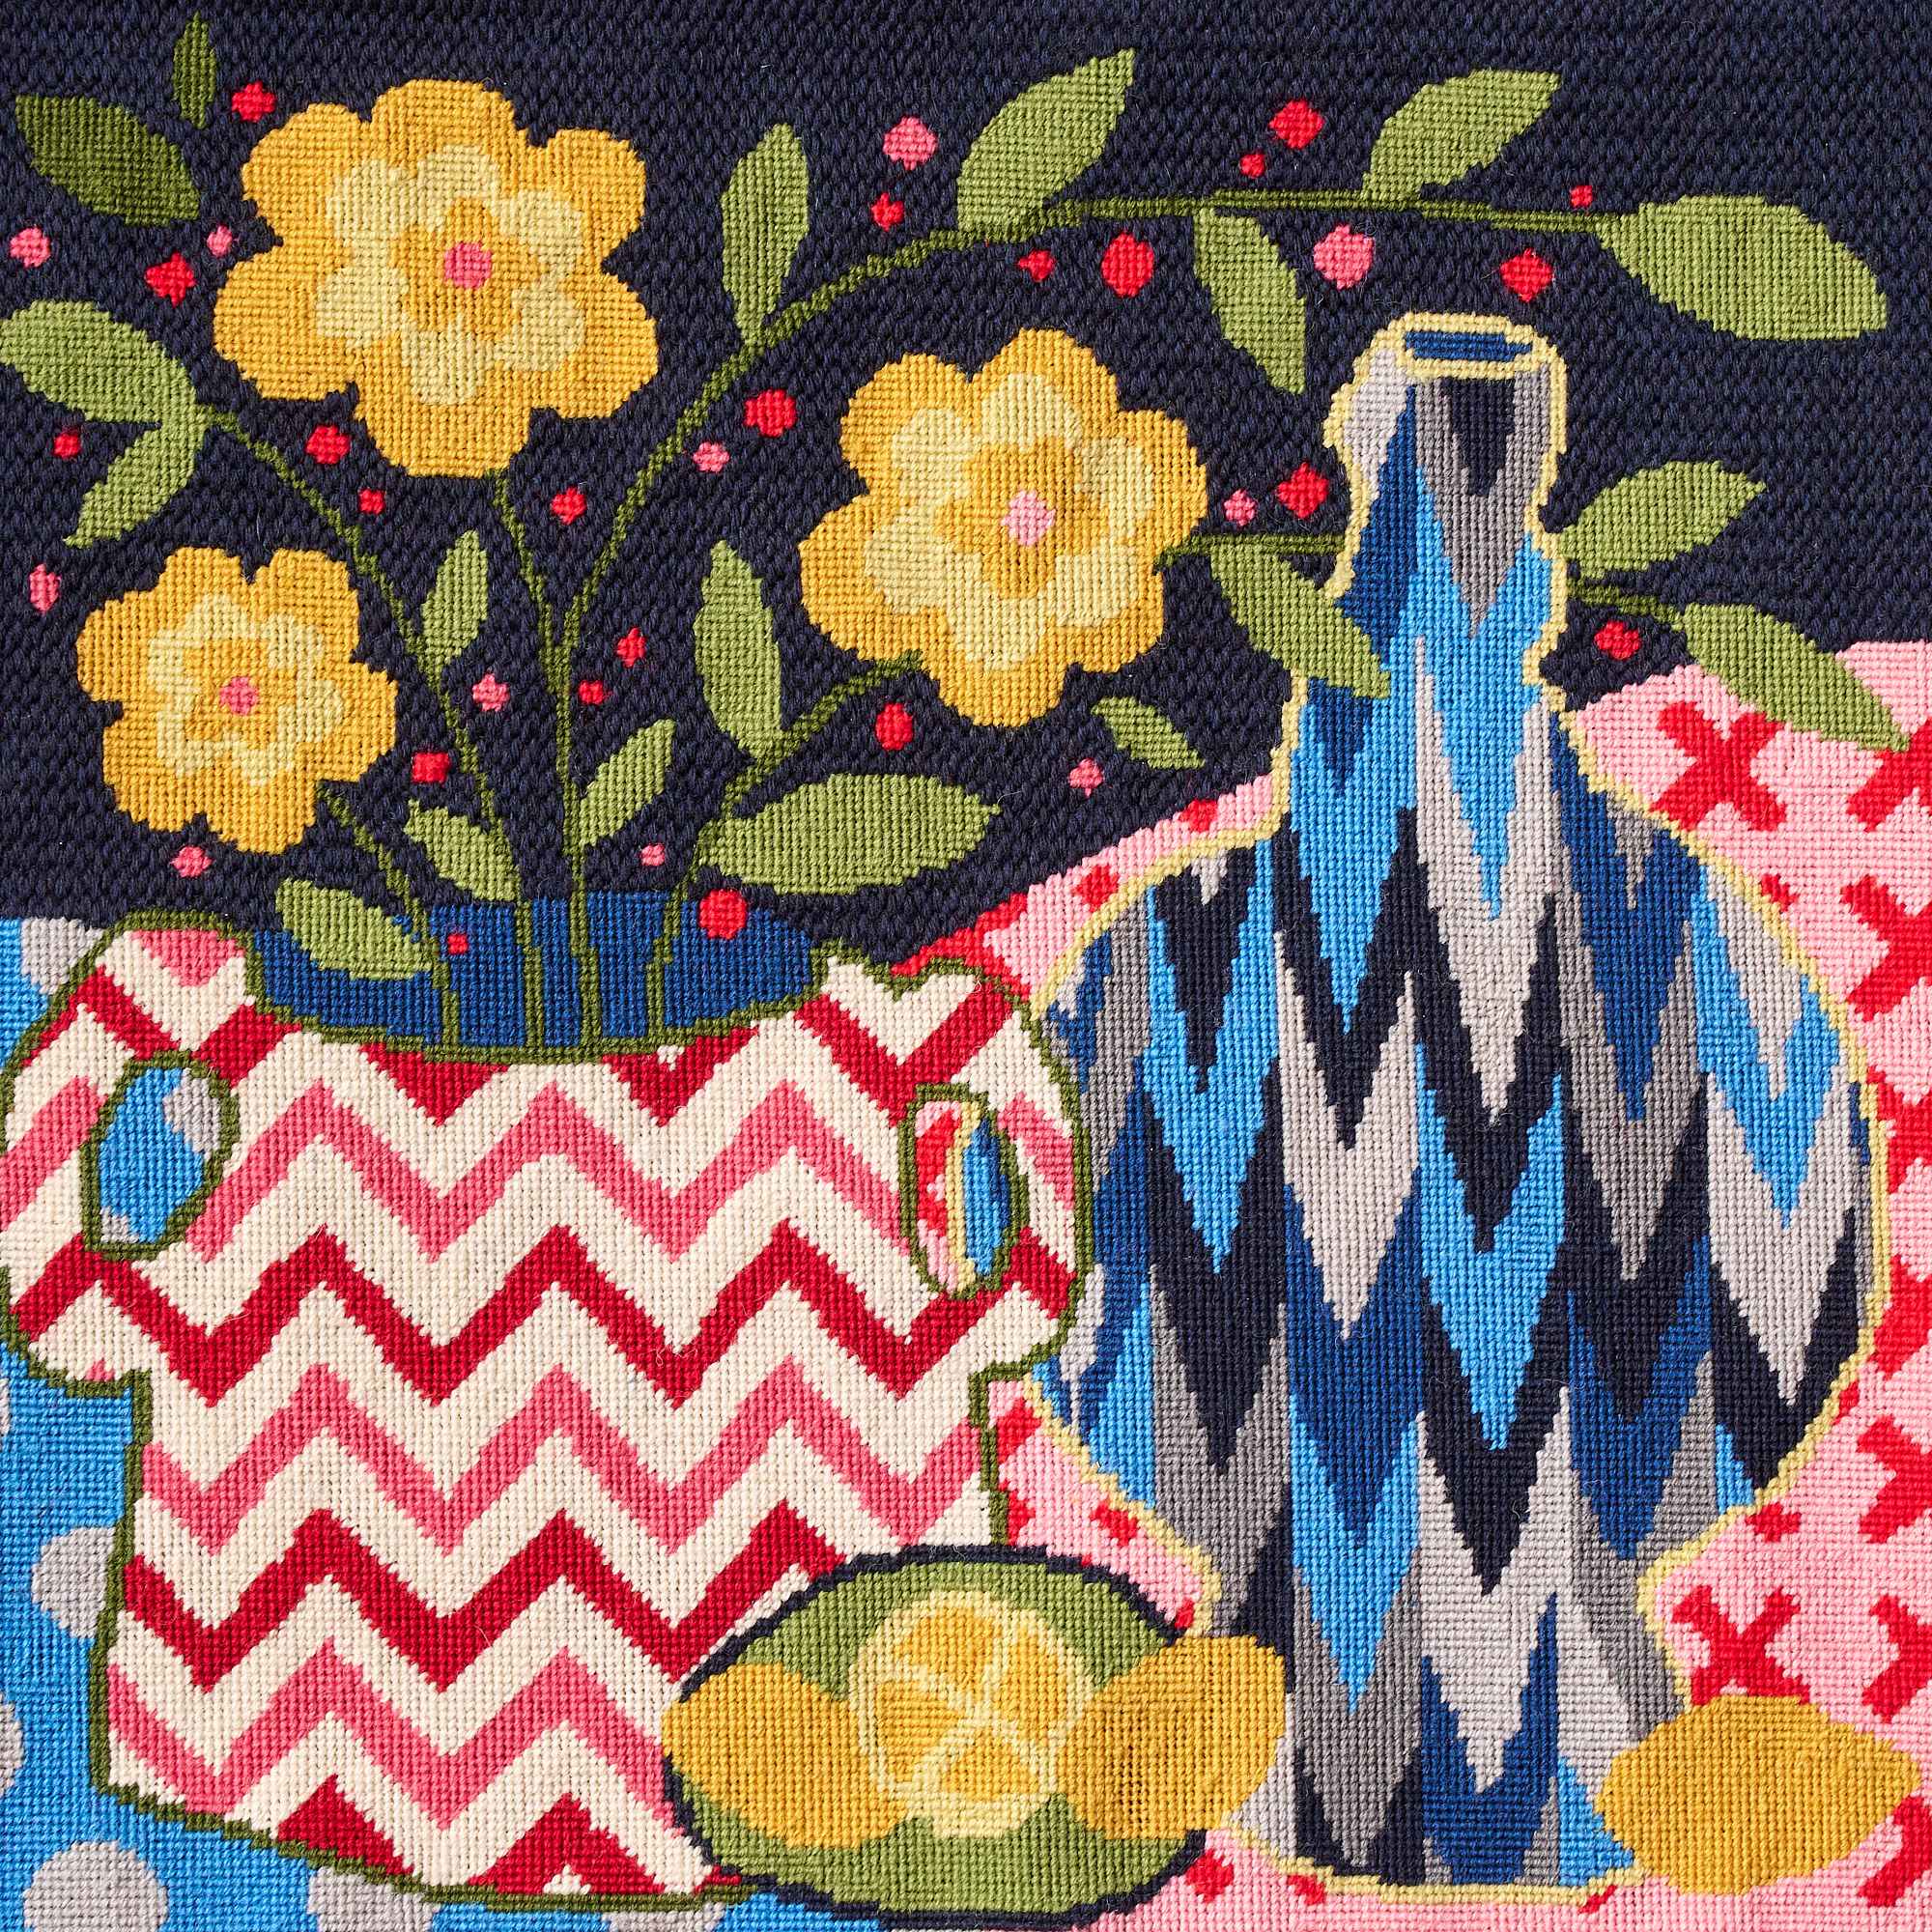
Running Stitch is often seen as a simple outlining stitch, so this is a bit of a wild stitch to start with, but it’s a brilliant choice for filling areas with a light and airy texture. While it is often overlooked for filling in favor of denser stitches like satin stitch, running stitch offers a unique advantage. It creates stitched areas that aren’t too heavy, allowing the fabric to show through and giving a more delicate finish. This stitch is particularly effective when used in the style of Indian Kantha work, where rows of running stitches are layered side-by-side to create texture and depth.
I particularly love combining running stitch alongside satin stitch when you want to highlight the weight of certain areas - for example the trunk of a tree in satin stitch accompanied by the area of leaves in running stitch. So... despite its simplicity, this stitch is a versatile tool in any embroiderer’s repertoire, making it an unexpected but, I think, very deserving addition to my list. If you want to practice using the stitch in this way, take a look at our Lion and Boar kit.
Quick Skills: How to do Running Stitch
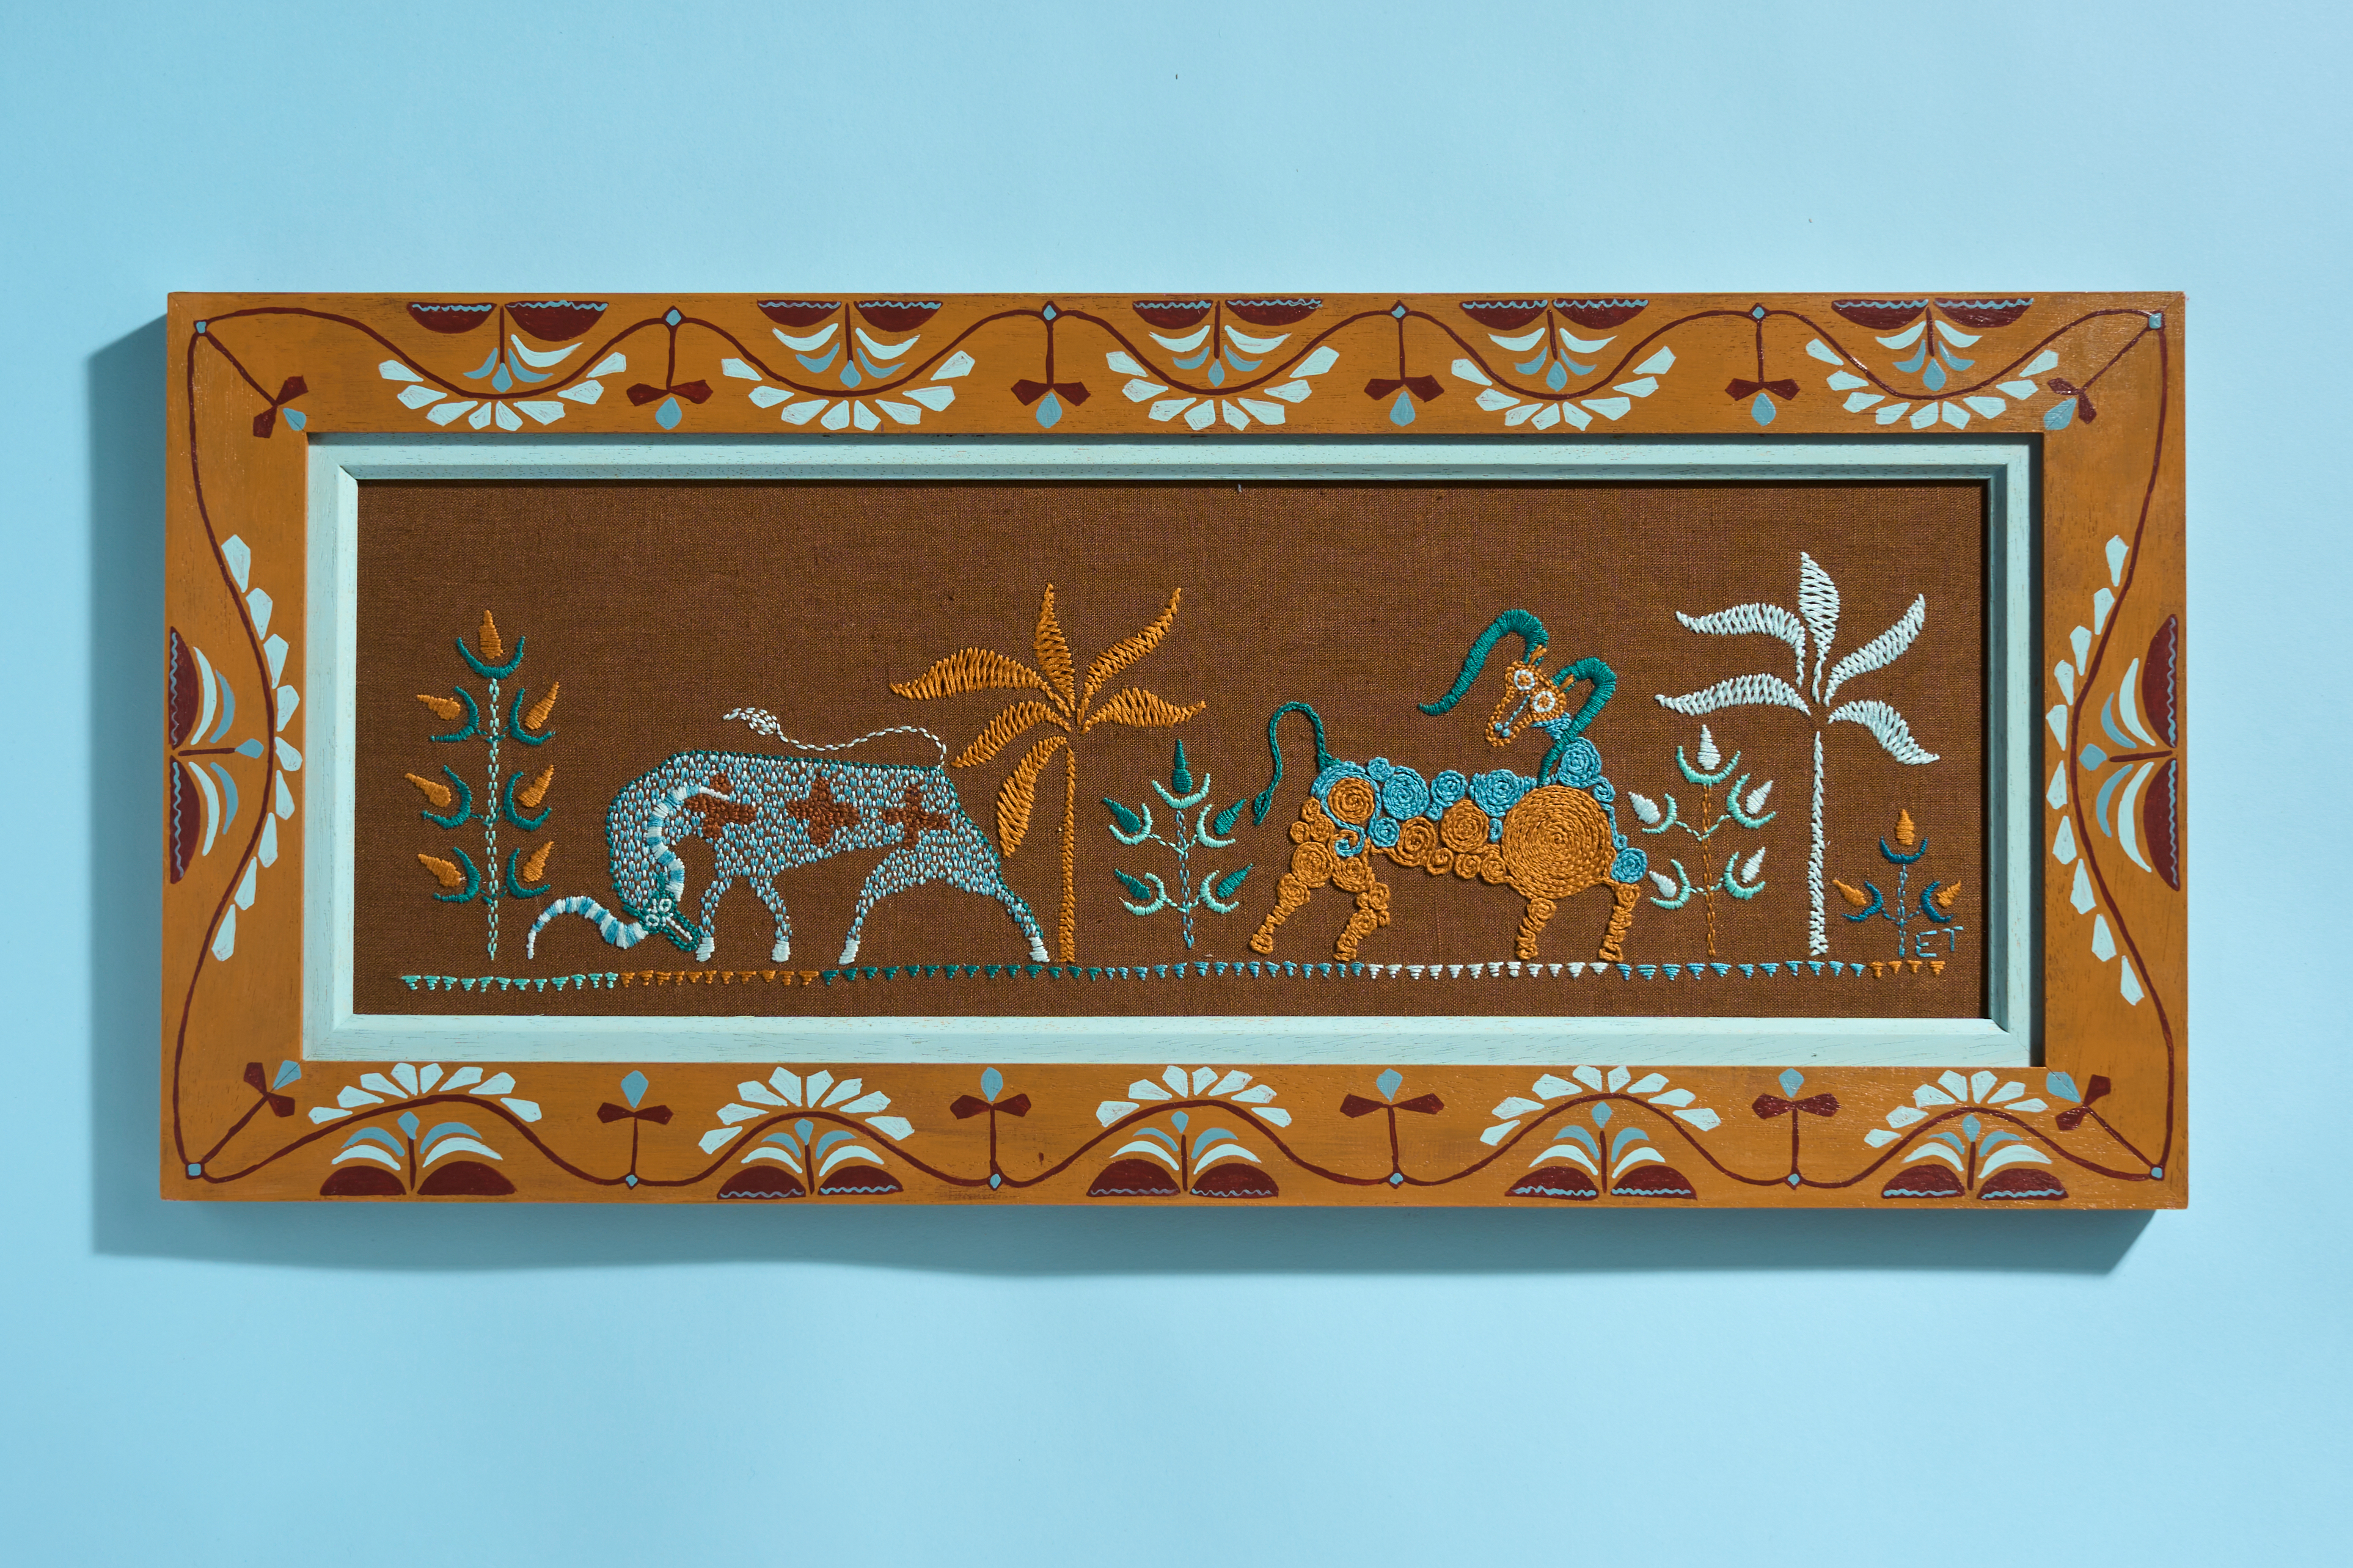
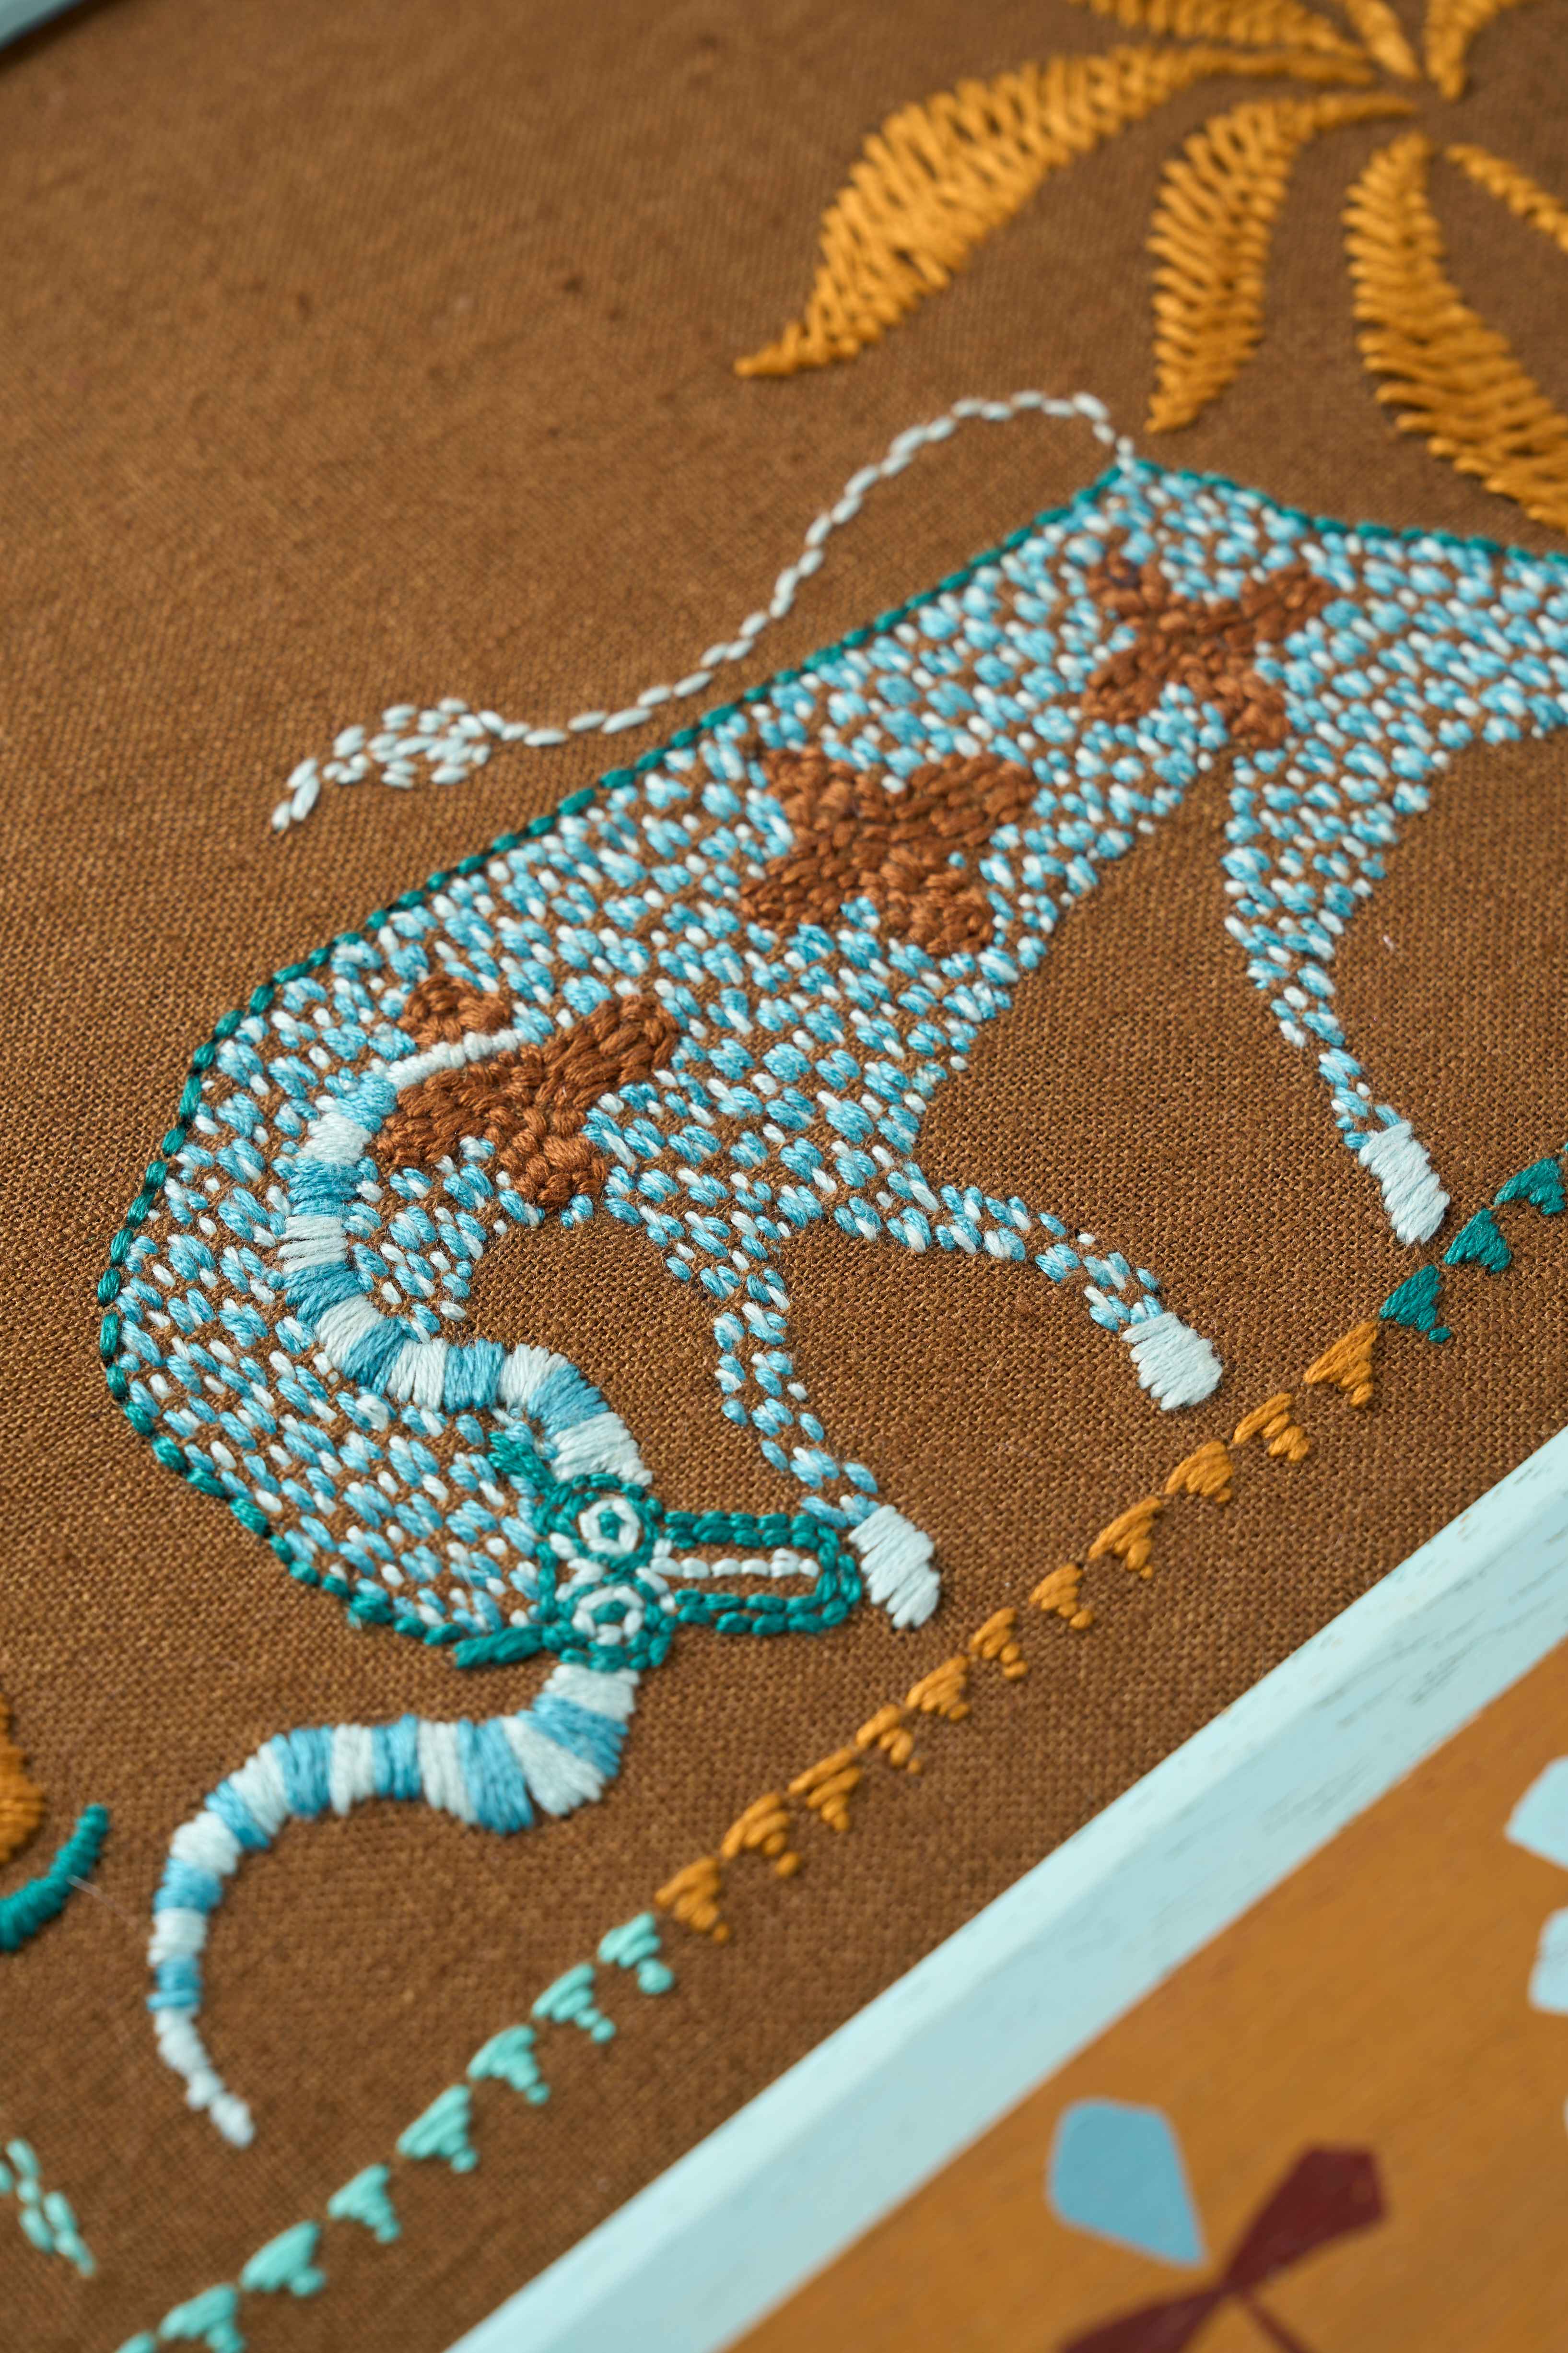
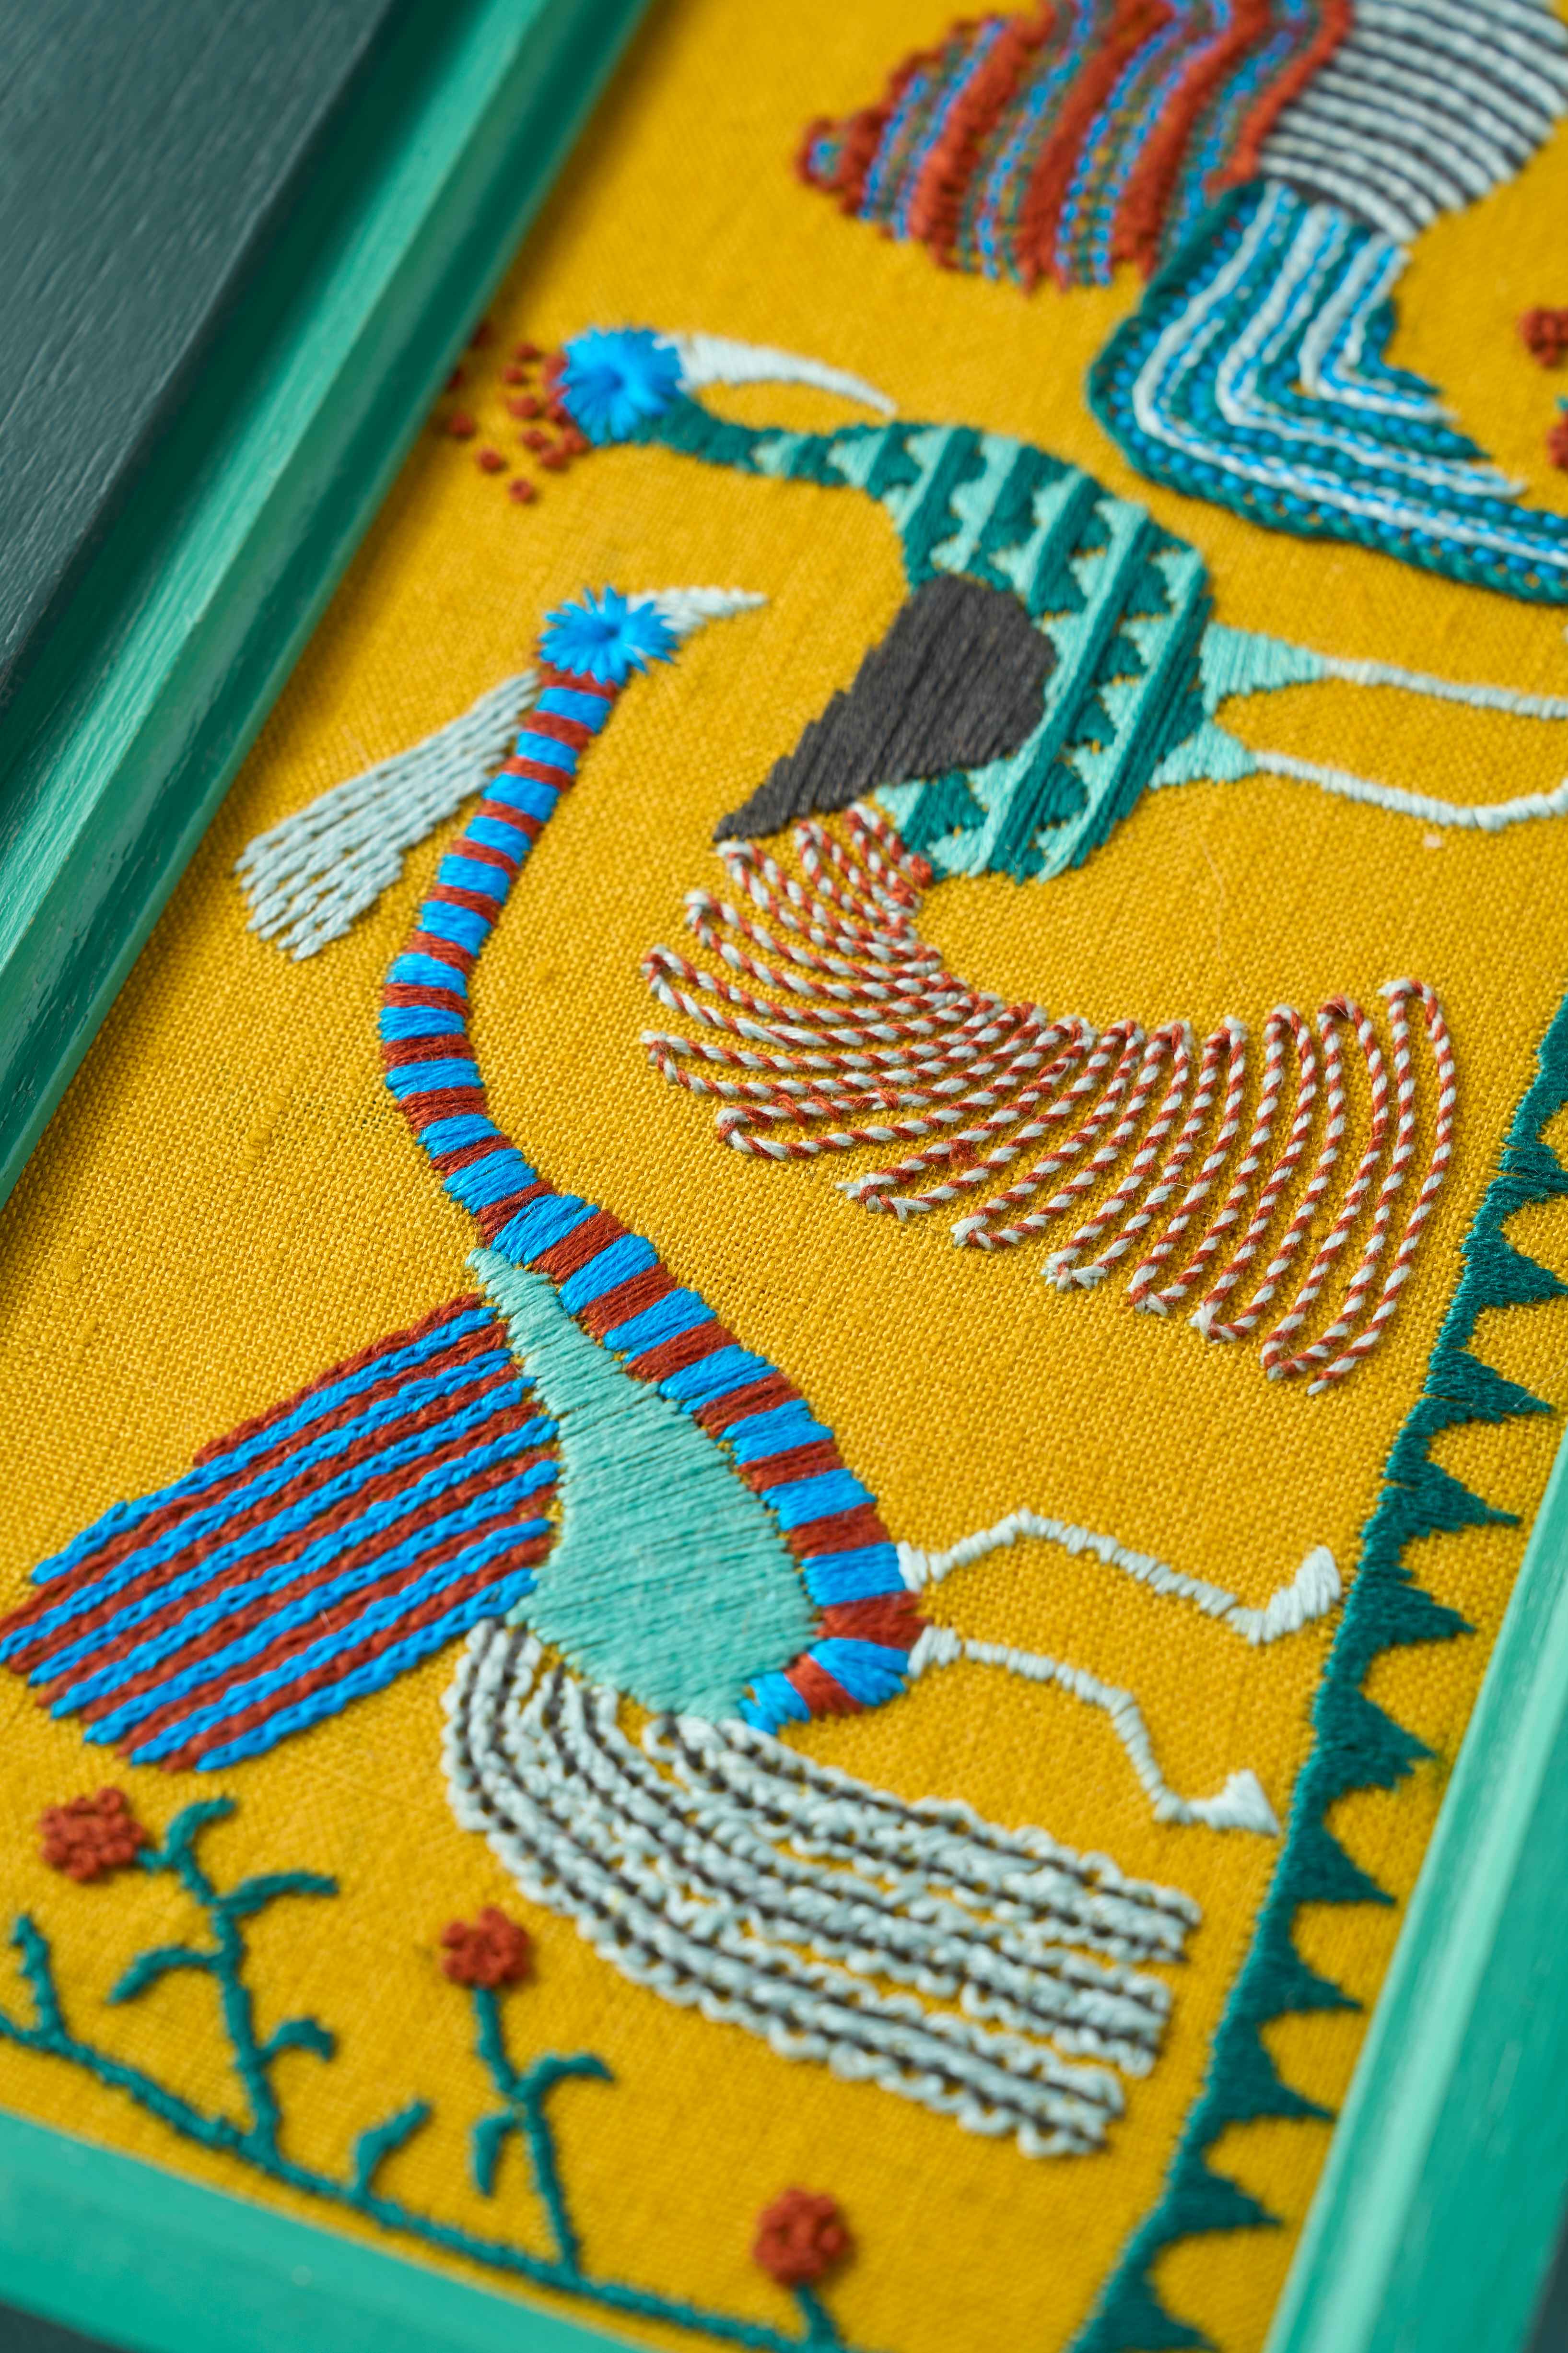
Chain Stitch is one of the simplest embroidery stitches, making it ideal for beginners. However, when used for filling, it transforms into something truly special. The nature of the chain stitch means that you fill areas using lines, which forces you to think creatively and work with unusual shapes. This limitation is actually a strength, as it encourages you to play with the structure and flow of your design, leading to really interesting results - such as the antelope filled with circles of chain stitch below. For that reason, chain stitch is perfect for adding texture and movement to your embroidered art.
Quick Skills: How to do Chain Stitch (using the link method)
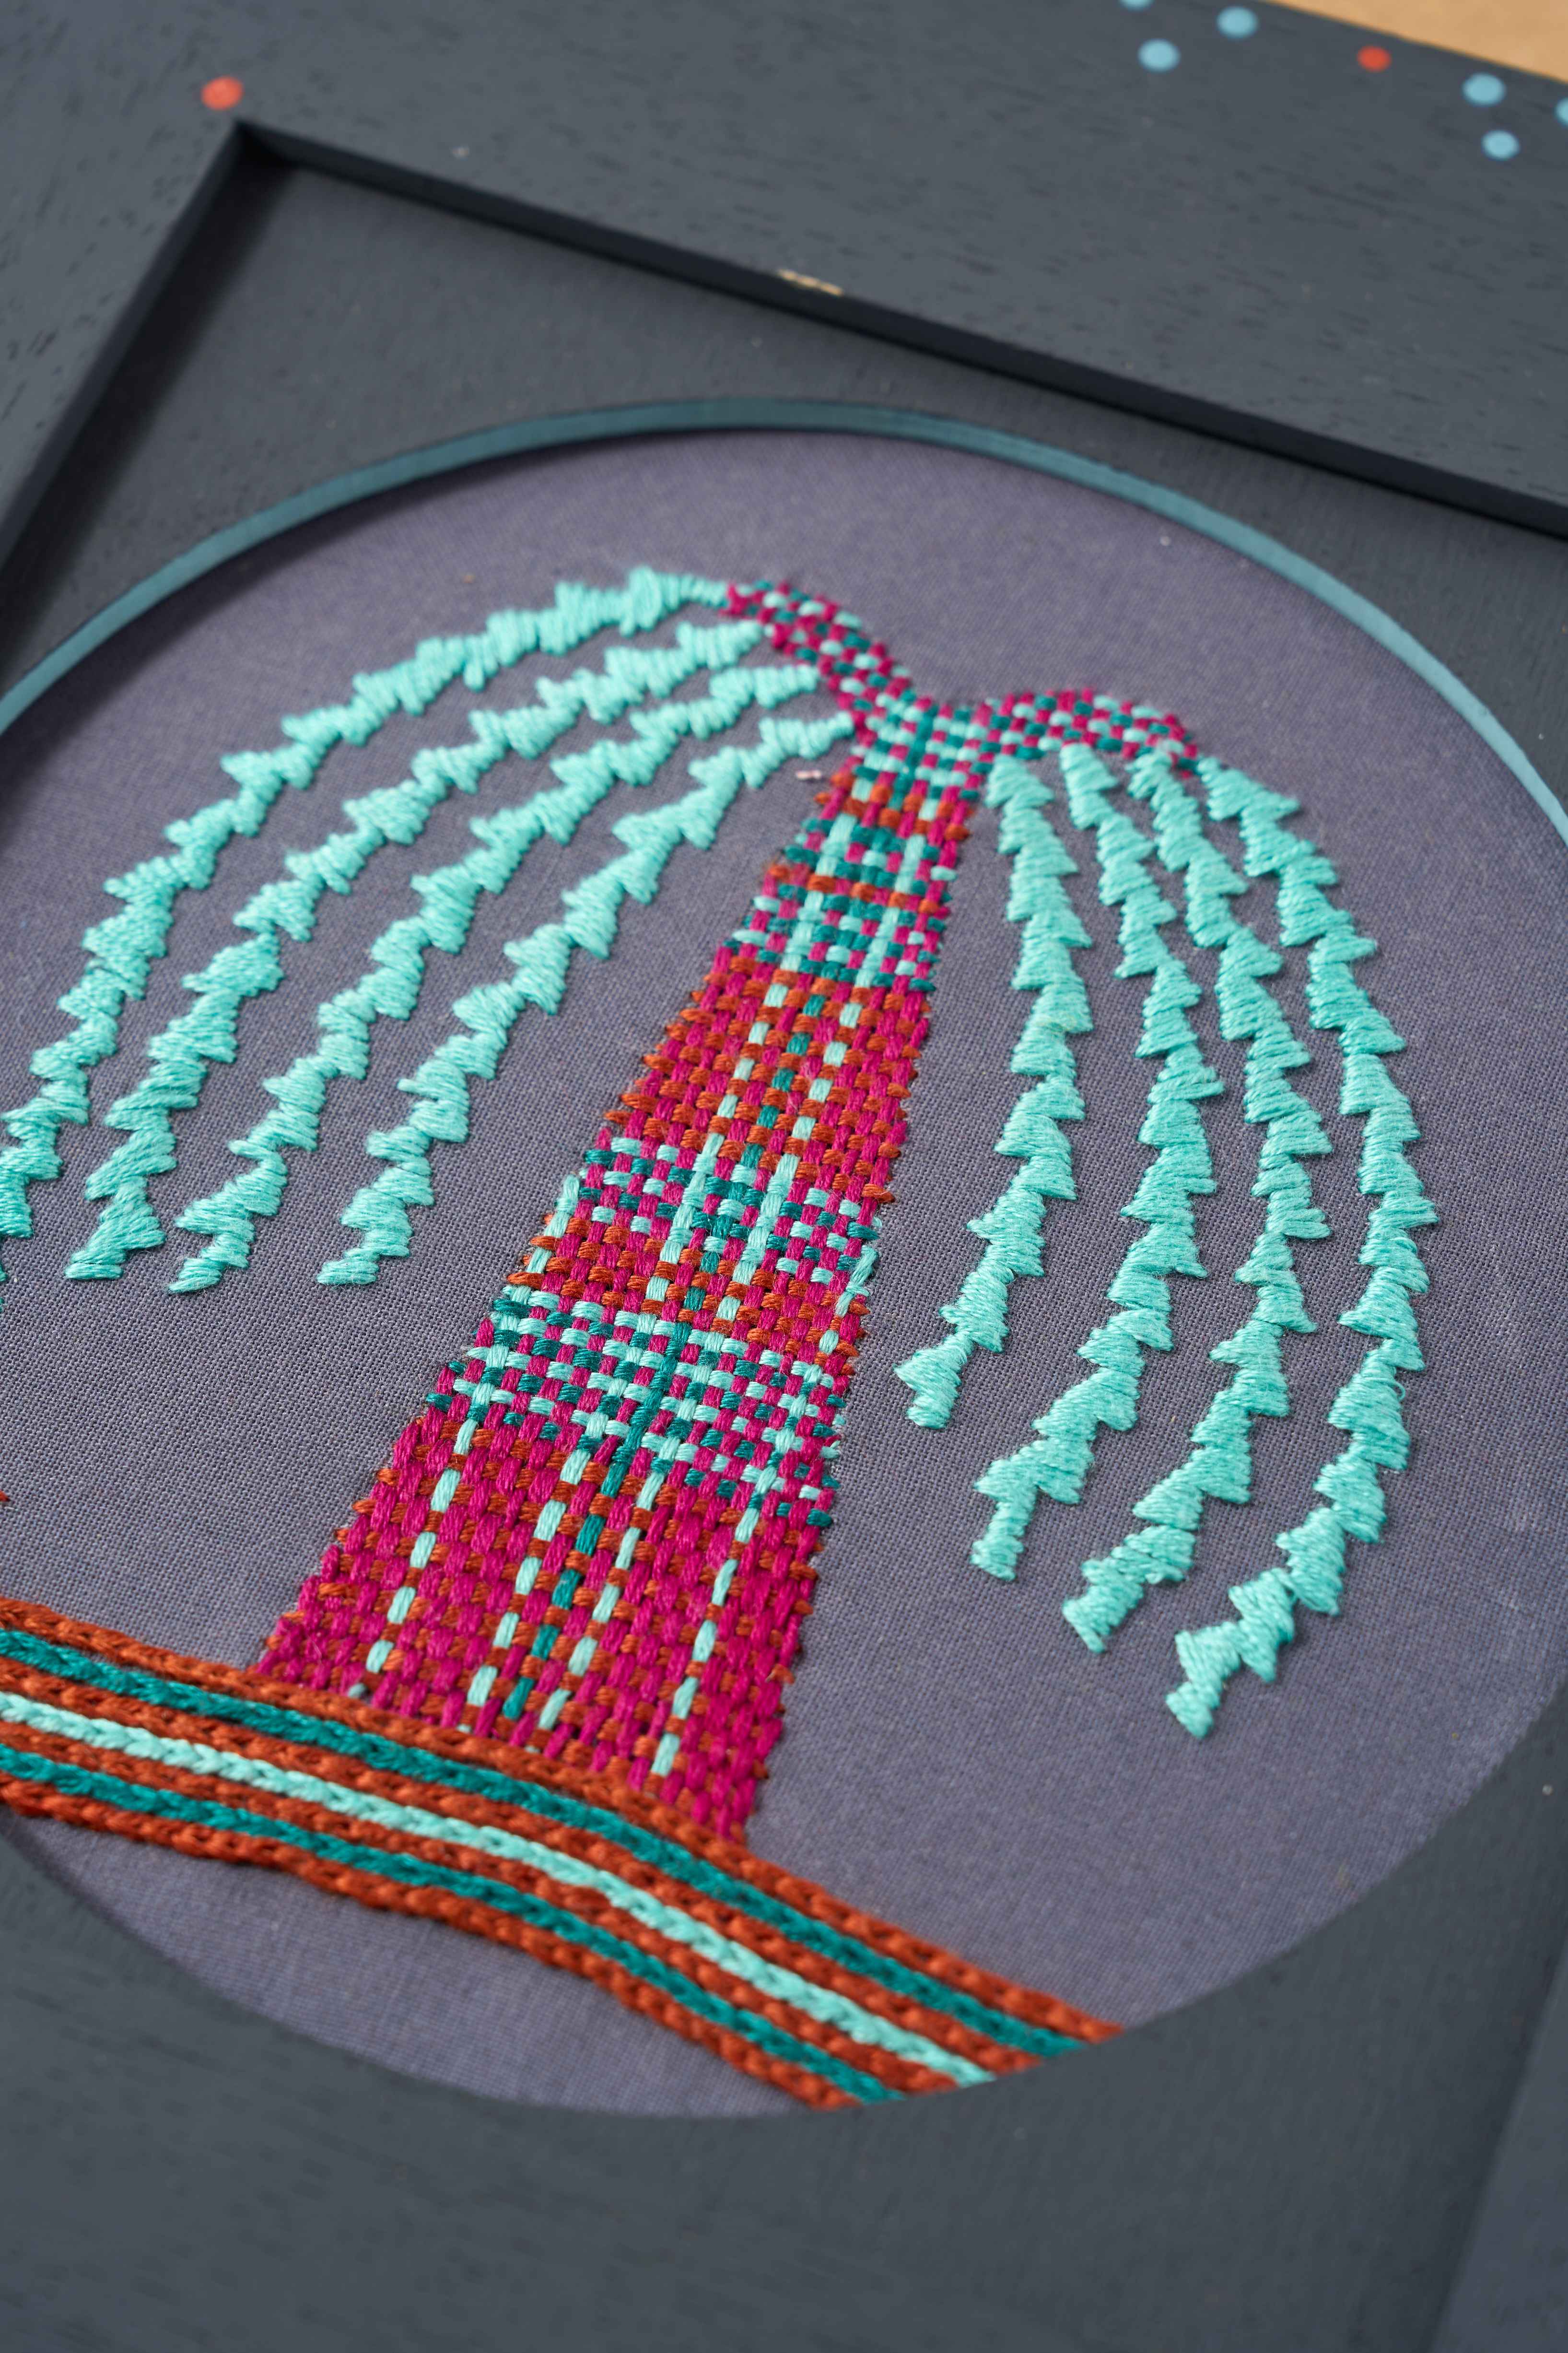


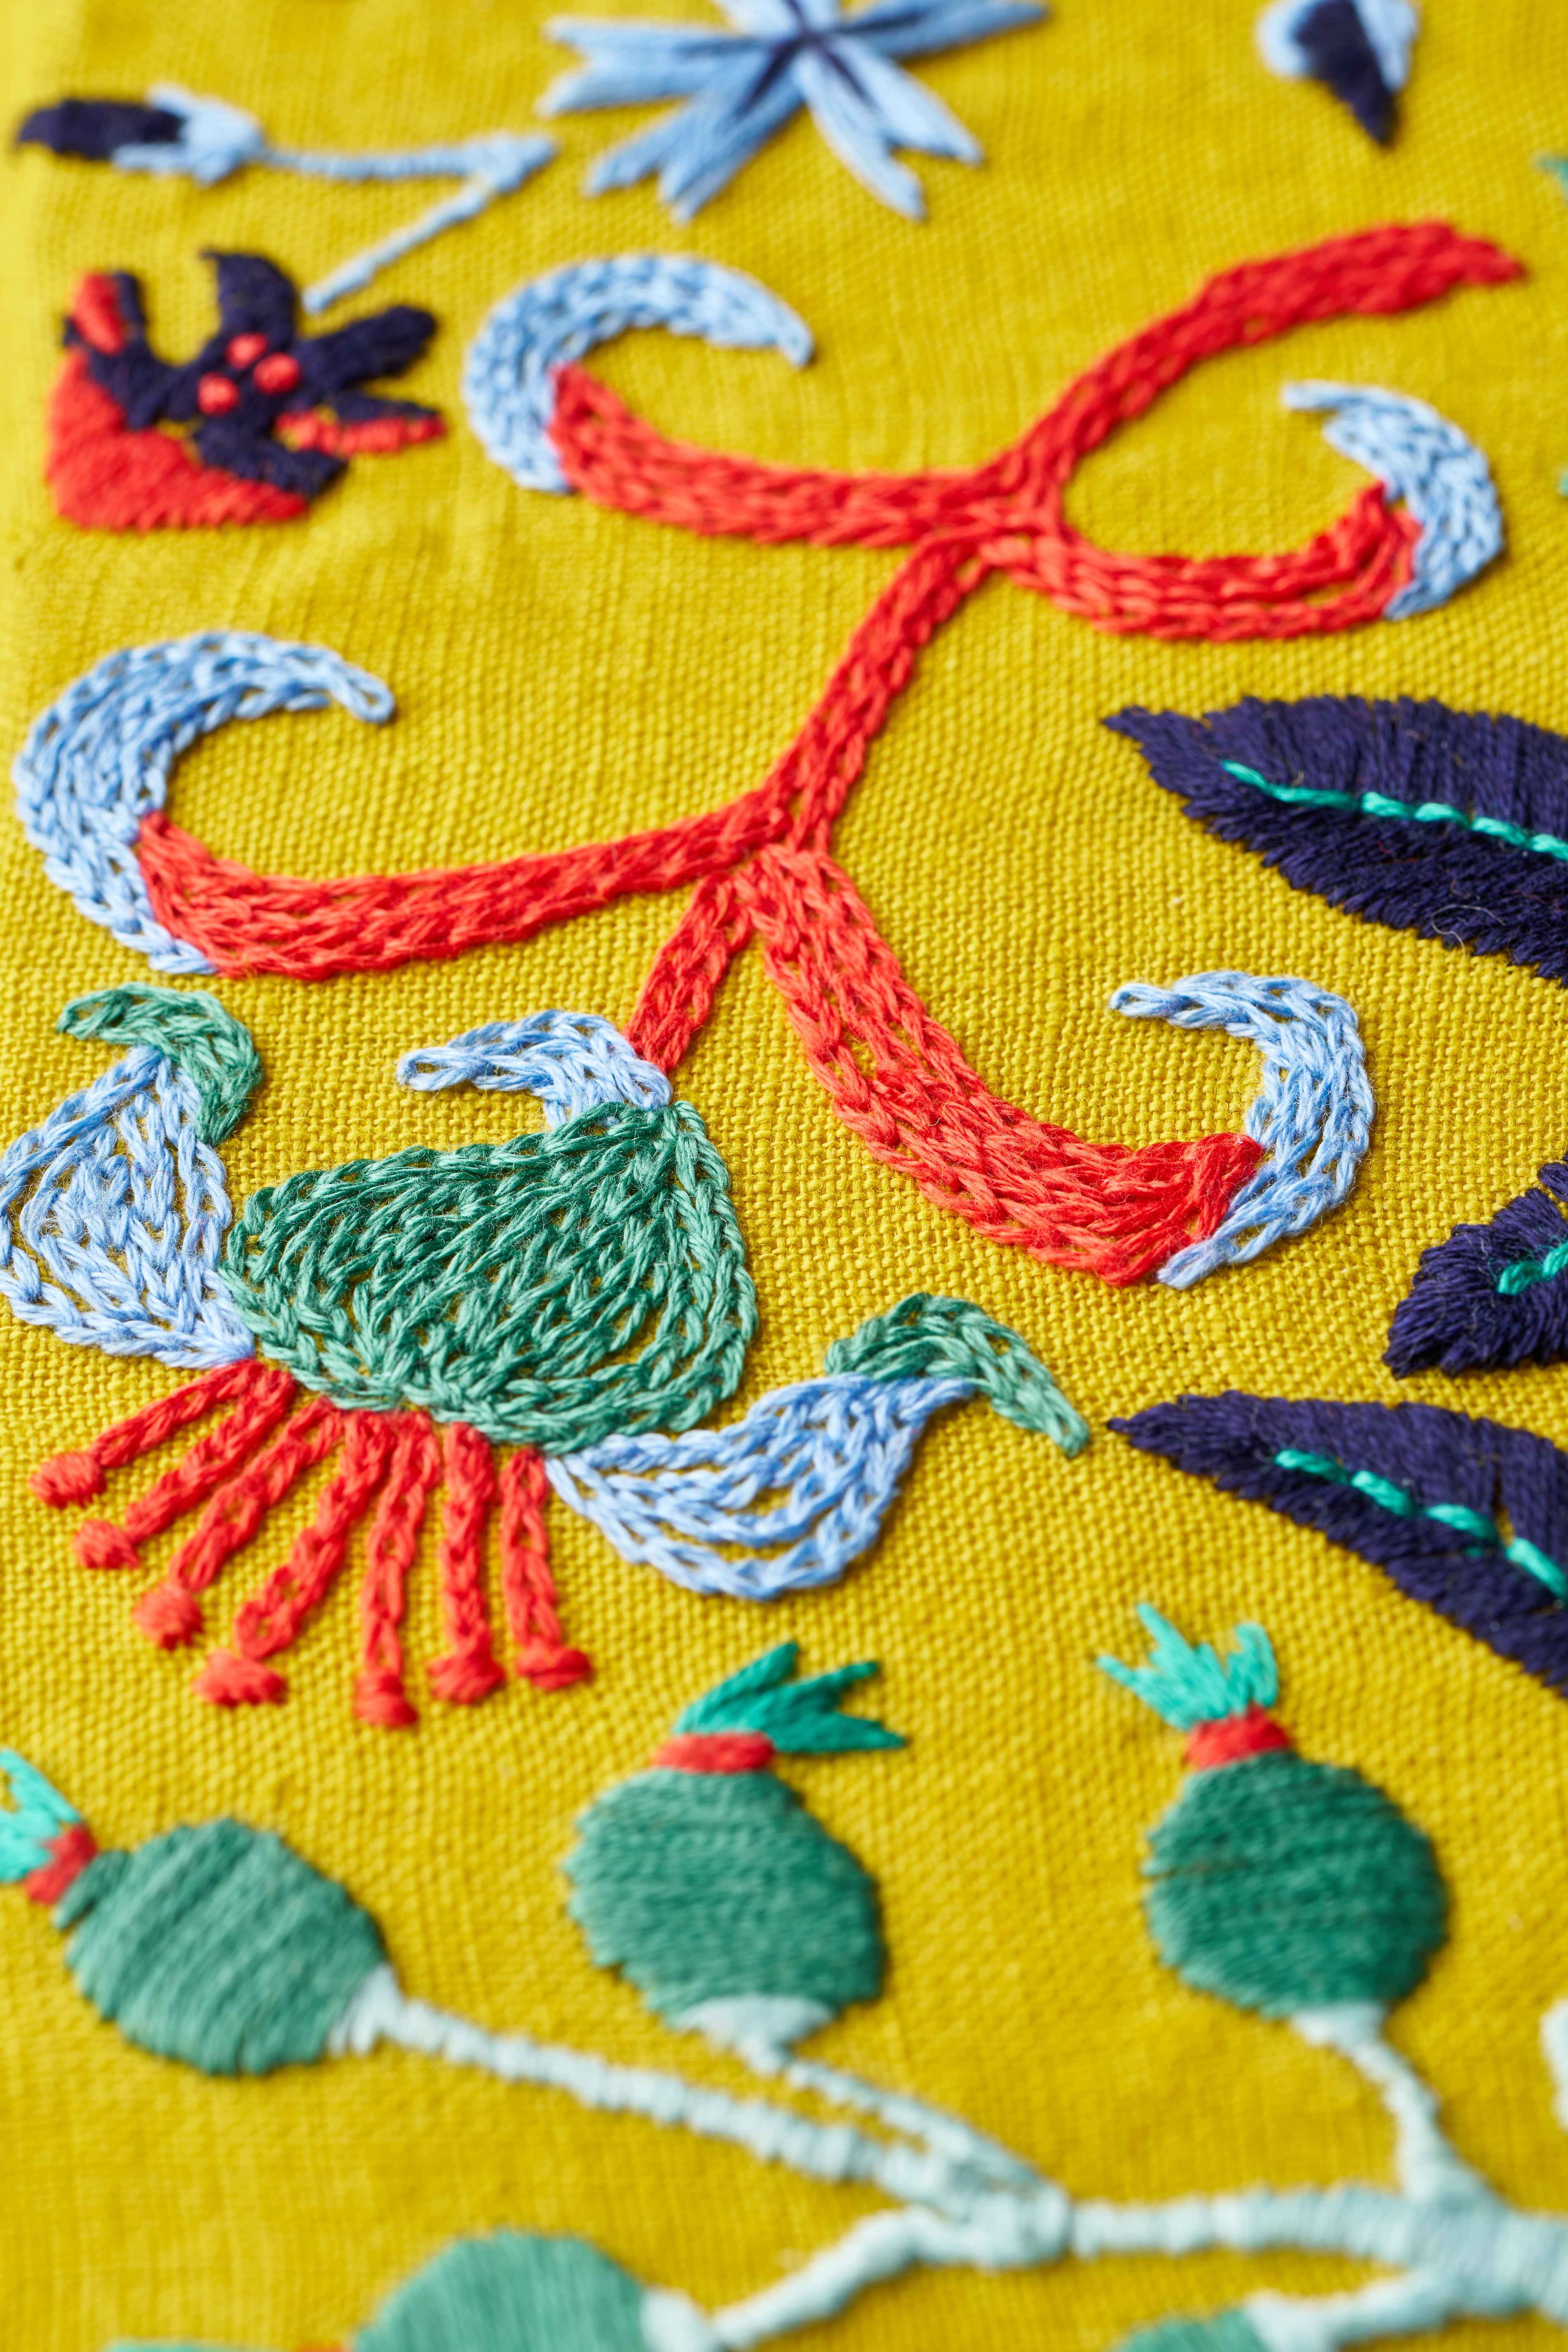
Darning, sometimes referred to as needleweaving in embroidery, is a wonderful technique for creating woven areas within your design. This method allows you to incorporate multiple colors seamlessly, adding depth and complexity to your work without actually being too difficult to do. Now only is it particularly effective for making your embroidery look more advanced, but it is also incredibly fun to do. You can use a whole range of different combinations of colours to create different kinds of check patterns. Whether you're filling a small detail or a larger area, this stitch can bring your embroidery to life with its rich texture and color variation. Its a harder one to learn, so have a bit of patience. We have a video below or if you want something to guide you through more gradually, then take a look at our Start Stitching course.
Quick Skills: How to do Darning Stitch (Needleweaving)

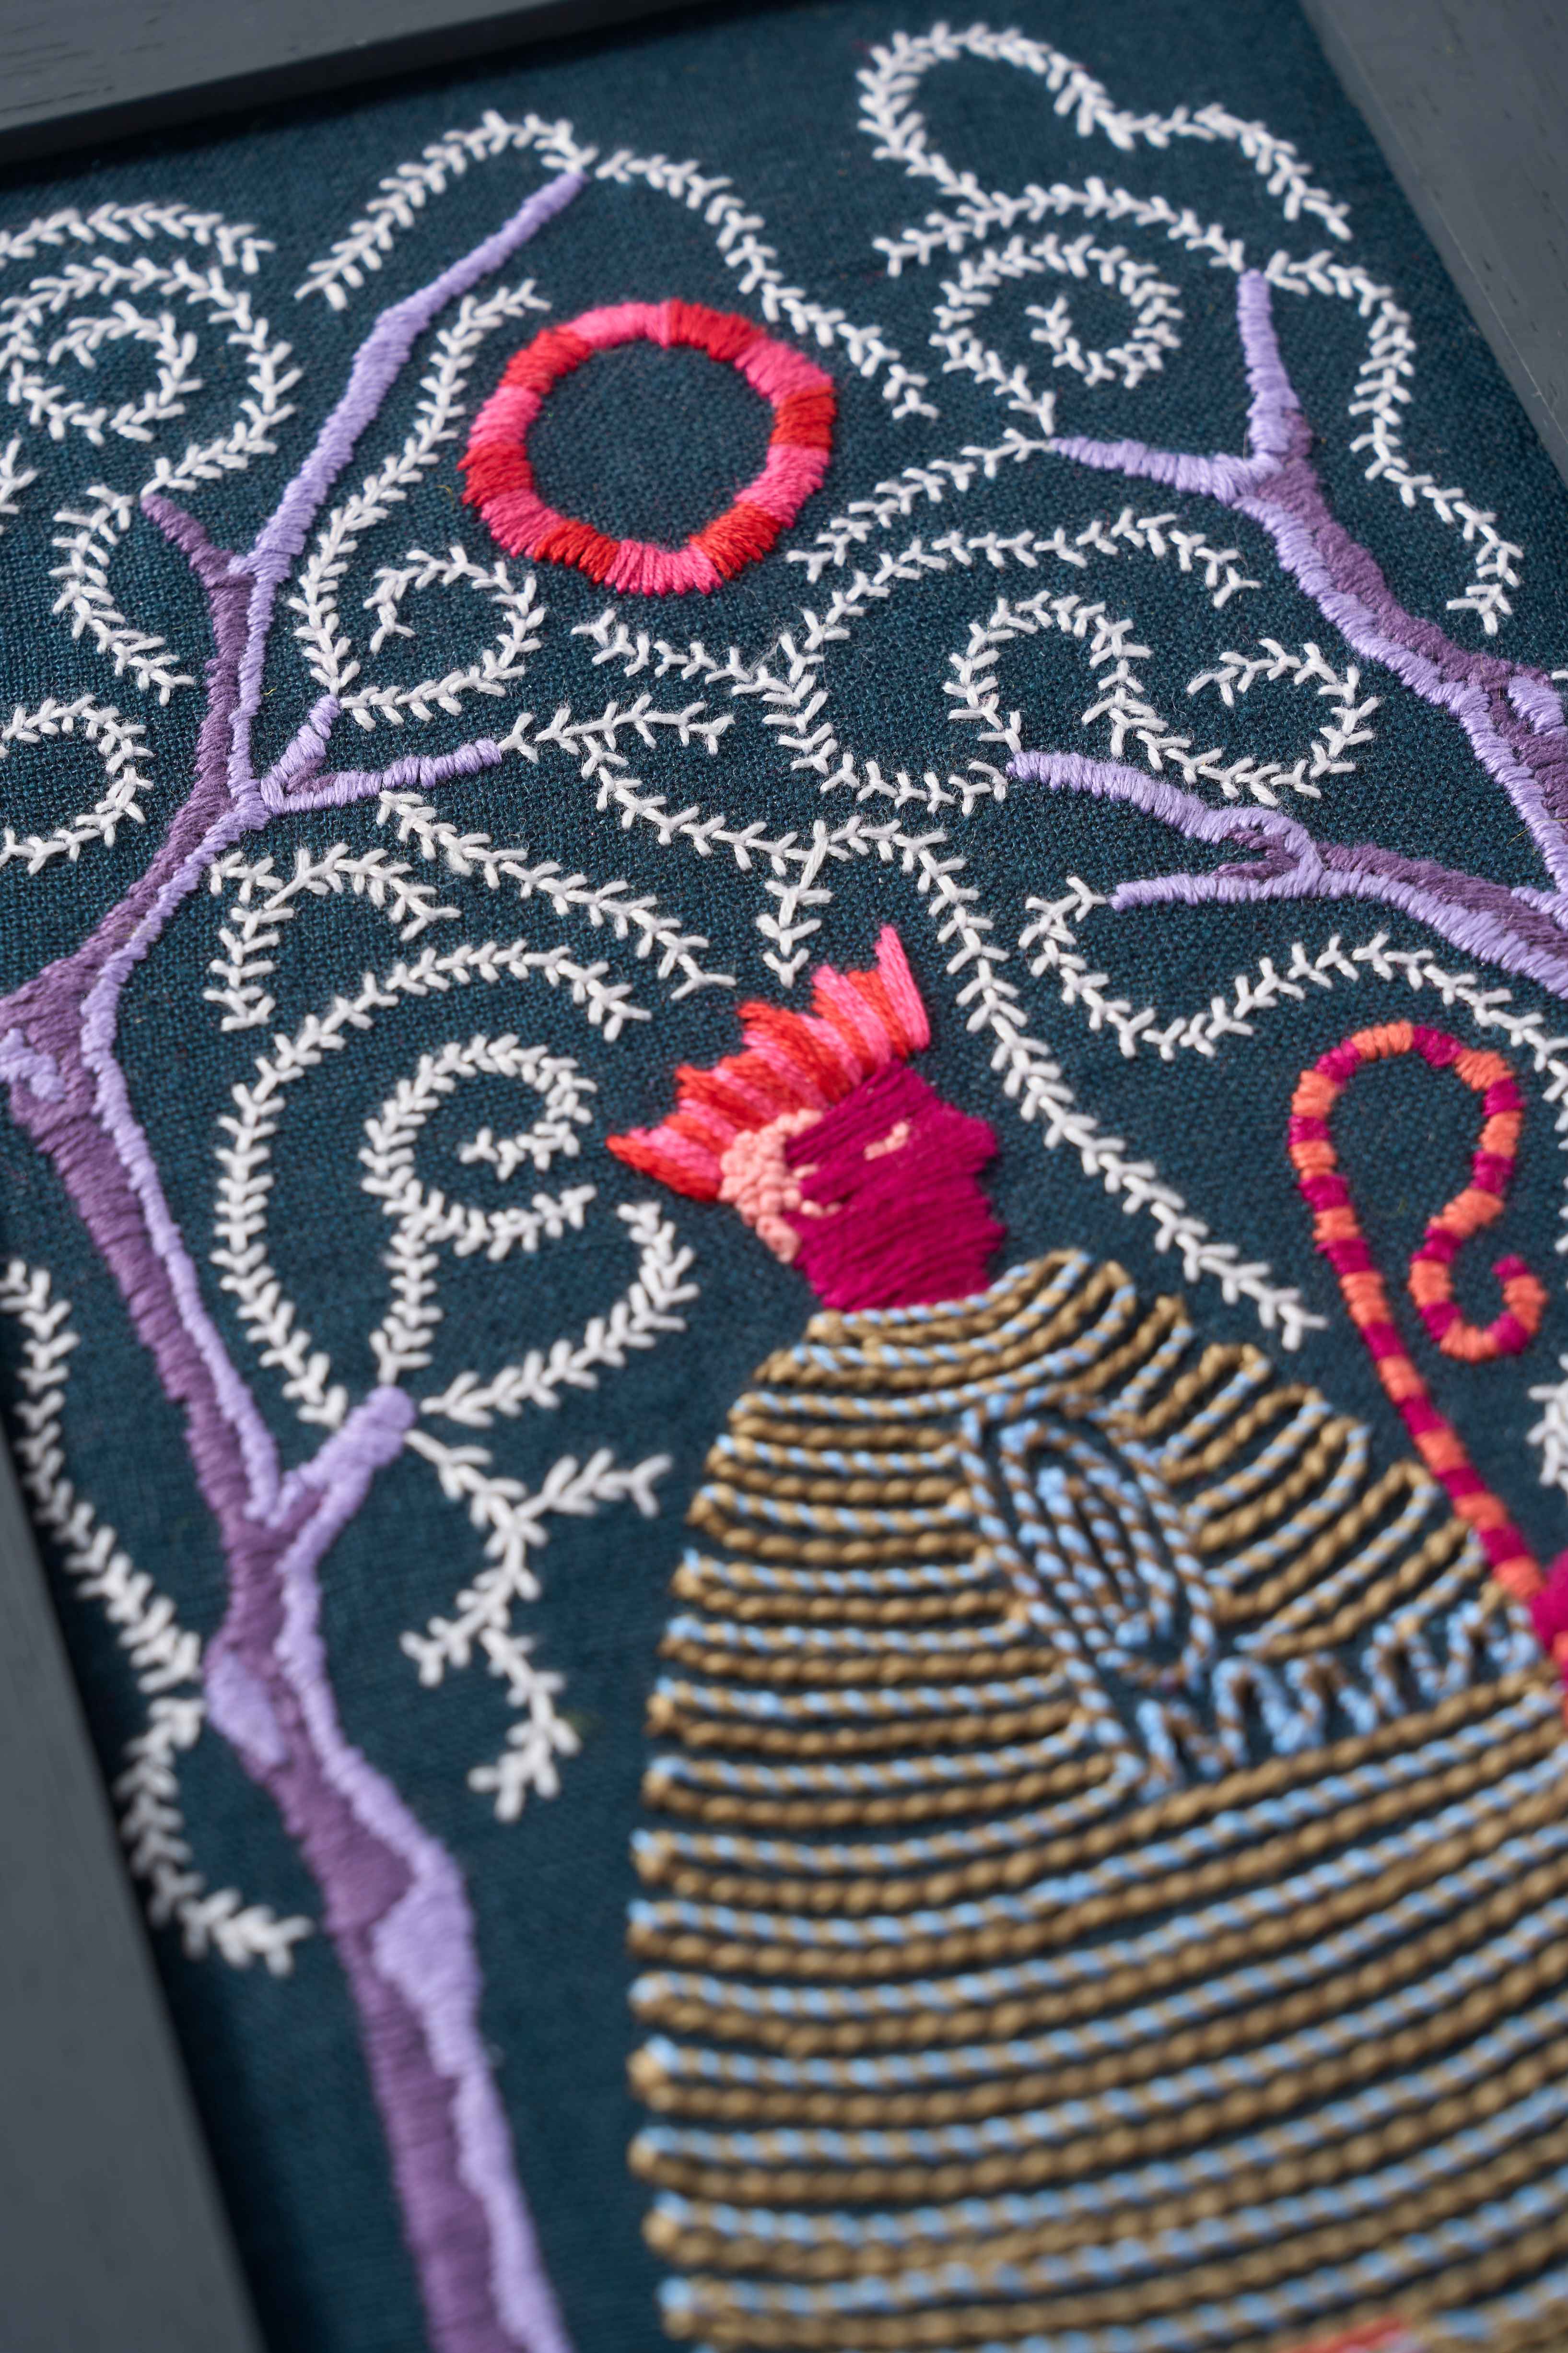
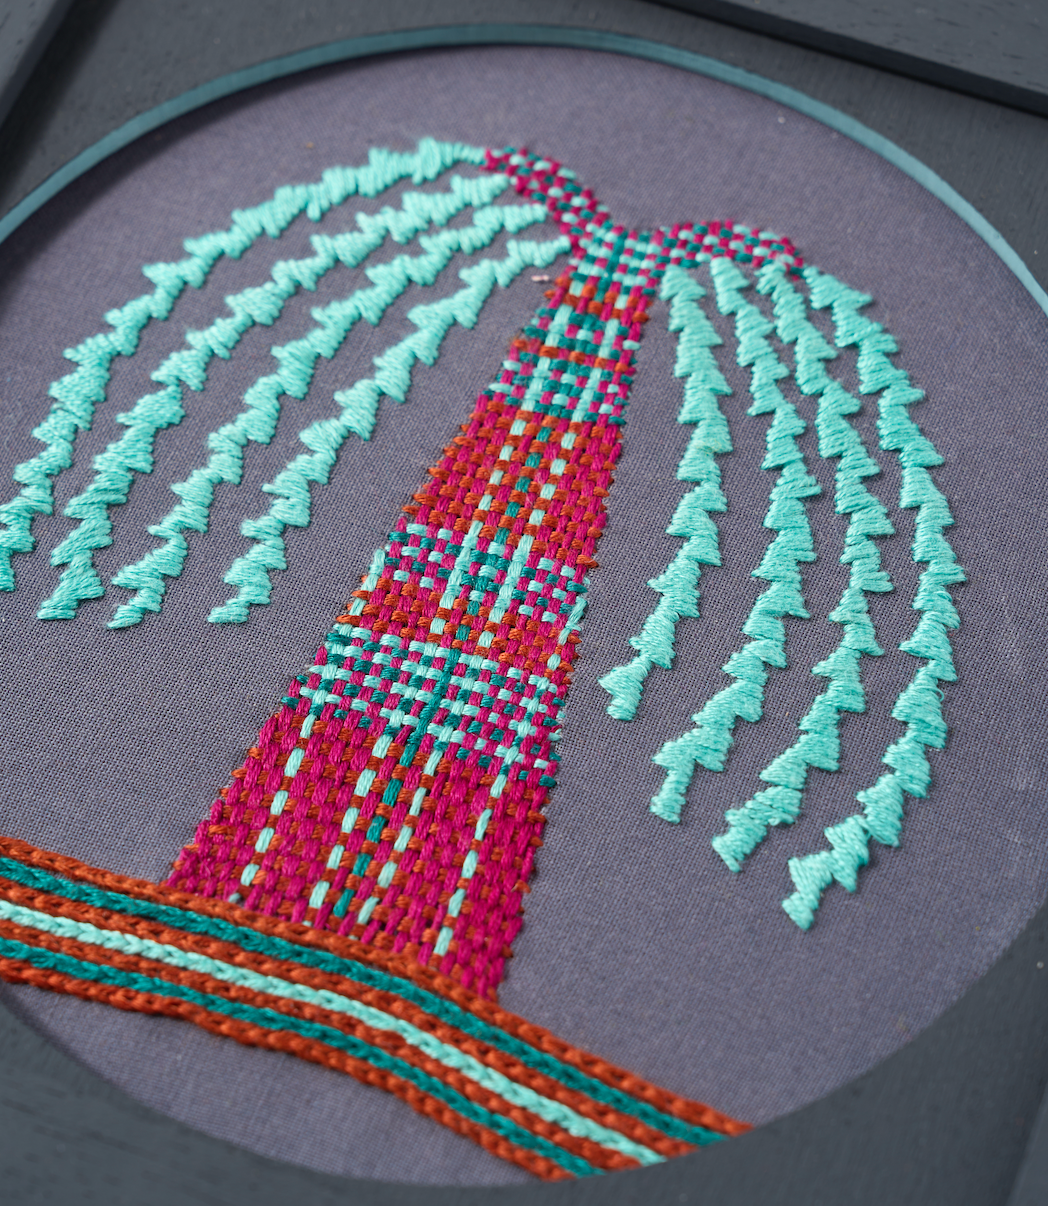
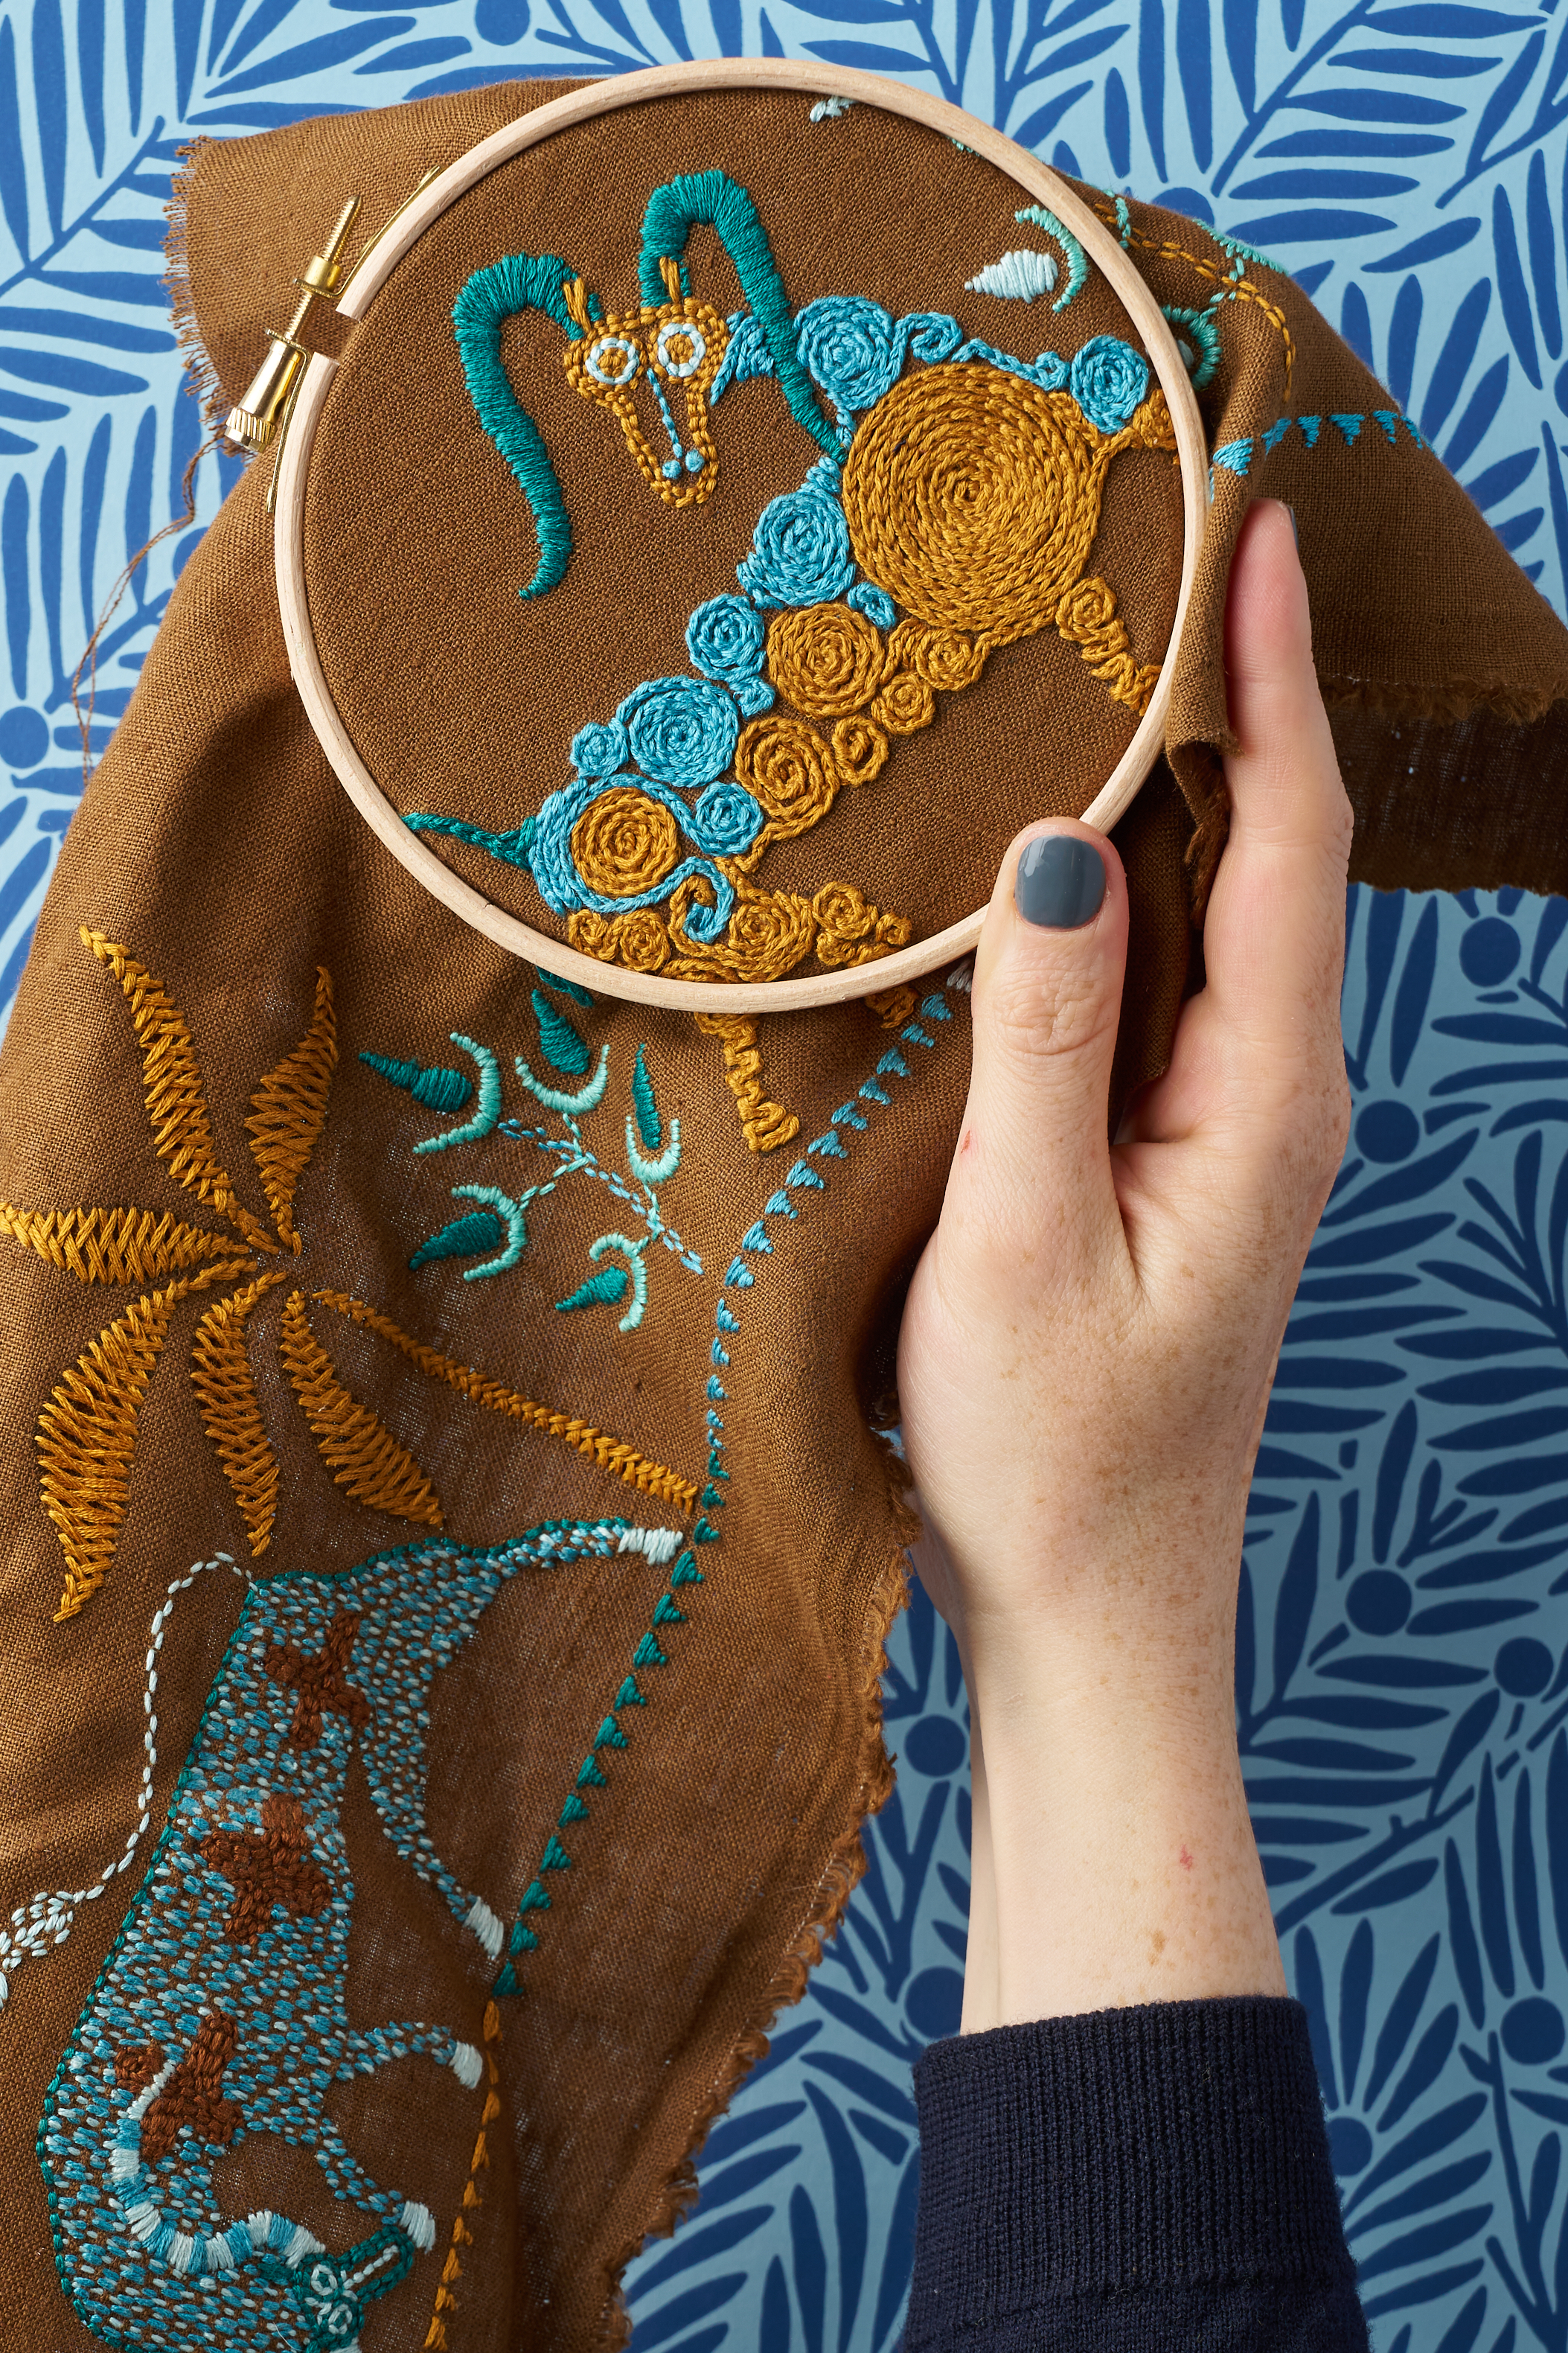
Whipped Stem Stitch is typically used as an outline stitch, but I believe it really shines when used as a filling stitch. When rows of whipped stem stitch are placed closely together, they create an almost candy-cane effect. I love how this stitch combines the slight translucency of running stitch with the multicolor effect of darning, giving a really unusual vibrant and textured fill. It's quite an advanced stitch when you do it the way I have here: alternating different wrapping colours on each row. So start simply and build up to something more complicated! This is quite an unusual way to used whipped stem stitch (one I have actually never seen before outside of my own work!) so I think it is also an example of how you should always experiment with stitches to find a way they will work for you!
Quick Skills: How to do Whipped Stem Stitch
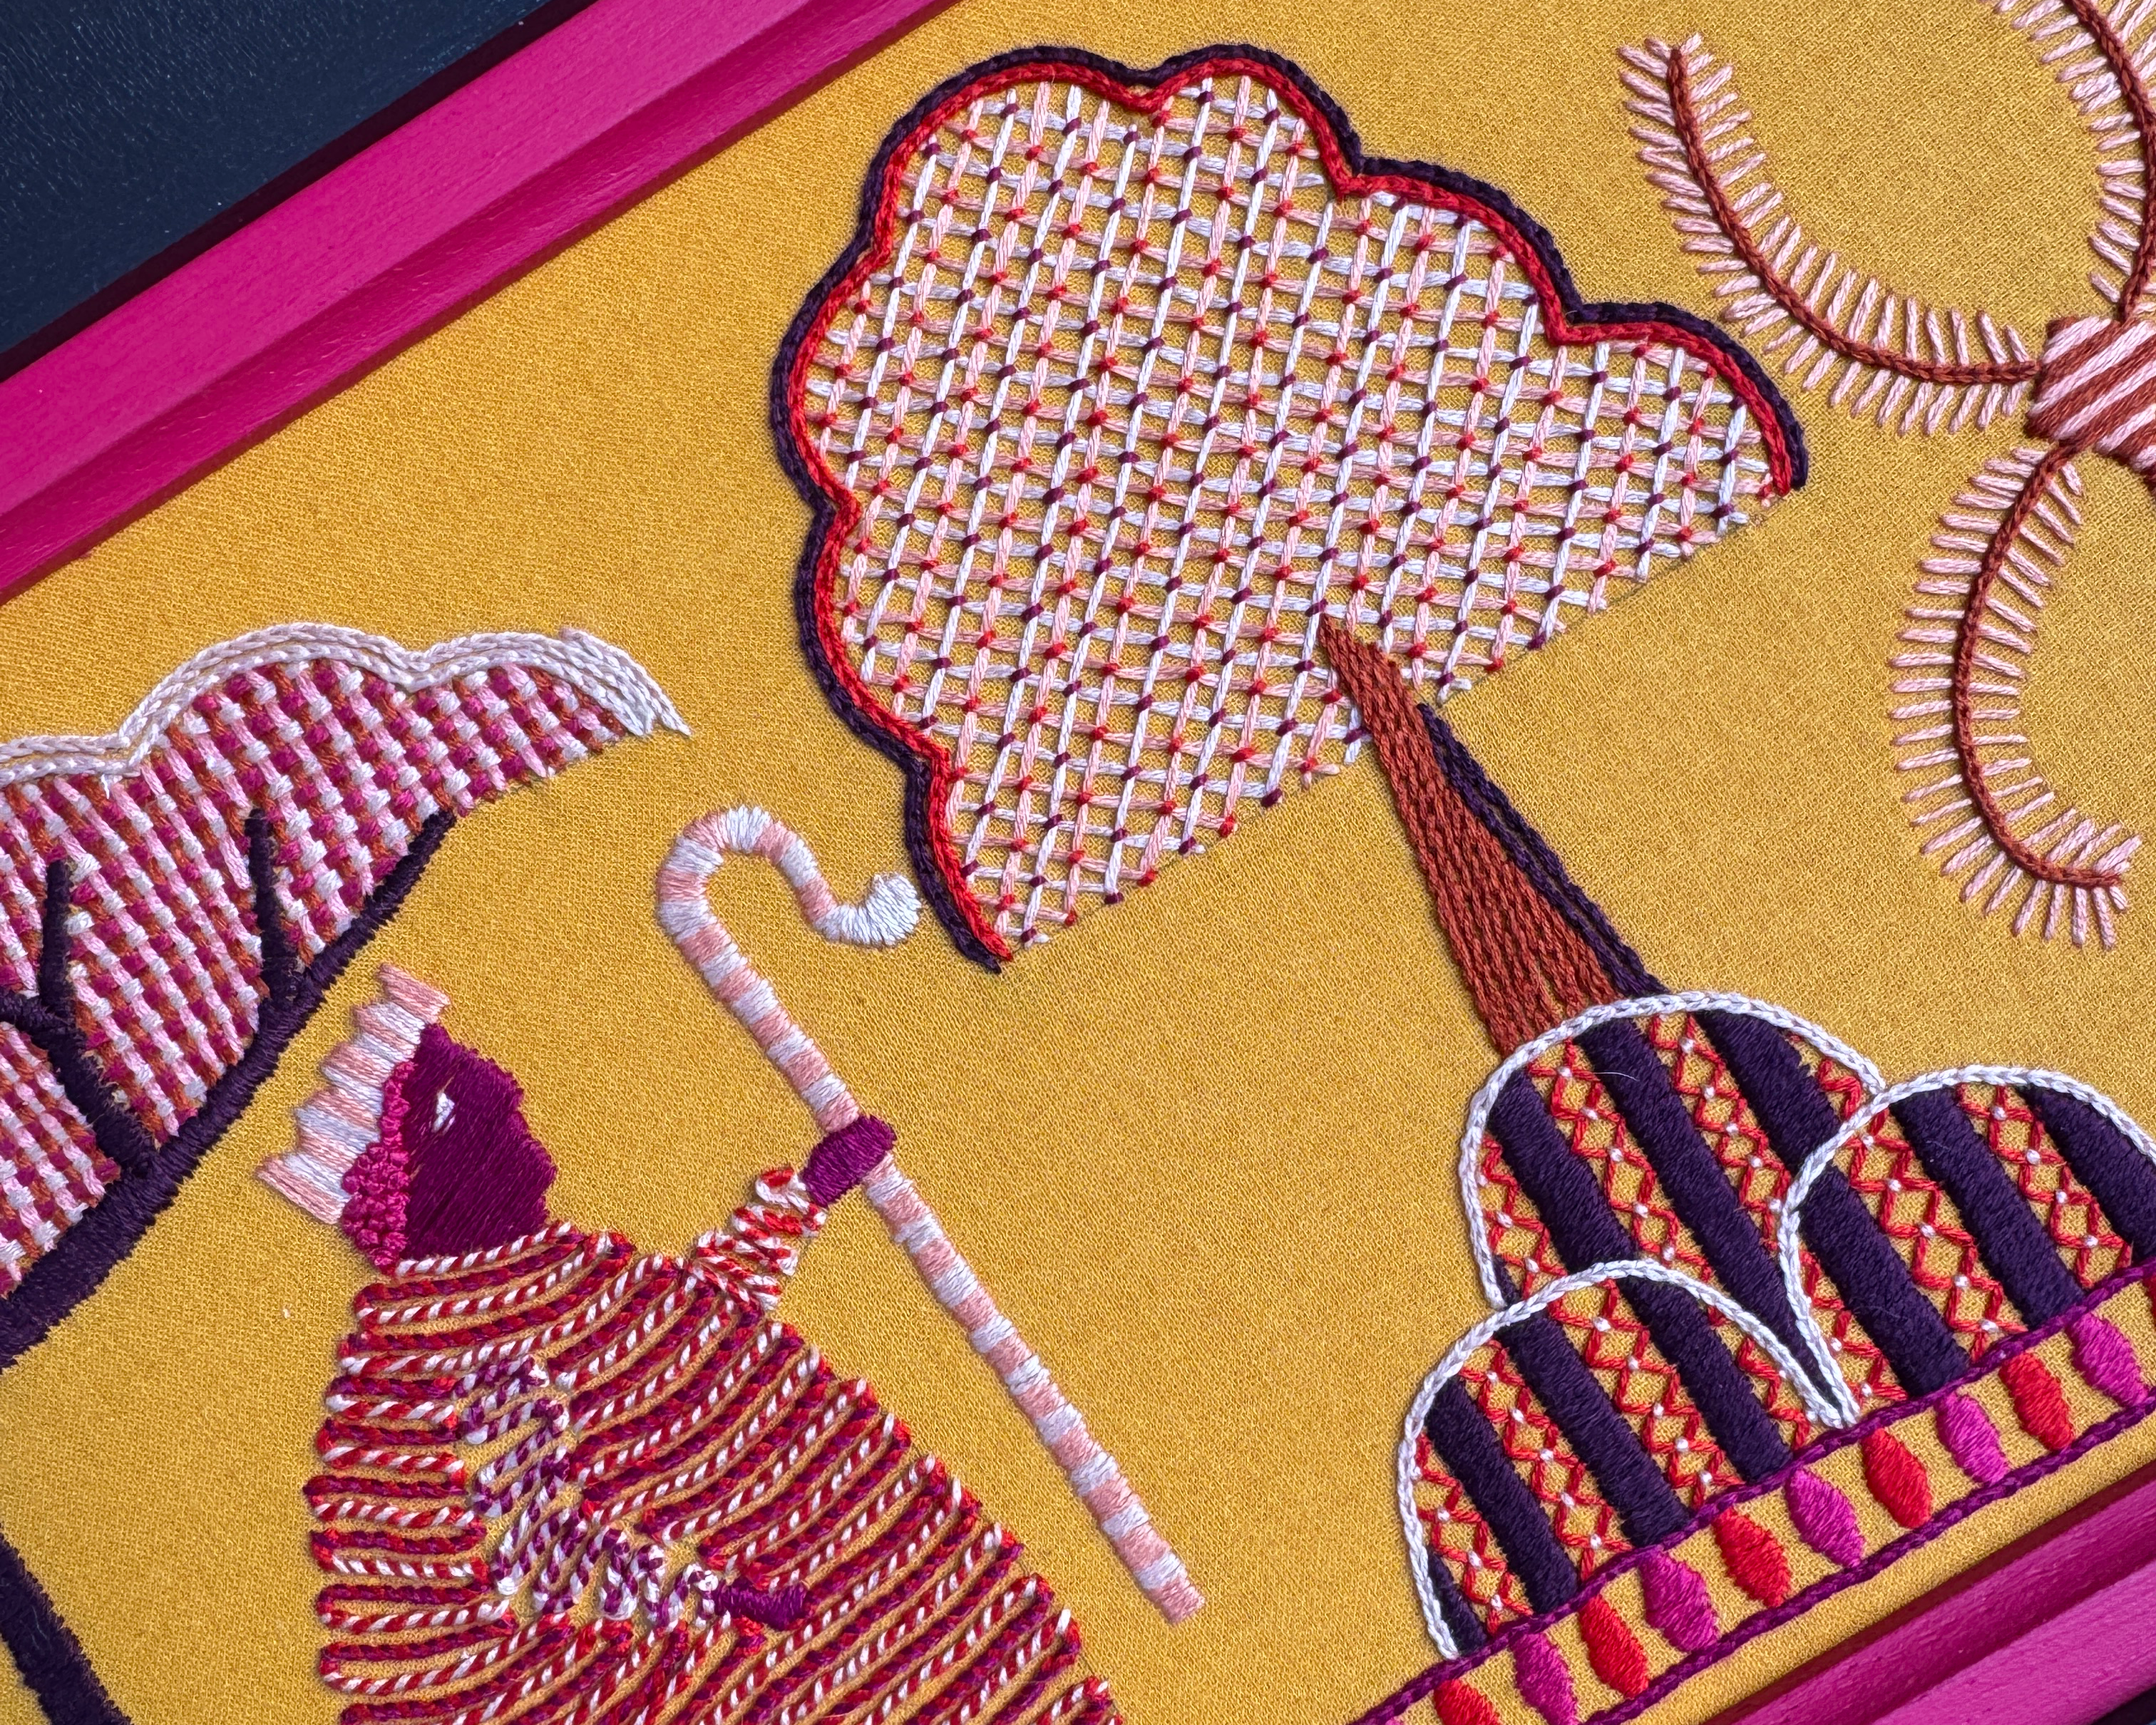
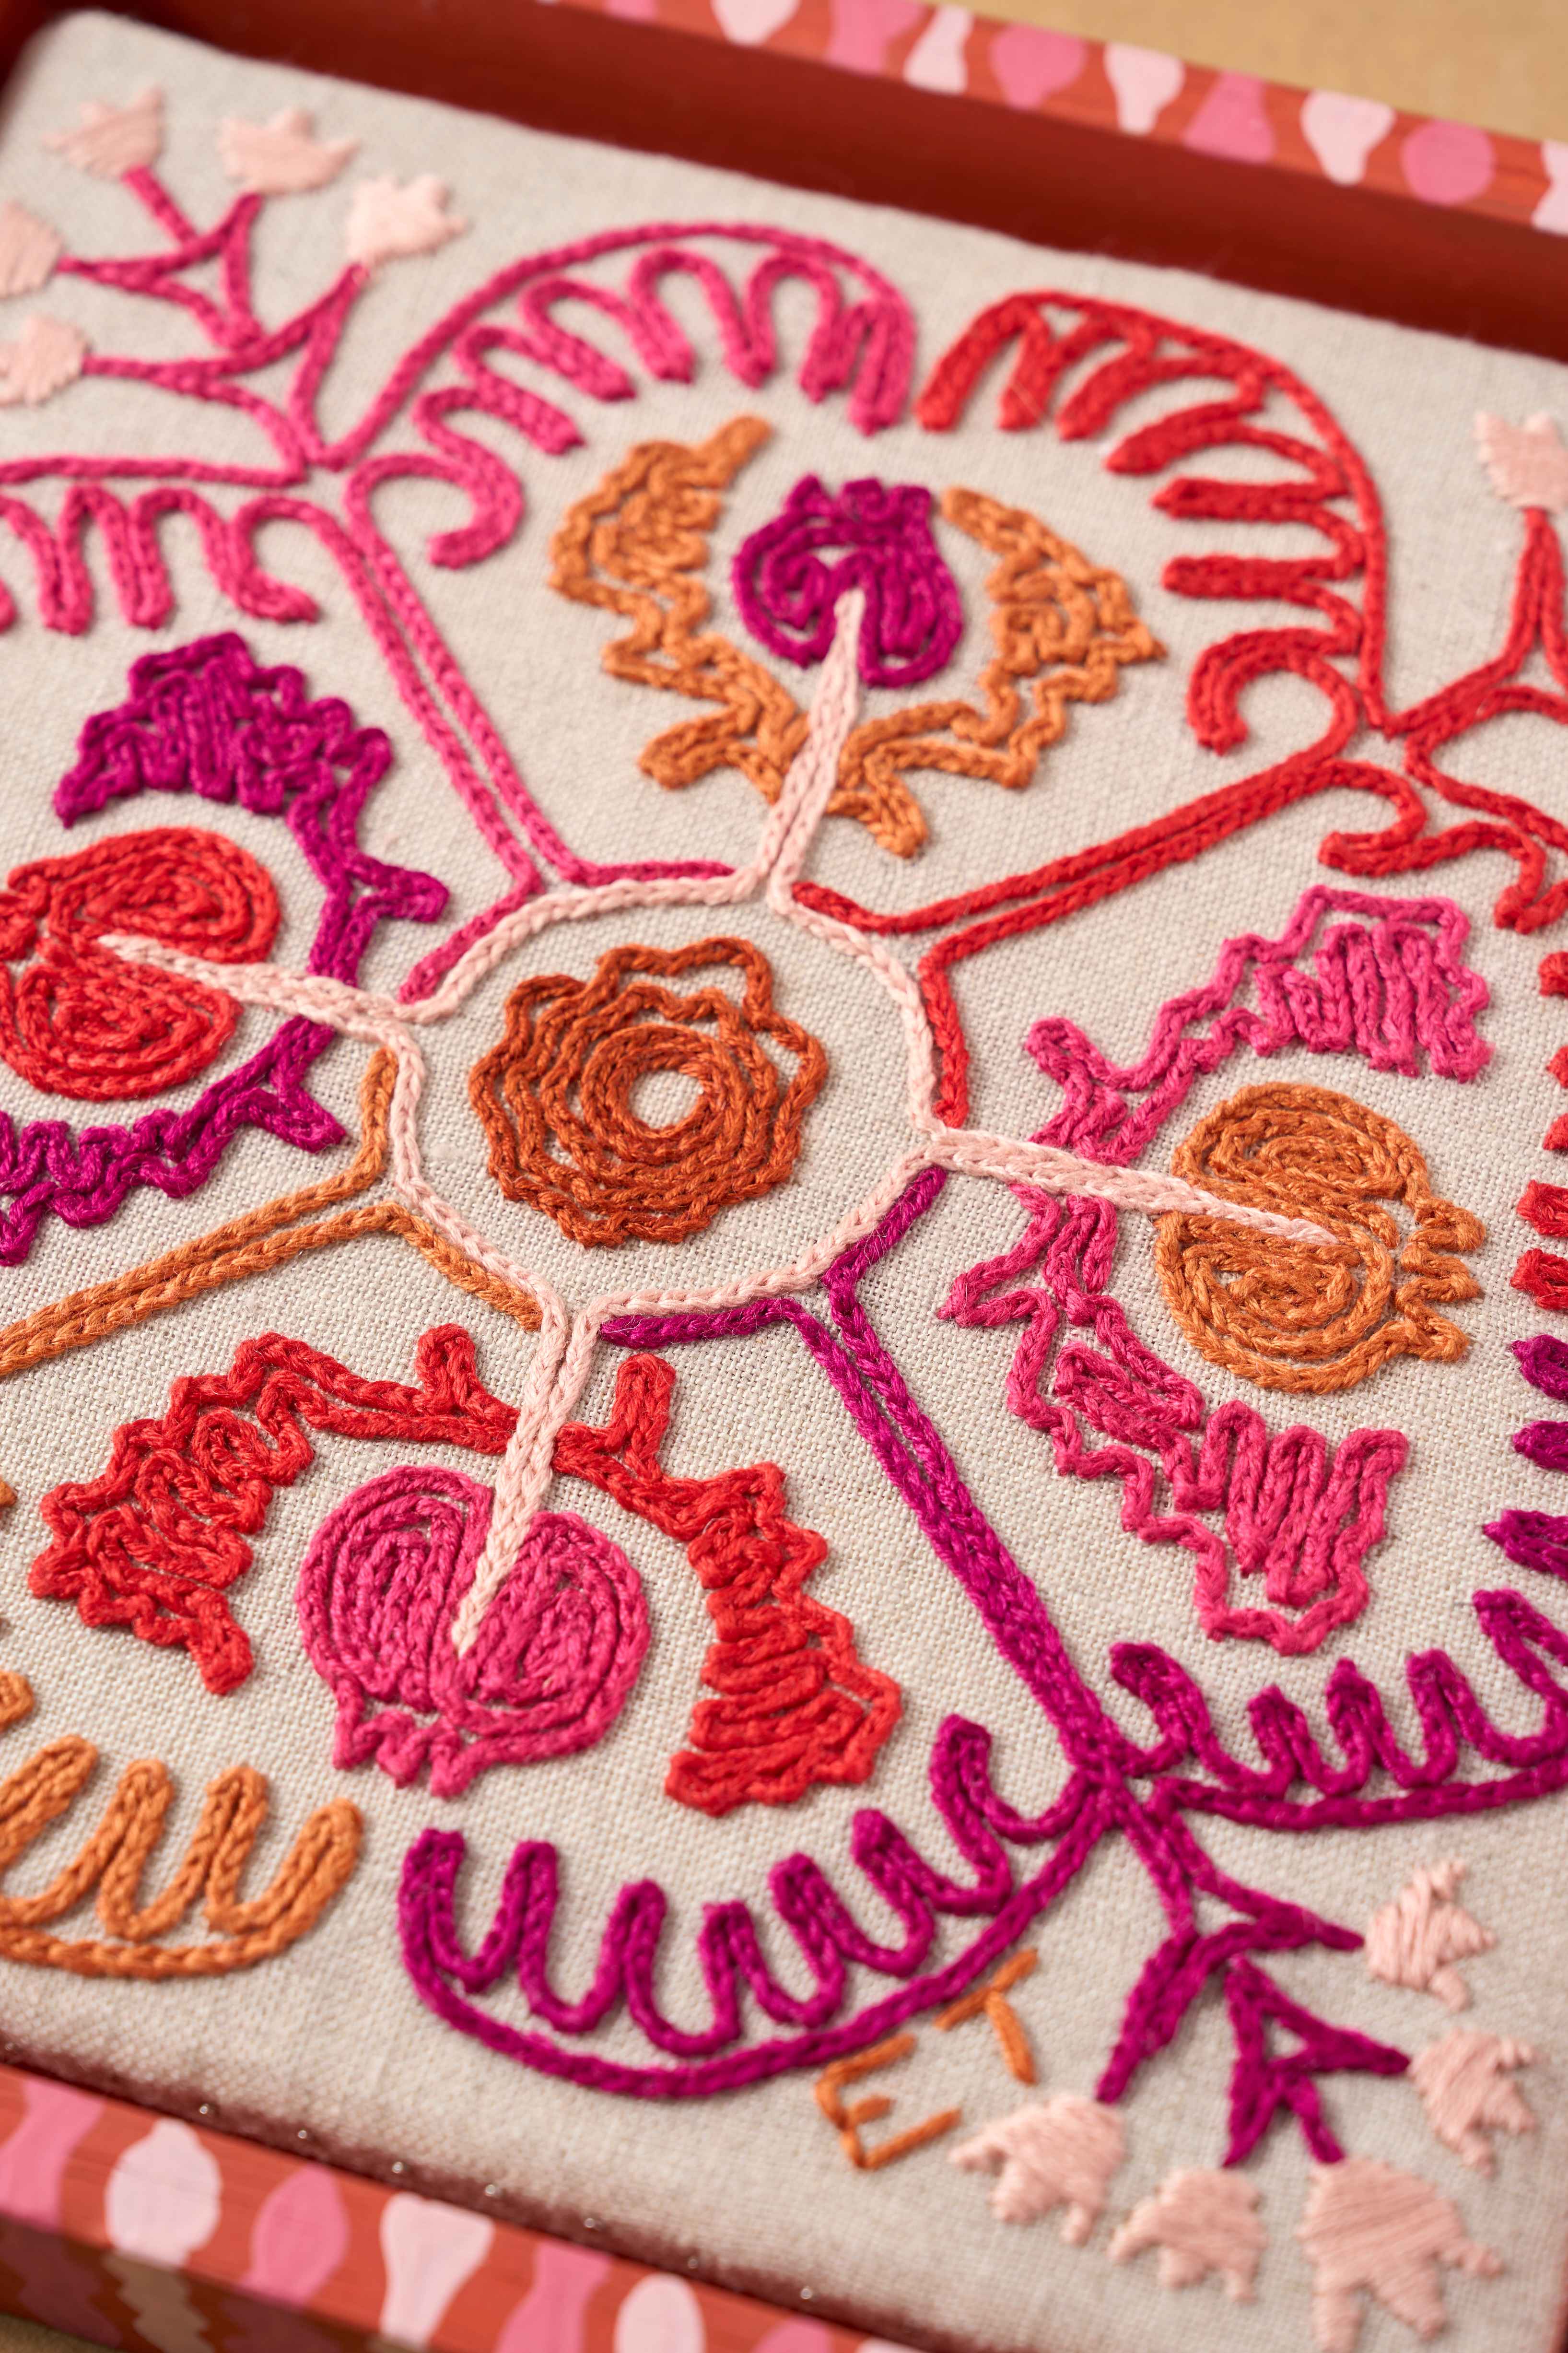
Finally, taking the top spot is Lattice Work, also known as trellis work. This is a new stitch to me and I am OBSESSED. But, for that reason, I don't have a lot of pictures yet. So I'll update this article in a few weeks once I have a few more examples to show you just how wonderful it it.
Lattice work involves creating a grid of stitches that are then anchored with smaller stitches, creating a raised, textured surface. It’s highly versatile - you can vary the colours, the grid size, the area shape - allowing for a really high level of creativity, whether you’re working with simple or complex designs. The structured yet open nature of lattice work makes it ideal for adding both texture and dimension to your embroidery, solidifying its place in my mind as the best embroidery stitch for filling!
Quick Skills: How to do lattice work (also known as Trellis Stitch)
Choosing the right embroidery stitches for filling is one of the ways of creating embroidery designs that are totally unique and capture attention. Whether you're a beginner or an experienced embroiderer, experimenting with my top 5 embroidery stitches—running stitch, chain stitch, darning, whipped stem stitch, and lattice work—can help take your embroidered art to new heights. If you want more guidance on how to incorporate these stitches into your own designs, do take a look at our virtual courses.
Our Virtual Courses


Whilst its good to experiment with stitches, do remember to not get hung up on the technique too much. I firmly believe you can create a great design with just one simple stitch!